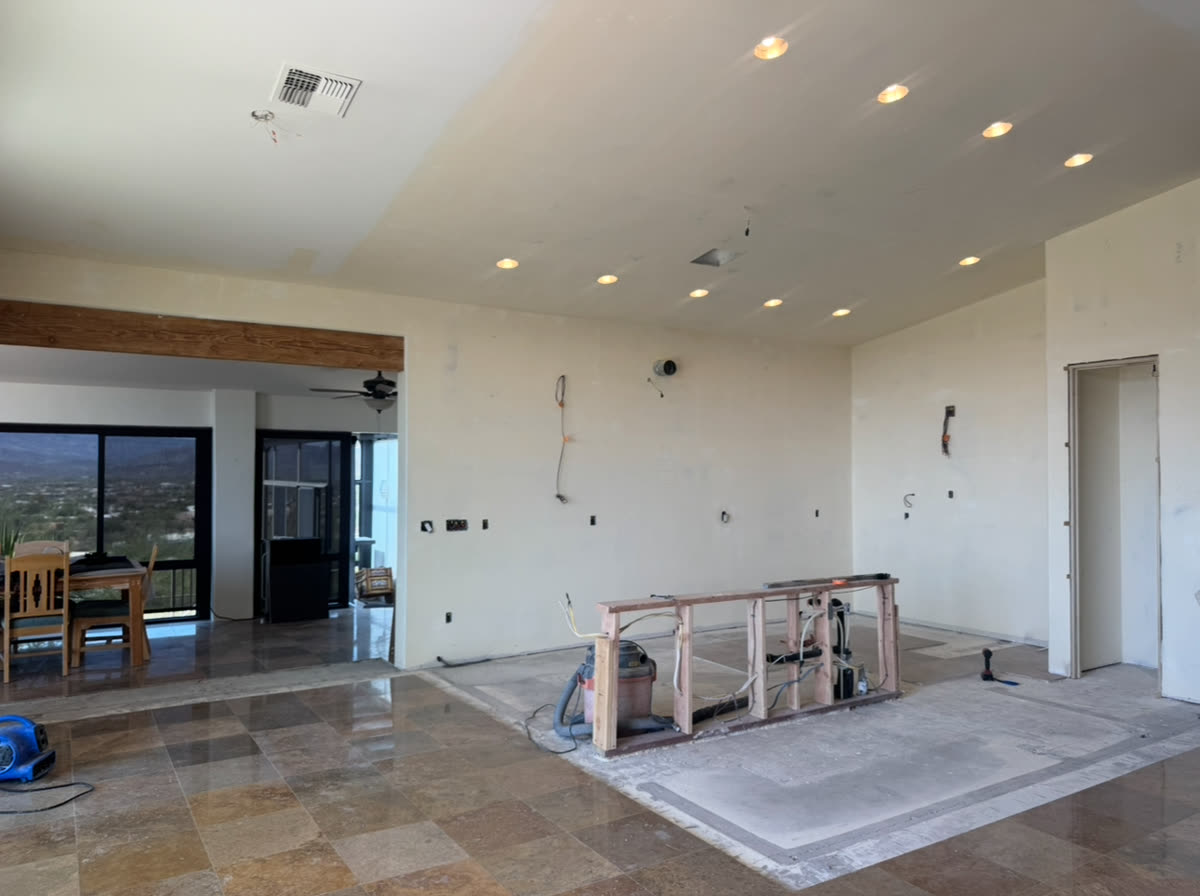
Most remodels that change how a home actually feels start behind the walls, with framing and drywall. New paint and new fixtures get the attention, but the bones are what make a space open and usable instead of chopped up and dark. This is a framing and drywall Glendale project where we took a space down to the studs and built it back the way it should have been laid out in the first place. Here is what each stage looked like.
Norem Contracting is a licensed Arizona general contractor (ROC #365090), and as a Class B residential contractor we self-perform the framing and drywall on jobs like this. The electrical rough-in is handled by a licensed electrical subcontractor under the same contract, so the homeowner deals with one company start to finish instead of chasing separate trades.
Project at a Glance
- Area: Glendale, with the same work available across Peoria, Phoenix, and Scottsdale
- Scope: demo down to the studs, reframe walls and a new door opening
- Rough-in: electrical roughed in by a licensed electrical subcontractor before drywall
- Insulation and board: insulate exterior wall cavities, then hang drywall over the new framing
- Finishing: tape, mud, and sand, then texture to match the rest of the house
- Before we touch a wall: confirm whether it is load-bearing, and pull permits where the work is structural
- One GC end to end: framing and drywall in-house, electrical via licensed sub, all under one contract
What "Down to the Studs" Means, and Why It Is Worth It
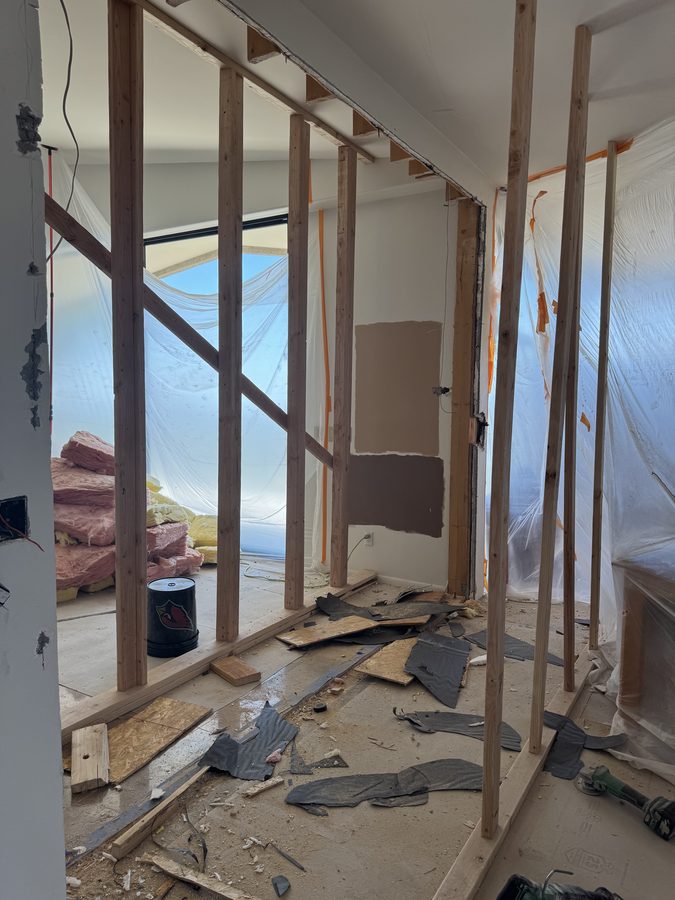
Taking a room down to the studs means stripping the old drywall off until you are looking at the bare framing, wiring, and whatever else is living inside the walls. It sounds drastic, and it is more work up front, but it is often the honest way to fix a space instead of papering over its problems.
Once the walls are open you can see everything: how the framing was built, where the wiring runs, whether anything is rotted, undersized, or done wrong by a previous owner. From there you can change the layout, move or add openings, run new electrical to where people actually use it, and insulate exterior walls properly. None of that is possible if you are only patching drywall over the existing bones. For a lot of structural and framing work in Glendale and the rest of the Valley, going to the studs is what turns a tired floor plan into one that works.
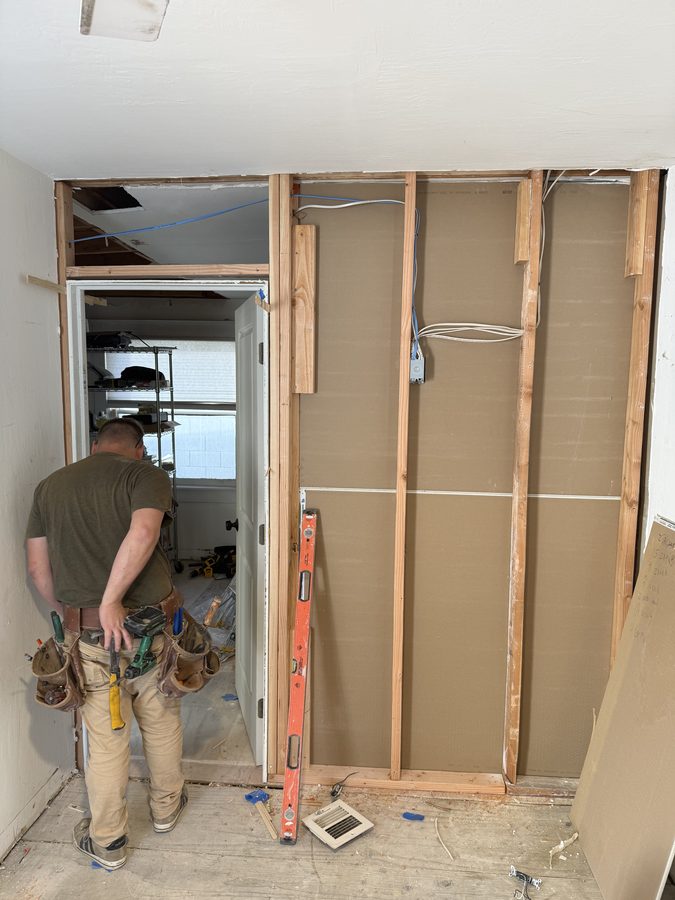
Framing New Walls and Openings, and Checking Load-Bearing First
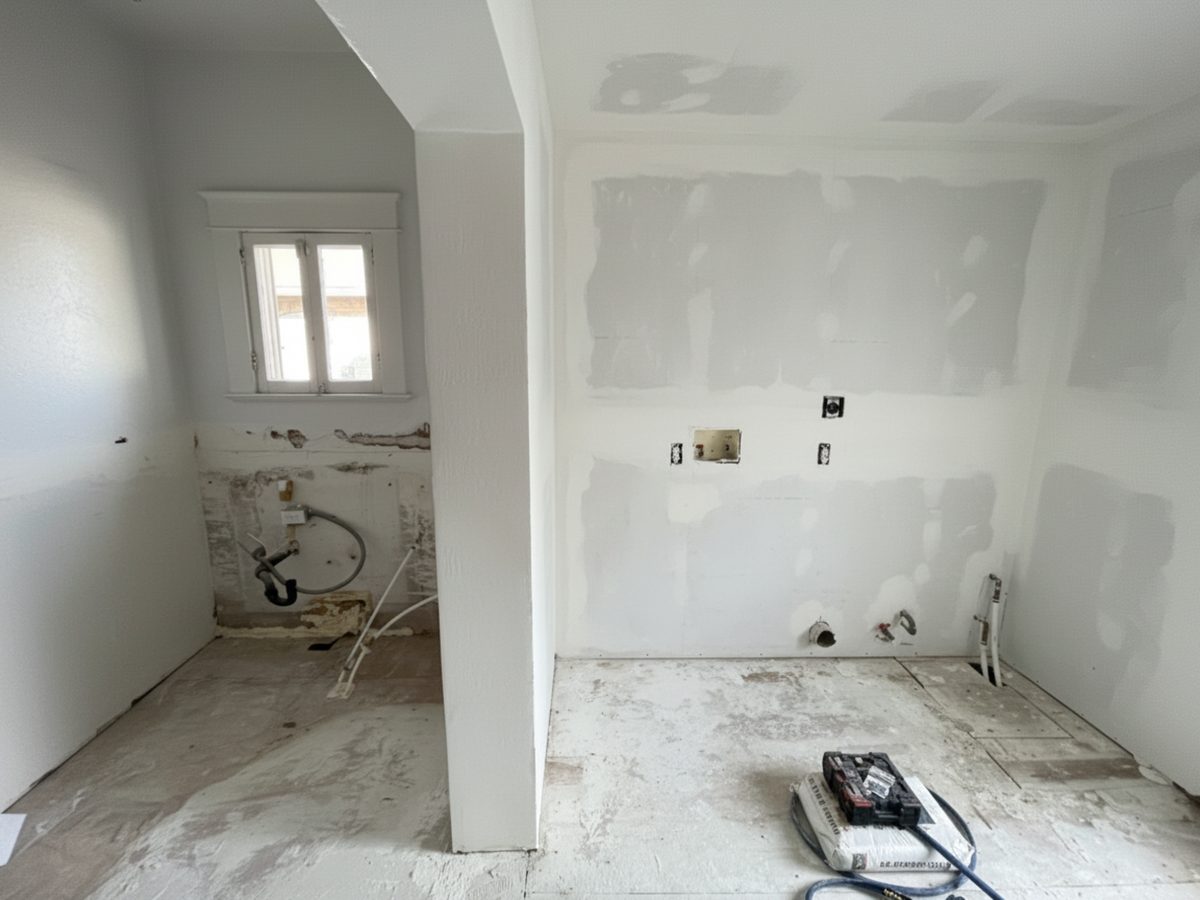
With the old surfaces gone, the next stage is framing. On this project that meant building a new stud wall and creating a new door opening to change how the space flowed. Framing is where the new layout becomes real: the walls have to be plumb, square, and laid out so the openings land where you want doors, passageways, and finishes to go.
If a remodel calls for removing a wall to open up a space, the very first question is whether that wall is load-bearing. A load-bearing wall is carrying weight from above, the roof or a floor, down to the foundation, and you cannot just pull it out. We confirm what the wall is doing before anything comes down. If it is non-structural, it can be removed and the opening reframed cleanly. If it is load-bearing, we frame in the right support, normally a correctly sized header or beam carried on posts, so the load still has a clear path down. This is also where permits come in. When the work is structural, it gets permitted and inspected, which is part of doing it as a licensed contractor rather than guessing.
The Rough-In Stage: Electrical Before Drywall
Once the framing is up and the openings are set, it is time for rough-in. On this remodel that was electrical, run by a licensed electrical subcontractor working under our contract. Rough-in is all the work that has to live inside the walls: pulling wire, setting boxes for outlets and switches, and feeding the recessed lighting.
The reason rough-in happens before drywall is simple. Everything in the walls has to go in while the studs are still open and easy to reach. Trying to add a circuit or move an outlet after the drywall is up means cutting the wall back open, which is slower, messier, and more expensive. Doing the wiring while the framing is exposed also lets the work get inspected before it disappears behind the board, so you know it is right before it is hidden. Insulation in the exterior wall cavities goes in around this same point, again because you only get one clean shot at it before the drywall closes things in.
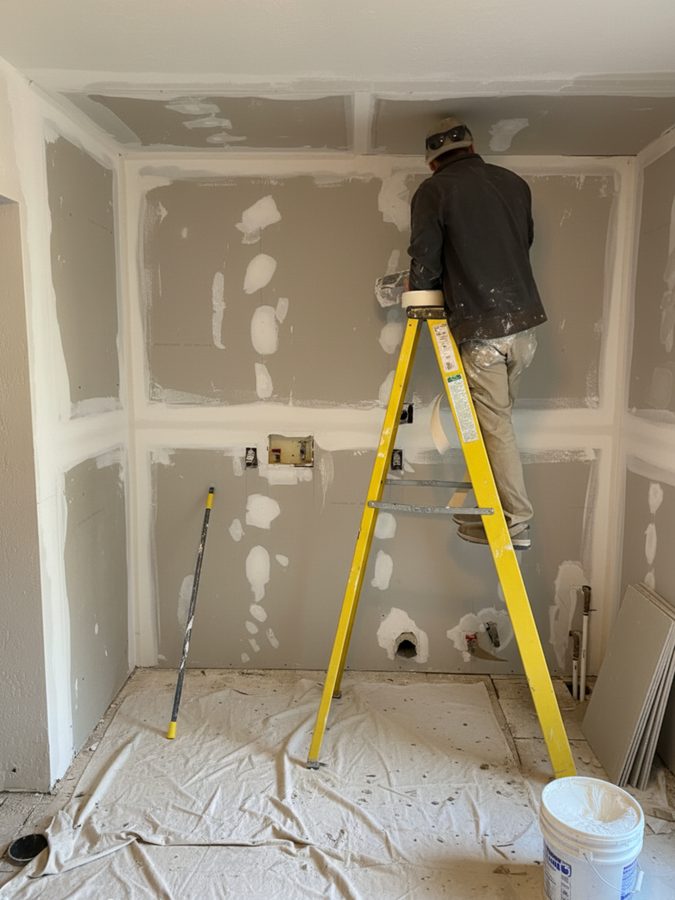
Hanging and Finishing Drywall
With framing done, wiring inspected, and insulation in, the walls get closed up. Hanging drywall is the part most people picture: lifting the sheets, fitting them tight to the framing, cutting out for the boxes and openings, and screwing the board off to the studs. Hanging actually goes fast. The finishing is what takes the time and skill.
Finishing means taping the seams, then running coats of joint compound, usually two or three, over the seams, the screw heads, and the corners. Each coat has to dry before the next, and each one gets feathered out wider so the seams disappear into the flat of the wall. After the last coat cures, the whole surface gets sanded smooth. This is the stage where drywall repair Phoenix homeowners pay for is either invisible or stands out under the lights, and the difference is entirely in how patient the mudding and sanding were. Rushed mud cracks and shows seams. Properly cured mud lies flat and you never see the joints.
Matching Phoenix Texture: Orange Peel and Knockdown
Almost no walls in a Phoenix-area home are dead flat. They carry a sprayed texture, and the two you see most around here are orange peel, a fine bumpy spatter, and knockdown, where that spatter is flattened slightly with a wide blade for a mottled, plaster-like look. When you drywall a new wall or patch into an old one, the new surface has to wear the same texture as everything around it or the repair jumps out at you.
Texture matching drywall in Arizona is its own skill. You have to read the existing texture, dial in the spray to the same coarseness, and on knockdown time the trowel pass so the flattening matches. Get it right and a brand new wall sitting next to a thirty-year-old one looks like they were always the same. Get it wrong and the eye lands straight on the seam between old and new every time it walks past. On this remodel the new walls were textured to match the rest of the house before paint, so the work blends in instead of announcing itself. You can see more of this kind of finished work in our project gallery.
The Result
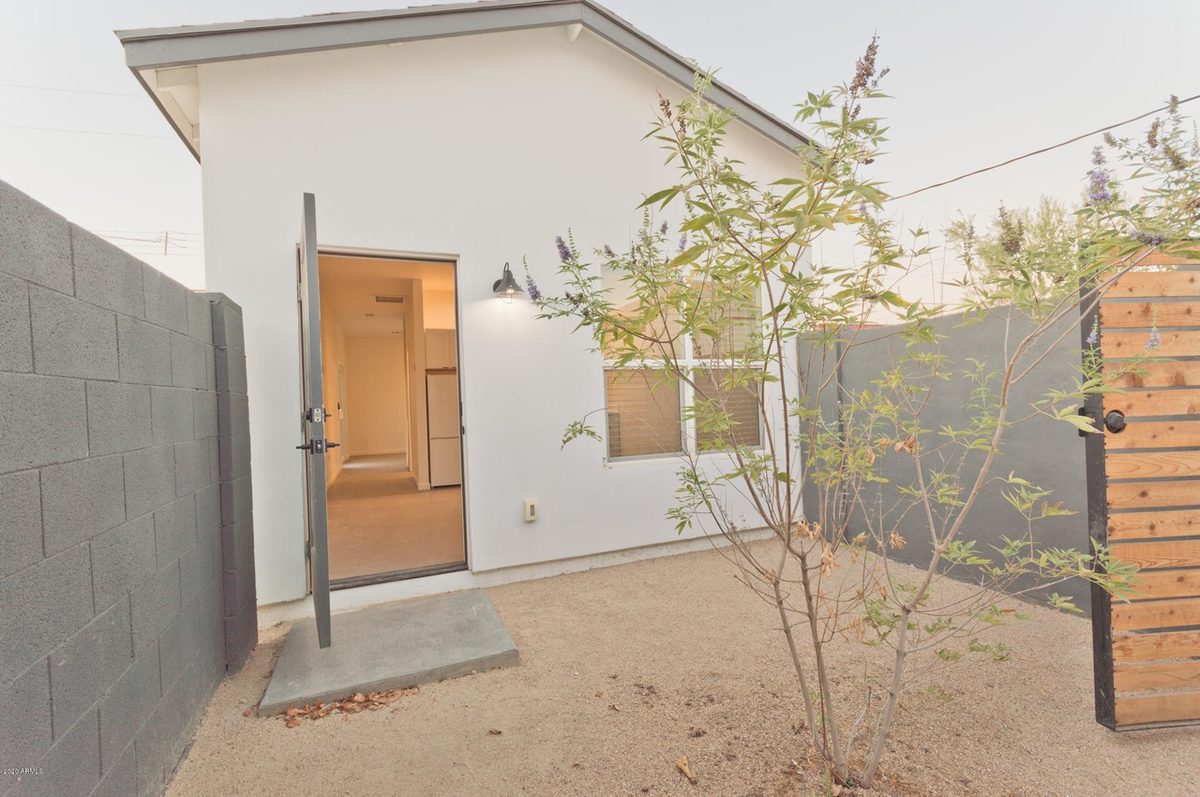
When it was done, the space had gone from a chopped-up room with old bones to an open, properly framed layout with a new door opening and an archway, fresh wiring and lighting where it is actually useful, and clean drywall textured to match the rest of the house. The work that made the biggest difference, the framing and the drywall, is the part you cannot see anymore, which is exactly how it should be.
Running it all under one license kept the job moving, with framing and drywall in-house and the electrical roughed in by our licensed sub. The homeowner dealt with one company instead of coordinating separate trades. It is the same approach we take on bigger jobs, like a full kitchen remodel in Phoenix.
Common Questions About Framing and Drywall
How much does framing and drywall cost in Phoenix?
For a typical room of drywall, roughly 16 by 8 feet, expect about $1,500 to $3,000 to hang, tape, mud, and sand it. On a per-sheet basis, hang and finish work usually runs about $60 to $90 per sheet. Matching texture into the surrounding walls adds about $150 to $300. Framing new walls or openings is priced separately based on how much wall is involved and whether any structural support is needed.
Can you remove a wall to open up a space?
Yes. The first thing we do is confirm whether the wall is load-bearing. A non-load-bearing wall can come out and the opening reframed cleanly. If it is load-bearing, we frame in the right support, usually a properly sized header or beam carried on posts, so the load still has a path to the foundation. That keeps the space safe while still opening it up.
How long does drywall take?
Once the framing is done, a room usually takes a few days to drywall. Hanging the board is quick, but taping and mudding needs time to dry between coats, and you normally put on two or three coats before sanding and texturing. Rushing the dry time is how you end up with cracks and visible seams, so the schedule is mostly driven by how fast the mud cures.
Planning a Remodel That Starts Behind the Walls?
If you want to open up a space, move a wall, or take a room down to the studs and build it back right, we can help. We handle framing and drywall in-house and bring in a licensed electrical sub when the job needs it. Every project starts with a free on-site consultation in Glendale, Peoria, Phoenix, and Scottsdale.
Request Free Estimate