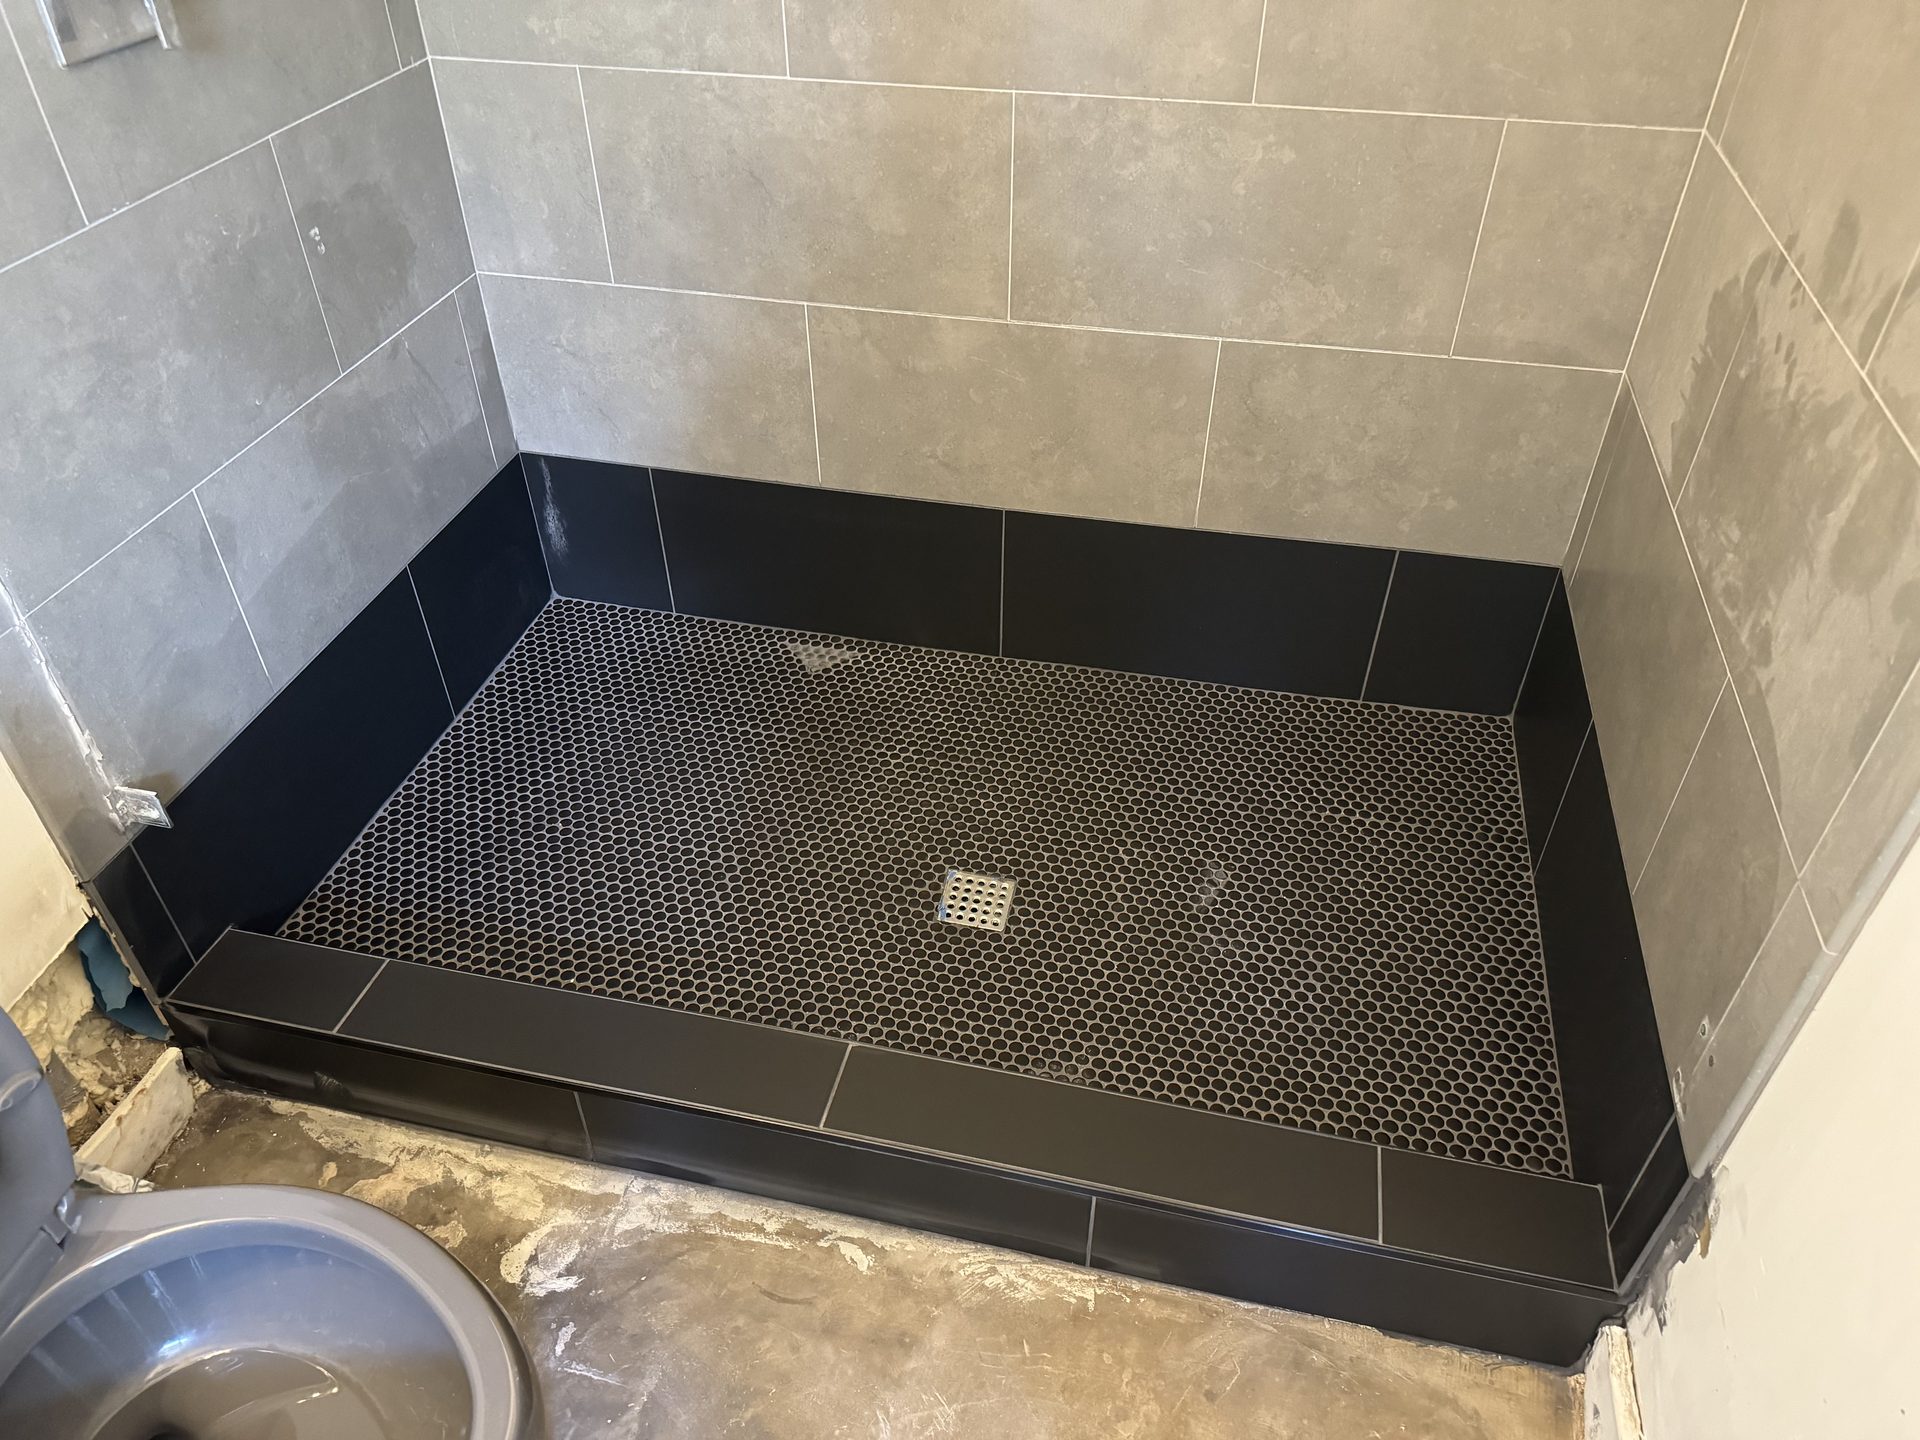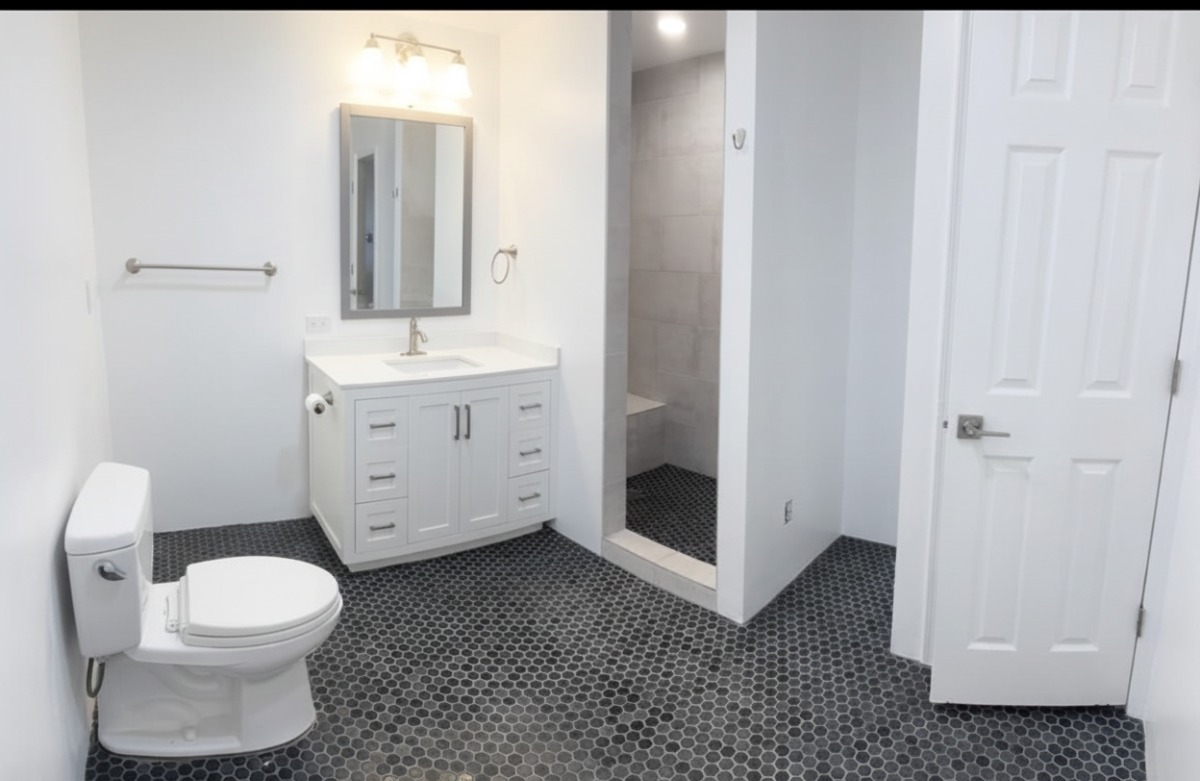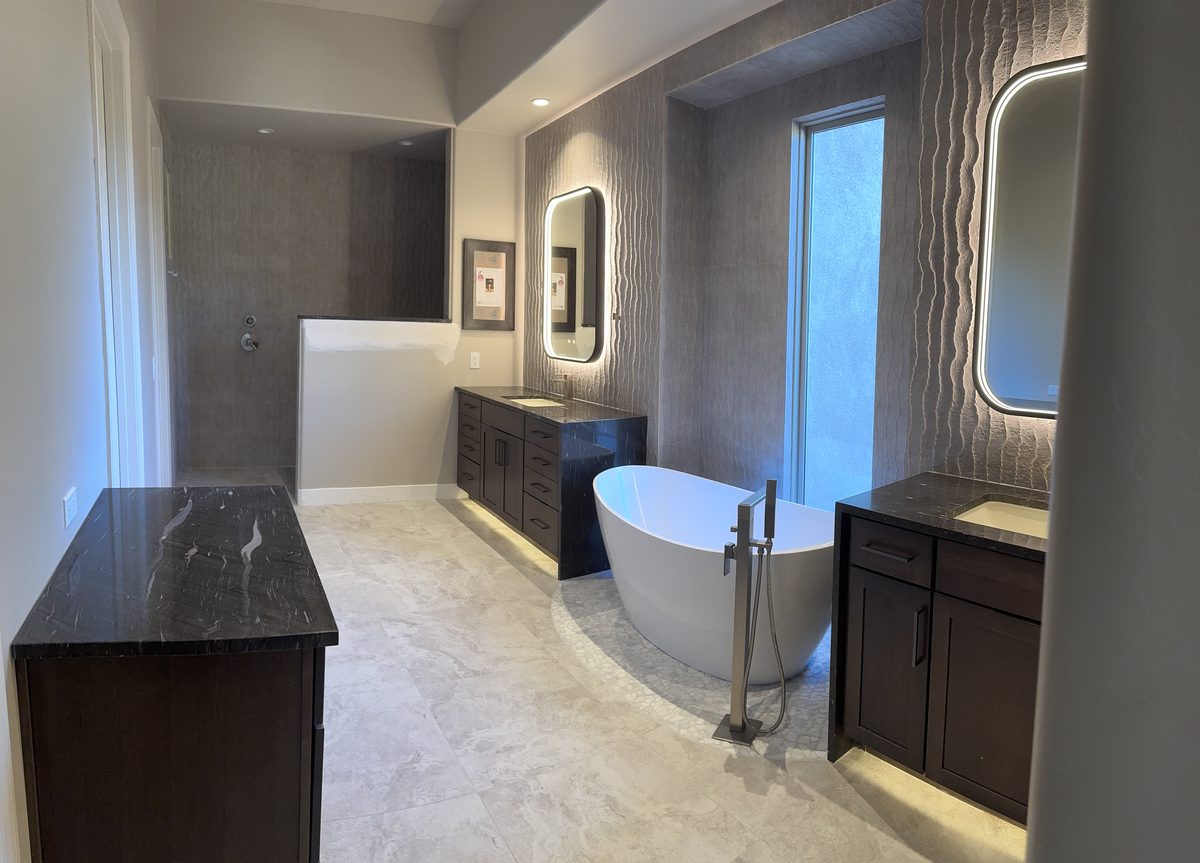
Most bathroom remodels start the same way: you are tired of looking at it. The tile is from another decade, the grout will not come clean no matter what you use, the shower is too small, and the vanity was cheap the day it went in. You want the room in the photos, you want to know what it costs, and you want to know how long you will be without a shower. All fair. The part nobody photographs gets real time here too, because that is where a bathroom either lasts or does not.
Everything you will look at, the vanity, the glass, the fixtures, the tile, sits on an assembly that has to keep water out of your framing, and that assembly is buried before the visible work starts. Built properly, a tiled shower lasts for decades. Built to look right and no further, it soaks the framing long before anything shows on the surface, which is why the rot in the last shower we tore out sat at the low corner by the door where nobody could see it. A standard full bathroom remodel in the Valley runs $8,000 to $20,000, a larger primary with new tile throughout runs $25,000 to $45,000, and a cosmetic refresh that leaves the layout alone runs $4,000 to $8,000.
We are a licensed Arizona general contractor, ROC #365090. We carry the contract for your job. Everyone who works on your bathroom is licensed for the work they are doing. That matters more here than anywhere else in a house, because demolition, plumbing, electrical, mechanical, waterproofing, tile, glass and finish carpentry all land in one room the size of a parking space, in an order that cannot be rearranged.
What gets replaced in a bathroom remodel, and what stays?
Three different projects get sold under one phrase, and the first useful thing a contractor can do is tell you which one you are describing.
A cosmetic refresh leaves the wet assembly alone. New vanity and top, mirror, lighting, toilet, faucet and hardware, paint, and a full re-grout and re-caulk. The shower keeps its pan, tile and plumbing. It is what a lot of people are describing when they say the bathroom looks dated, because what looks dated is usually the vanity, the mirror, the light bar and the grout color.
A full remodel in the same footprint takes the room to the studs: new pan, waterproofing, backer, tile, fixtures, vanity and glass. The shower drain, the toilet flange and the lavatory drain stay exactly where they are, and that single restraint is what keeps the slab closed.
A remodel that moves plumbing relocates something cast into concrete: a shower drain, a toilet, a tub bay converted to a walk-in shower, or a curbless entry needing the slab recessed. This is the tier with saw cutting, tendon scanning, an inspection with the trench open, and plan review time.
Know which tier you are in before the first bid, so you are not paying for the third one's problems on the first one's budget.
Why do tile showers leak?
Because tile is not a waterproof surface and was never meant to be one. Neither is grout. Water passes through both, and where it goes next is the design question. The clearest published statement of it is in Schluter's own shower system installation handbook: "Contrary to popular belief, the tile covering itself is not waterproof... With regular use of the shower the mortar bed can remain saturated, particularly if pre-slope installation is ignored or the weep holes become clogged."
A traditional mud-set shower is built on the assumption that water gets in. Under the mortar bed sits a sheet liner, and under the liner a first slope, the pre-slope, carries whatever reaches it back to weep holes in the drain body so it can leave. Water in, water out. It has worked for a century and is still a permitted method today.
It fails four ways, and all four are workmanship. The liner is laid on a flat bed with no pre-slope, so water reaching it stands there. The weep holes get packed with mortar during the top bed, sealing the drain's own exit. The liner is cut at an inside corner instead of folded and dammed, putting a seam where water concentrates. Or it stops too low at the curb and water climbs past it.
The tell is where the damage lands. Rot at the low outside corner beside the shower door is the signature of a pan that never drained, and it tells you how long it has been going on. Framing in an air-conditioned Phoenix house dries fast between wettings, so wood only decays here when it is re-wetted essentially every day.
Diagnosing a shower that is already leaking, and whether the pan alone can be rebuilt, is a separate job with its own page: shower pan rebuild and leak repair.
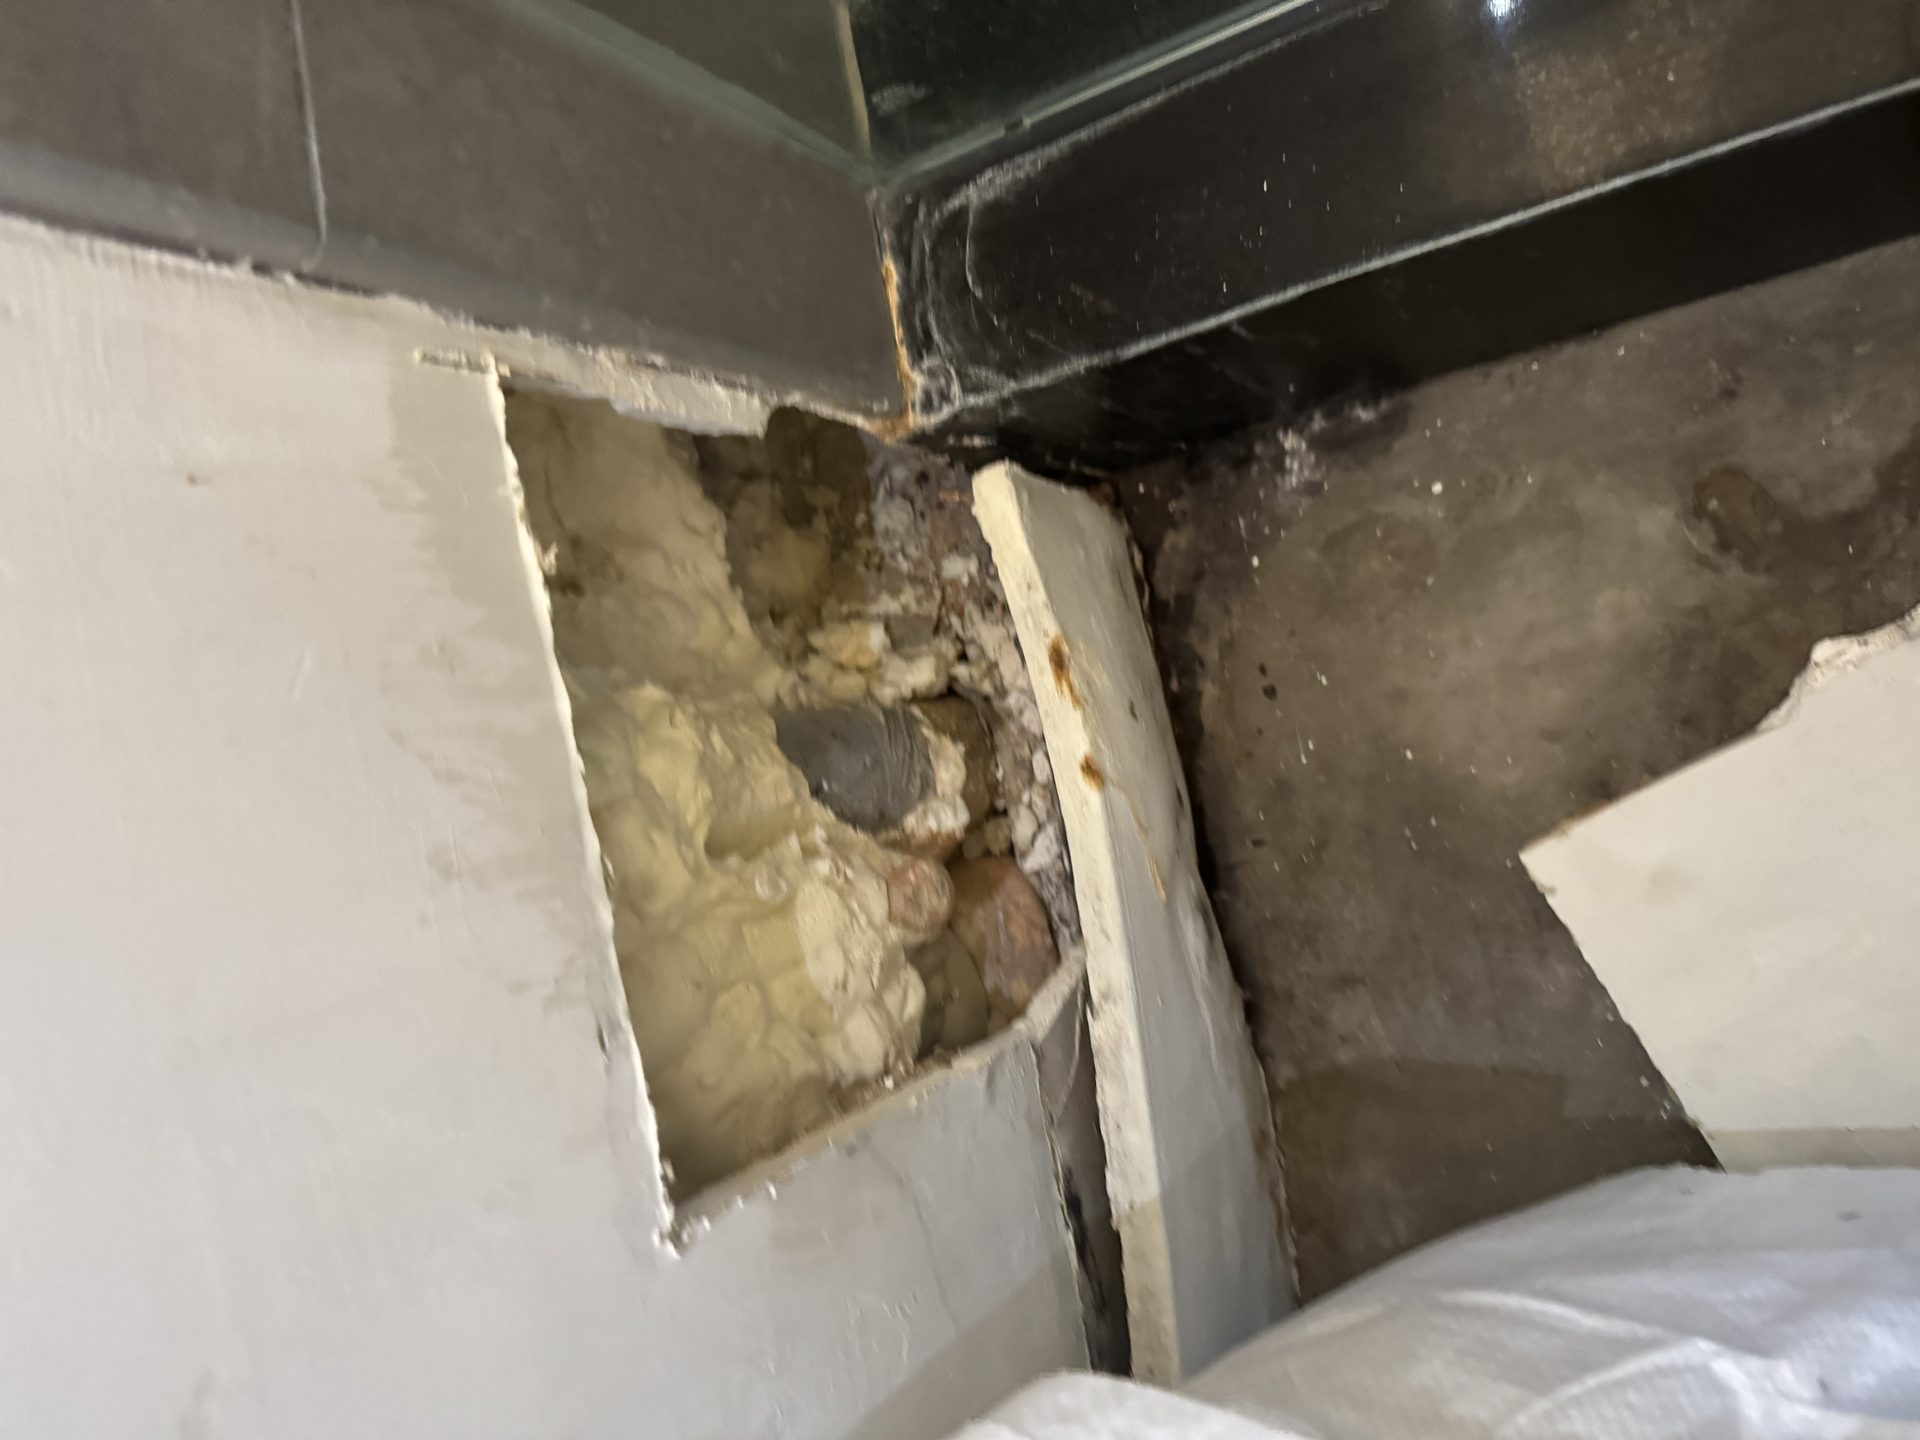
A failed pan once the wall is open. Nothing on the finished surface of this shower told the homeowner anything was wrong.
How is a shower waterproofed, and what belongs behind your tile?
Two families of correct answer, both named in the code. The difference is where the waterproof plane sits.
IRC P2709.2 lists what a shower receptor may be lined with, and the list is short: sheet lead, sheet copper, a plastic liner meeting ASTM D4068 for chlorinated polyethylene or ASTM D4551 for PVC, hot mopping of asphalt felt, or a sheet-applied load-bearing bonded membrane meeting ANSI A118.10. P2709.2.4 adds the liquid version, applied to that same standard. Whichever is used has to extend two inches beyond the rough jambs and two inches above the finished threshold.
Both are code-legal and neither is a shortcut. What separates them in service is drying. A bonded membrane sits directly under the tile, so the setting bed never saturates. A traditional liner sits at the bottom of a bed expected to get wet and then drain, which works as long as the two slopes and the weep holes are right, and stays damp far longer if they are not.
The names that let you compare two bids using identical words are the TCNA method numbers, and any tile contractor who builds showers can quote theirs without looking it up. B415 is the traditional clamped liner in a mortar bed. B421 is a bonded membrane over solid backing with a clamping-ring drain, B422 the same with a bonding-flange drain, and B421C and B422C the curbless versions. A bid that cannot name one is describing a look.
Then ask for thickness, the number easiest to shave and hardest to see. A standard sheet membrane is 8 mil, the steam and high-vapor version 20 mil, a PVC pan liner to ASTM D4551 is 40 mil, and a liquid has to go on at roughly 25 to 30 wet mils per coat, twice, to build the dry film ANSI A118.10 requires. That last one is where liquid systems fail. A liquid applied too thin looks identical to one applied correctly: same color, same coverage, same wall, at half the required film. Which is why a wet-film gauge on site and photographs of the cured membrane are worth more than any brand name on the bucket.
One detail outlives the membrane: movement joints. TCNA EJ171 is the governing detail, and industry-published spacing runs roughly 20 to 25 feet indoors and 8 to 12 feet where tile is wet, at a minimum joint width of an eighth of an inch. The field version you can check yourself is simpler. Every inside corner and floor-to-wall junction gets 100 percent silicone, not grout. Grout in a corner is the first crack you will see, and it opens straight into the assembly you just paid for.
Can you tile a shower over drywall?
Not over ordinary drywall, and not over green board on its own. Past that there is more to it than the flat no you usually get, and this is where cheap work hides.
The code line is IRC R702.4.2. In tub and shower areas the substrate has to be a fiber-cement backer to ASTM C1288, a cementitious backer unit to ASTM C1325, a glass-mat gypsum backer to ASTM C1178 or a fiber-reinforced gypsum backer to ASTM C1278. Ordinary gypsum board is not on that list, and water-resistant green board with tile stuck to it and nothing else is the most common defect behind a failed surround.
What is contested is whether a tested waterproof membrane over gypsum board counts. The TCNA's own published answer declines to settle it: the Handbook "leaves the determination of a suitable membrane/backer board combination up to the membrane and backer board manufacturers to declare and up to the design professional to select/specify." ICC-ES ESR-2467 evaluates a named sheet membrane as a shower lining over several substrates including gypsum board. So there are documented assemblies where a membrane over gypsum is legitimate, and many more where somebody tiled over green board and called it waterproof.
What we build is a code-listed backer, with the joints, inside corners, fastener heads and every penetration treated by the method the membrane manufacturer publishes for that board. The board is what the waterproofing is attached to, and the detail work at the seams is what holds the line.
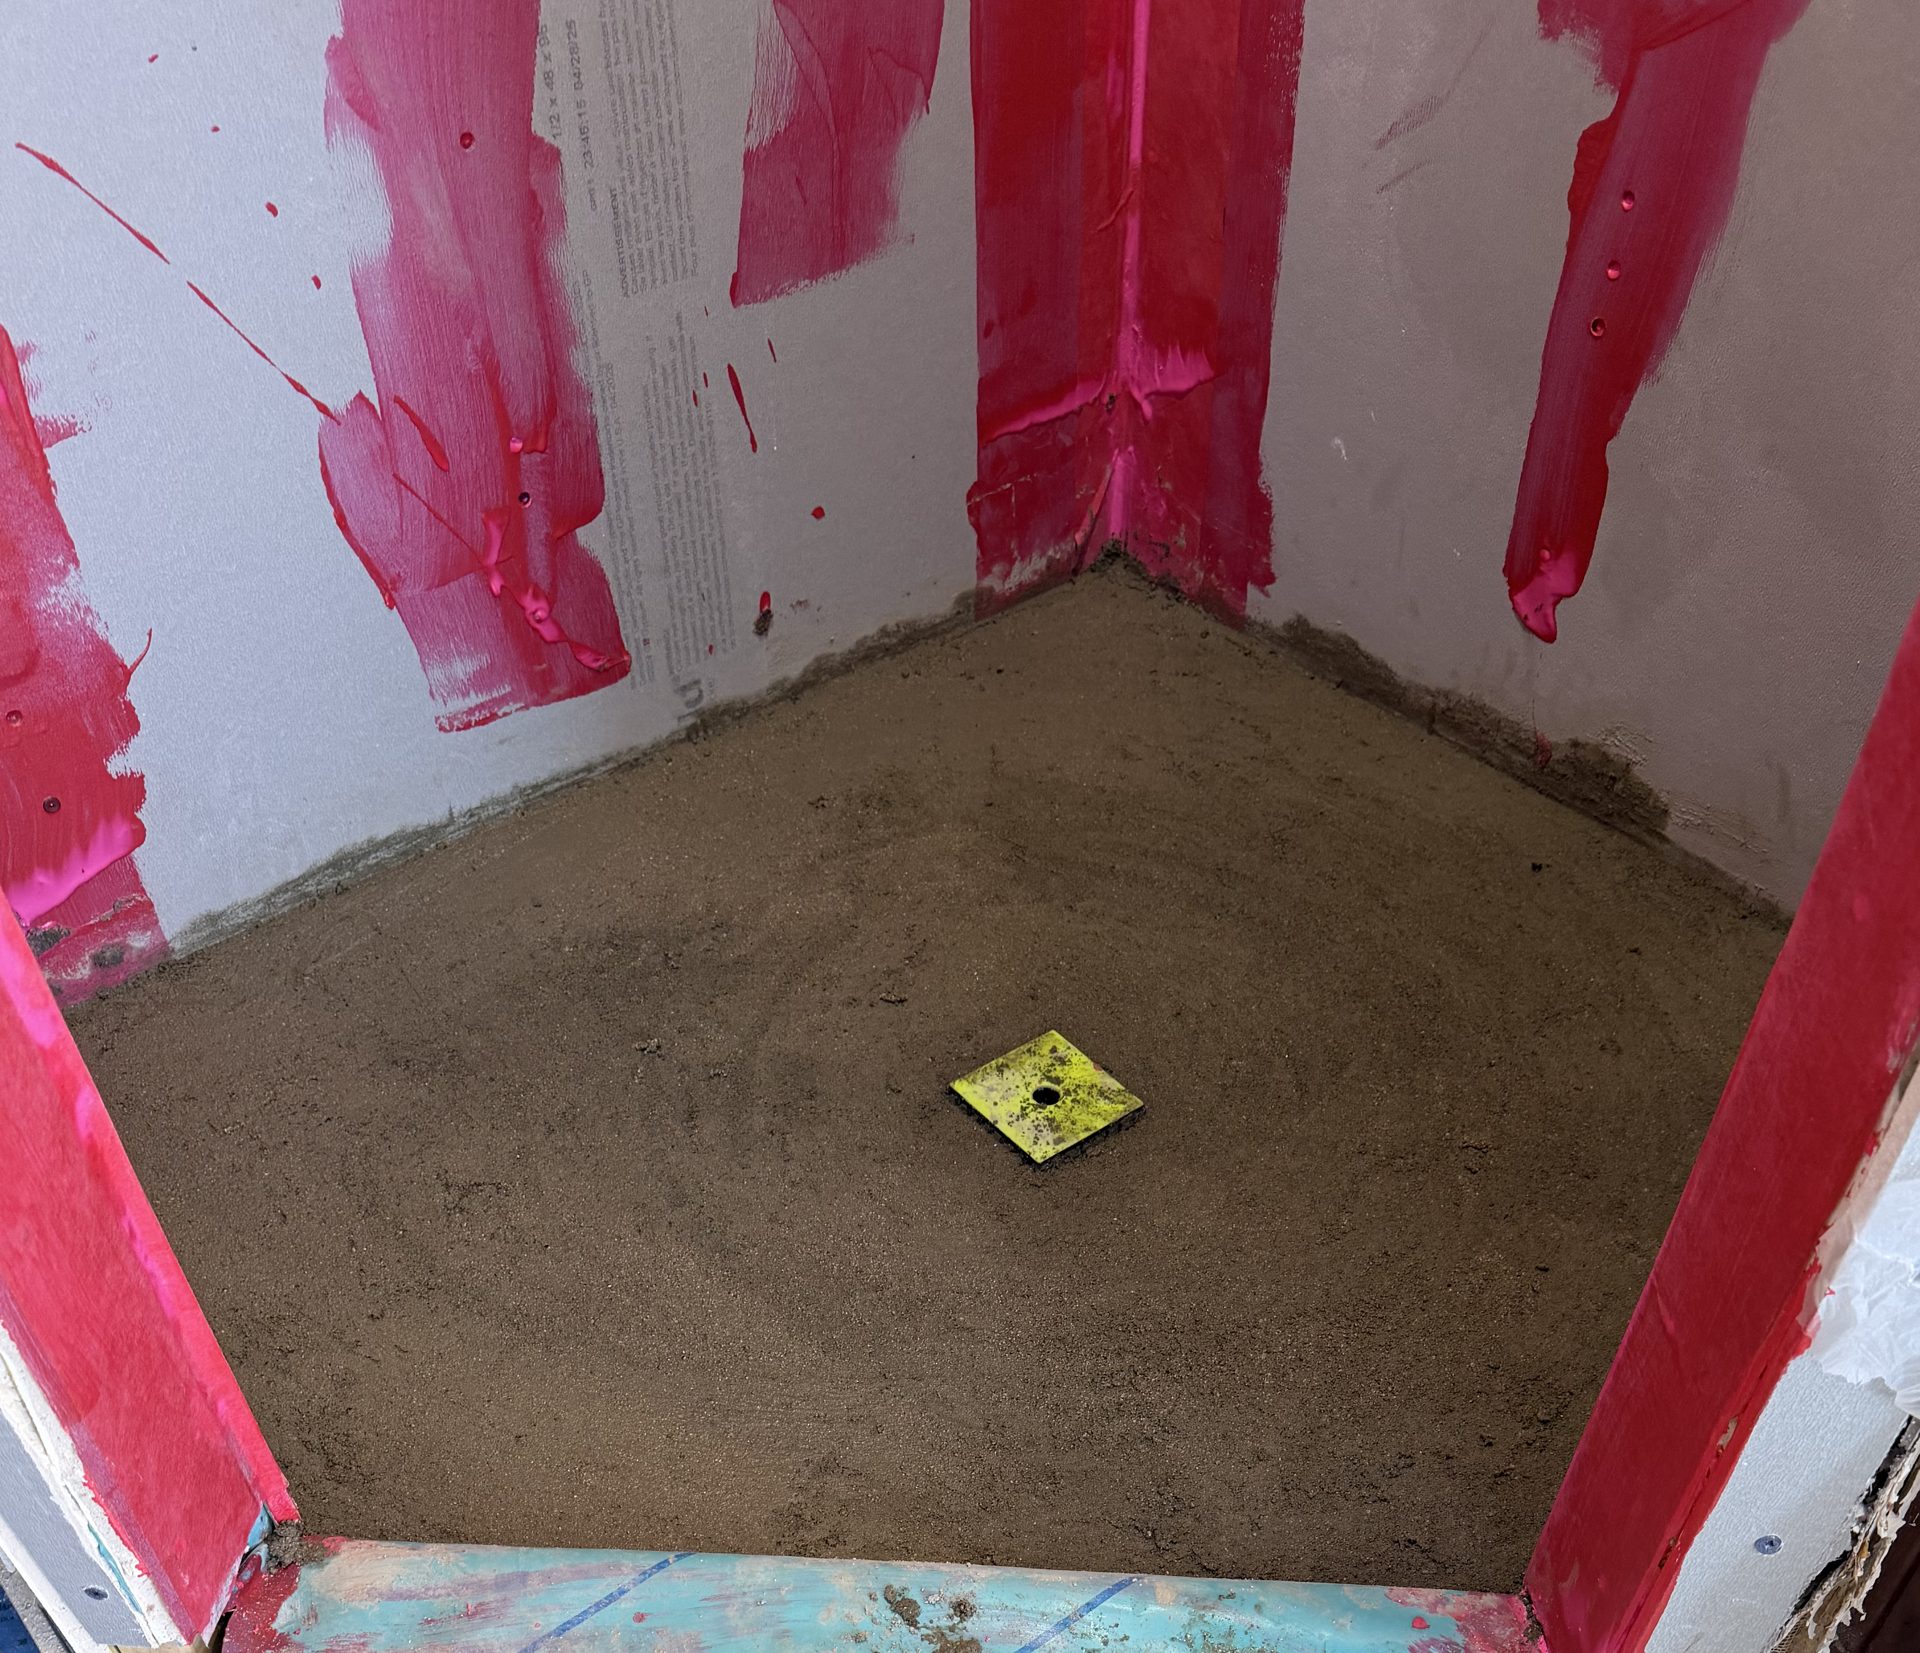
Backer up, membrane worked into every joint, corner, fastener head and penetration. This is the last day of a shower rebuild anyone can inspect. Everything after it is covered.
What does the code actually require in a Phoenix shower?
More than most people expect, and in Phoenix the answer is unusually clean. Since August 1, 2025 the city has enforced the 2024 International Residential Code, and the shower sections below are quoted from it.
Dimensions first. P2708.1 requires at least 900 square inches of interior cross-sectional area and a minimum dimension of 30 inches, both measured at the finished interior, and P2708.1.1 requires a clear access opening of at least 22 inches. Finished means measured on the tile, at the top of the threshold. Backer, membrane, thinset and tile eat roughly three quarters of an inch to an inch per wall, so a 30-inch rough opening is not a 30-inch shower. The same section has an exception that covers most tub bays: a shower can be as shallow as 25 inches when it has at least 1,300 square inches of floor, and a 60-inch alcove with 25 inches of finished depth has about 1,450.
Then the floor. P2709.1 requires the finished floor to slope not less than a quarter inch and not more than half an inch per foot to the drain, and where there is a curb it sits at least an inch below the sides and back, 2 to 9 inches from the top of the curb to the top of the drain. P2709.3 requires the lining to be sloped separately, a quarter inch per foot to the weep holes, over a smooth and solidly formed subbase. Read those together and you have the rule most old showers were built in violation of on day one: a traditional pan needs two slopes, not one. P2709.4 requires a flanged drain with a clamping ring and weep holes.
Last, the valve. P2708.4 requires a balanced-pressure, thermostatic or combination valve conforming to ASSE 1016/ASME A112.1016/CSA B125.16 or ASME A112.18.1/CSA B125.1, rated for the flow of the installed shower head, installed at the point of use, and field-adjusted to cap the outlet at 120 degrees. The code adds one more sentence: in-line thermostatic valves are not permitted as a way of meeting it.
Is a flood test required, and how long does it have to hold water?
Yes, and the code minimum is far shorter than most people assume. IRC P2503.6 requires the drain plugged watertight, the receptor filled to not less than two inches at the threshold, and the water held for not less than 15 minutes with no evidence of leakage. Fifteen minutes is the legal floor, enough to catch a hole and not much else.
The same section has a line worth knowing if you want a curbless shower: where there is no threshold to fill against, a temporary one has to be constructed. The code is acknowledging that a curbless pan has to be dammed to be tested at all.
There is also a timing rule a rushed schedule runs over. Membrane manufacturers publish a minimum wait before water goes in, commonly 24 hours, because a membrane that has not cured is not yet a membrane. Filling the pan the same afternoon proves nothing.
We hold water overnight rather than for a quarter of an hour, and the 24-hour test on each pan goes on the quote as its own line item, because writing it in is the only way a homeowner can tell whether it will happen. On the Scottsdale rebuild below, the pan sat under a flood test before the top mortar bed went over it, which is the point in a build where a failure is still cheap.
How do we build a shower, step by step?
This is the sequence from a Scottsdale primary bath we took to the slab and rebuilt. Photographs exist for every step, which is the only reason we publish it this specifically.
-
Containment, then demo to the slab
Poly across the doorway, perimeter taped, before anything is broken. Tile and old mortar bed out, walls opened to the studs, drain riser capped.
Day 1
-
New copper and the mixing valve
New copper up to a pressure-balancing valve on blocking between the studs. The plaster guard goes on immediately: it keeps mortar out of the cartridge, and its markings set the valve depth so the trim plate lands flat on finished tile.
Day 2
-
Drain body set flush, before any mortar
A three-piece clamping drain, body and ring and strainer, set flush with the slab, weep holes clear. Every layer above drains to them.
Day 2
-
Pre-slope floated in deck mud
The first of the two slopes, floated in dry-pack mortar to the drain body. This is the slope missing from most failed pans we tear out, and it is invisible after this hour.
Day 3
-
Curb built in masonry
The curb goes up in CMU with or before the pre-slope, because the liner is draped over a curb that already exists. Building it afterward is how a liner ends up cut where it should be folded.
Day 3
-
40-mil pan liner, one piece
A 40-mil PVC liner to ASTM D4551 over the pre-slope, up the walls and over the curb in one piece, corners folded and dammed rather than cut. Then it holds water before anything covers it.
Day 3
-
Top mortar bed and backer, three days later
The second slope goes over the liner, and the walls get a code-listed backer with the membrane worked into every joint, corner and fastener. The gap before this step is the cure schedule.
Day 6
-
Tile, then grout
Large-format porcelain plank run vertically, penny-round mosaic on the pan. Silicone at every inside corner and floor-to-wall junction, grout everywhere else.
Days 9 to 11
-
Glass, measured on the finished tile
A frameless single hinged door on two wall-mount hinges. The template could not be taken until the grout was done, which is why glass lands last.
Day 12
-
Trim-out and hand over
Shower head, valve trim, light, toilet reset, final clean. Thirteen days door to door, six or seven with a crew in the house.
Day 13
Look at the gaps in those dates, because they are why a bathroom takes weeks. The liner went in on a Friday and the top mortar bed went over it the following Monday. Nobody was standing around, the assembly was curing, and there is no way to buy that time back. Demolition and rough-in are fast. Waterproofing and its cure are slow.
One thing on that job is worth stating because it is checkable. The framing at the shower door was rotted, found on the first day. We replaced the studs and did the extra drywall repair it opened up, and the contract price did not move. A signed change order covered the wood floor outside the bathroom, because that was additional scope. The full day-by-day story is here: a full shower rebuild in Scottsdale, down to the studs in 13 days.
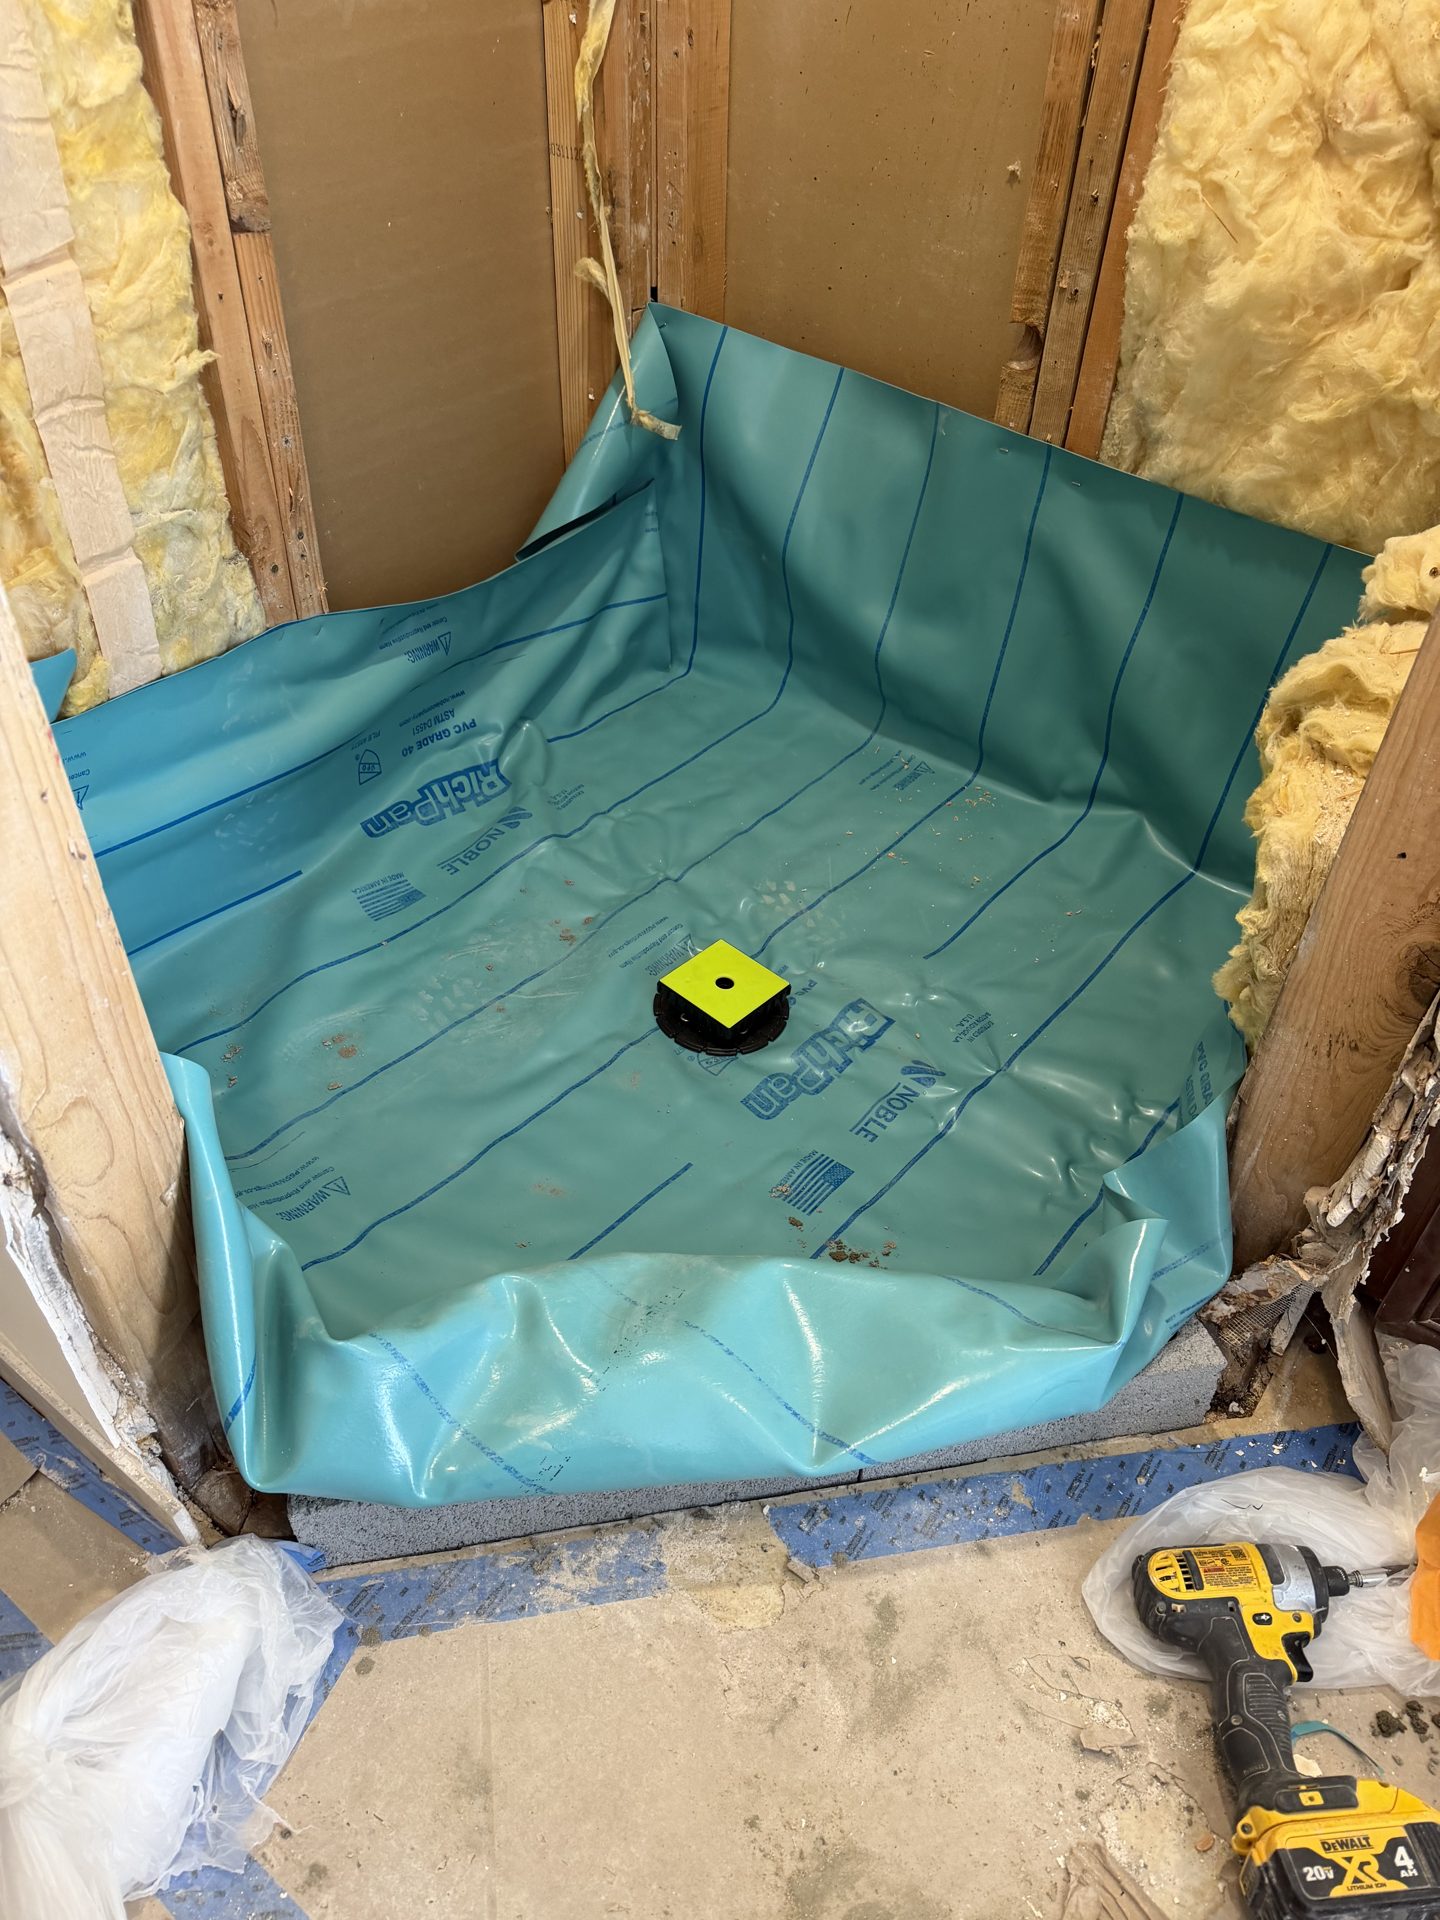
The liner over the pre-slope, wrapped over the block curb in one piece with the corners folded and dammed. Ask any contractor for this photograph of your own shower.
Can you build a curbless shower on a Phoenix slab?
Usually yes, and on a slab-on-grade house it is more straightforward than upstairs on wood. The mechanism is worth understanding, because it decides whether the answer is yes at all.
The standards-based curbless methods, TCNA B421C and B422C, both call for a depressed concrete slab so a mortar bed can be sloped at the same quarter inch per foot the code requires everywhere else. On a Phoenix slab that means recessing the shower area 2 to 3 inches. What decides how much recess you need is the drain, not the tile. A bonding-flange or linear drain needs no more than about three quarters of an inch of build at its thickest point. A traditional clamping-ring drain, the three-piece assembly used in a mud pan, needs an inch and a quarter to two inches. That is the whole feasibility question, and it gets settled at selection, well before the saw comes out. On a wood-framed floor those methods are not available in the same form, because cutting floor joists is not permitted. What is left is a recessed subfloor panel carried on blocking and ledgers, which is a framing job first and a tile job second.
Then the question everyone asks, which is whether the water stays in it. Containment on a curbless shower is a design problem. Put the high point of the bathroom floor outside the shower area, beyond the opening, so the room drains back toward the drain. Waterproof the drying area as well as the wet area, because there is no line where wet stops. Span a linear drain across the full width of the entrance. And slope every horizontal surface toward the drain, the bench and niche shelves included, because a flat niche shelf is a puddle living behind your tile.
What happens when you move a toilet or a shower drain?
Two things, and they are why this tier costs what it costs.
The first is the slab. Most Valley houses are slab-on-grade and many are post-tensioned, with steel tendons running through the concrete under enormous tension. Before anything is cut, the area gets scanned with ground-penetrating radar, the tendons get marked, and the trench gets routed around them. A cut tendon takes an engineered re-stress repair. Many of these houses carry a builder's plate reading do not drill, cut or core, usually near the garage, and finding it is worth five minutes before anyone quotes a relocated fixture.
The second is fall. Drain pipe has to run downhill at a rate the code sets, and inside four inches of concrete there is not much to spend. IRC P3005.3 requires a quarter inch per foot on drains two and a half inches and smaller, and an eighth of an inch per foot at three inches and larger. Move a shower drain eight feet and the pipe has to drop two inches, inside a four-inch slab, on a route that misses the tendons. Sometimes the geometry works, sometimes only in one direction.
A third item catches people buying a spa-style shower. Table P3201.7 sizes the shower trap by the total flow rate running into it, not by the fact that it is a shower. Up to 5.7 gallons per minute takes an inch and a half, over 5.7 and up to 12.3 takes two inches. A rain head plus a hand shower plus a pair of body sprays clears 5.7 gallons a minute without trying, which takes the drain to two inches and changes the size of the hole in your floor. Settle it at selection, before the hole in the floor is cut.
The money side of the slab question, worked through on a real job, is on our bathroom remodel cost guide.
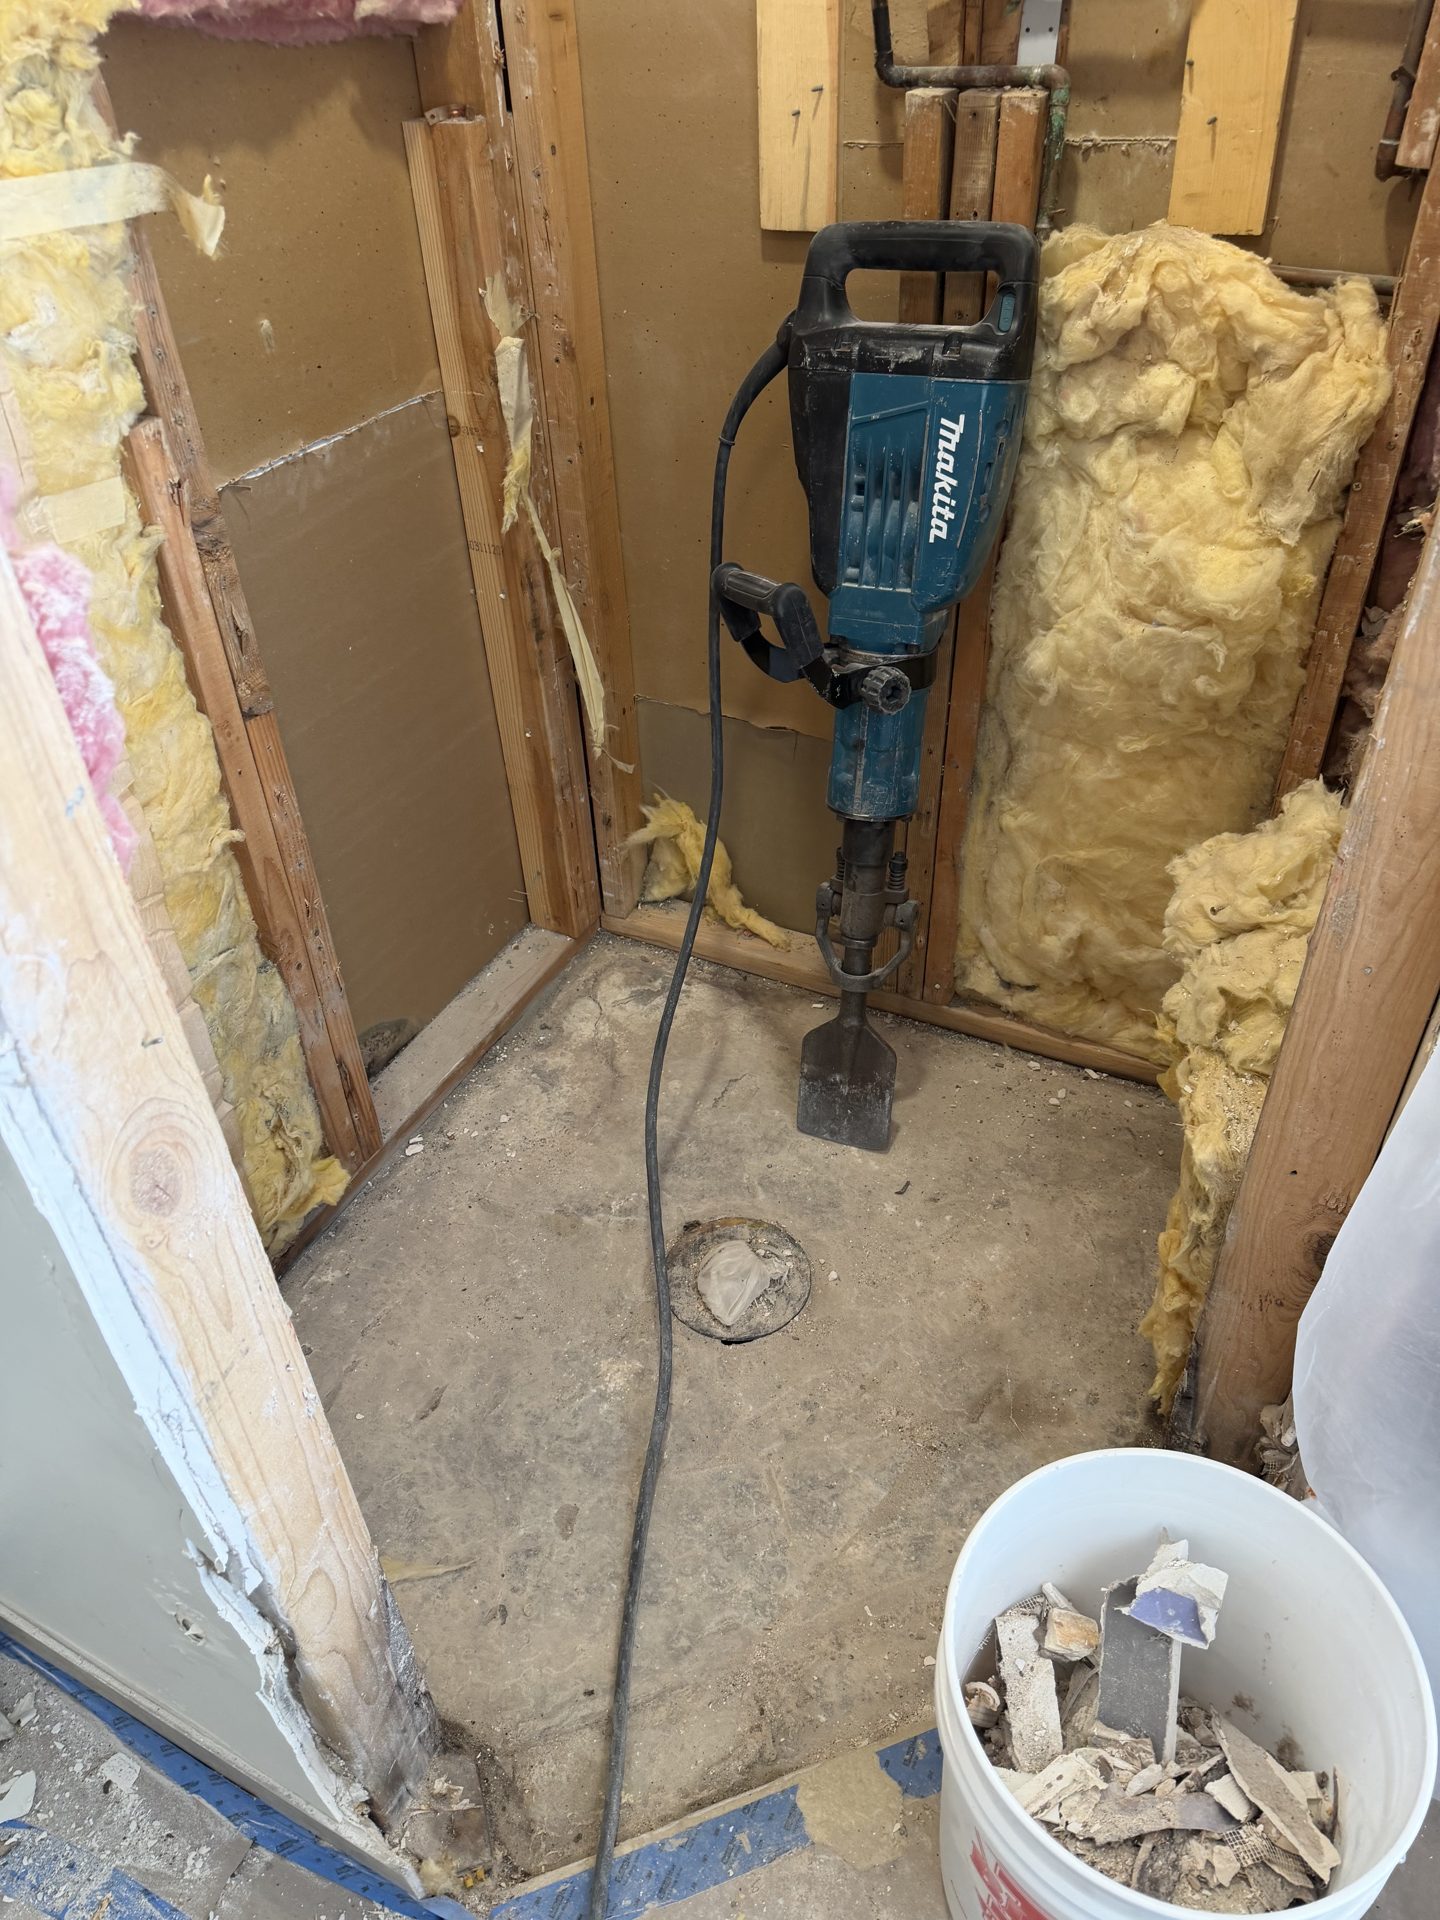
Stripped to bare slab with the riser capped. At this point the drain is either staying where it is or the floor is getting scanned and cut, and those are two different projects.
What does Phoenix hard water do to a new bathroom?
It ruins the glass, permanently, which makes it one of the few bathroom decisions that cannot be reversed later.
The City of Phoenix publishes its own numbers in the annual water quality report: total hardness of 172 to 302 parts per million, which is 10 to 17.6 grains per gallon, and total dissolved solids of 464 to 716 parts per million. Hardness is not a health contaminant and the city files it under unregulated aesthetic parameters, which is why it gets little attention. The industry scale calls anything above 10.5 grains per gallon very hard, so the whole city sits in the top band.
Glass is the casualty. The minerals left when a droplet evaporates do not just sit on the surface. Over time they react with the glass and etch it, and once glass is etched no squeegee or polishing kit brings it back. The same water scales fixture finishes and valve cartridges, which is an annoyance rather than a permanent loss.
The decision that follows has to be made before the glass is ordered. Protected glass comes two ways: a coating fused at the factory during fabrication, or a chemical treatment applied afterward that bonds to the silica. Either way it is a specification on the order, and you cannot decide to have coated glass once the panels are hanging. This is exactly the decision that gets rushed, because glass is ordered late in a job when everyone is tired of choosing things.
Check water pressure at the same time, house by house. IRC P2903.3.1 requires a pressure-reducing valve where static pressure exceeds 80 psi, bringing the house down to 80 or less, and checking it takes five minutes with a gauge on a hose bib. The consequence surprises people: a pressure-reducing valve creates a closed system, and that needs a thermal expansion tank at the water heater.
When does the shower glass get ordered, and why does it land last?
Because a frameless enclosure is templated on the finished tile, not on framing or a drawing. The panels are cut to the walls as they exist after tile and grout, which is the only way a frameless door closes properly against a real surface, so the order physically cannot go in earlier.
From that measurement to a shower you can use runs about two to five weeks. Frameless panels are 3/8 or 1/2 inch tempered glass, and the holes for hinges and clips are drilled before tempering, because tempered glass cannot be drilled afterward, which is why there is no expediting a mistake. If you are rebuilding and the opening dimensions are not changing, your existing panels may be reusable, and we settle that before demolition because tempered glass does not always survive coming out.
Tub or walk-in shower: which one belongs in this bathroom?
The most requested change we do is pulling an old tub and shower combination and building a proper walk-in tiled shower. It is usually the right call, with one condition.
Keep at least one bathtub somewhere in the house. In a multi-bathroom home, converting the primary and leaving a tub in the hall or guest bath is the safe version of the call. In a single-bathroom house, removing the only tub narrows the pool of future buyers, particularly families with small children, so make that one deliberately.
Then check the geometry against P2708.1. A 30-inch rough tub bay finishes under 30 inches once backer, membrane, thinset and tile are on it, and the code's exception covers it: 25 inches of finished depth is enough when the shower has at least 1,300 square inches of floor, which a 60-inch alcove has. Moving the front of the shower into the room buys elbow room, not code compliance, and it is a real scope item when you want it.
What does an aging-in-place bathroom need?
Start with the framing, because the expensive mistake here is one of sequence rather than product. A grab bar is designed to a 250-pound load applied in any direction at any point on the bar, and that load has to be carried by the bar, the fastener, the mounting device and the structure behind it. That makes it a framing decision, taken while the walls are open. A bar screwed to tile and backer with no wood behind it pulls out of the wall under exactly the load it was bought for. A suction-cup bar is not a grab bar.
The rest of the numbers are the design standards this work is built to. Bar diameter 1-1/4 to 2 inches, with 1-1/2 inches of clearance to the wall. A seat 17 to 19 inches off the floor and 15 to 16 deep. A transfer shower at 36 by 36 inches. A standard roll-in at 60 wide by 30 deep as a minimum, or an alternate roll-in at 60 by 36 with a 36-inch entry. A threshold no more than half an inch high, beveled where it exceeds a quarter inch.
Neither the ADA standards nor ICC A117.1 is mandatory in a private single-family home. They are the standards we build to because they have research behind them, and a contractor who tells you the code requires them in your house is either confused or selling.
The cheapest advice on this page: put the blocking in the walls during the remodel even if no bars are going in now. Adding it in five years means opening finished tile. We widened a bathroom doorway in Mesa into an open walkway with a curbless tile transition so a wheelchair could get through it, which meant reframing the opening, moving electrical and re-tiling the threshold: the Mesa accessible bathroom.
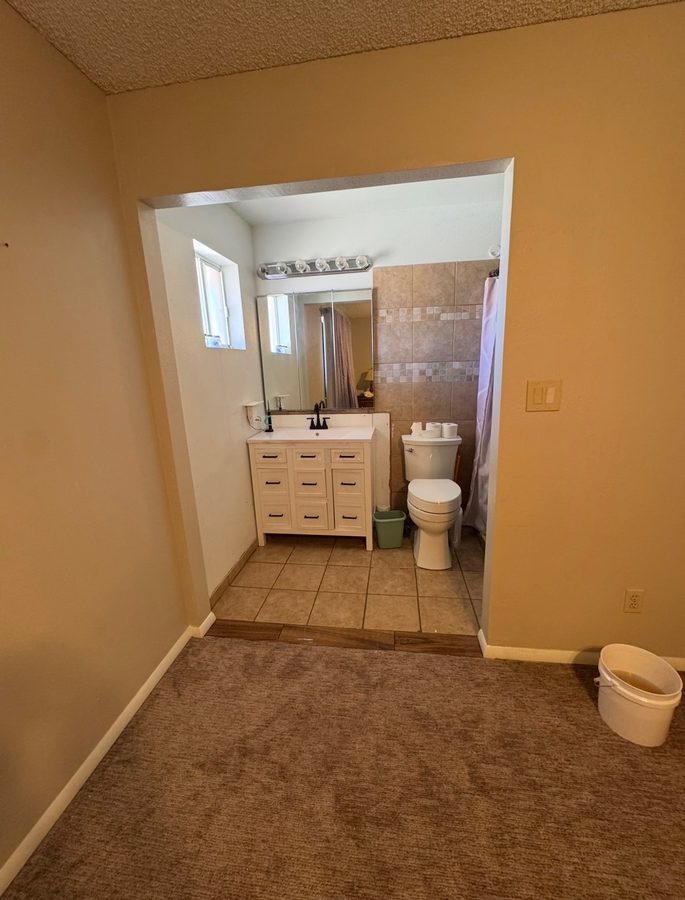
The finished Mesa opening, reframed into an open walkway with the tile carried through and no threshold to catch a wheel.
What about ventilation, lighting and outlets?
Ventilation is the item most often left exactly as it was, which in a room whose purpose is generating water vapor is a poor decision.
IRC R303.3 and M1505.4.4 give two ways to comply: mechanical exhaust at 50 cfm intermittent or 20 cfm continuous, or an operable window with at least 3 square feet of glazing, half of it openable. The window is still a legal alternative and most people assume it is not. What is never acceptable is a fan discharging into an attic, a wall cavity or a crawlspace.
Three install details decide whether a compliant fan moves air. The first three feet out of the housing should be straight duct rather than an immediate elbow, the duct diameter has to match what the fan was rated with, and the cap needs a working damper. Rated cfm is measured on a bench at 0.25 inches of water gauge, so a 50 cfm fan on 25 feet of crushed flex duct is not moving 50 cfm. Treat 50 as a floor. On sound, look for 1 sone or less for continuous running and 3 sones or less for intermittent.
On the electrical side, E3901.6 requires a receptacle within 36 inches of the outside edge of each lavatory basin, and E3902.1 requires GFCI on 125-volt 15- and 20-amp bathroom receptacles. Phoenix adds E3902.14.1, extending GFCI to indoor damp locations generally. Bathrooms also want a dedicated 20-amp branch circuit under NEC 210.11(C)(3), and plenty of older Valley houses do not have one.
Lighting carries a restriction that matters if you want a pendant. In a zone reaching three feet horizontally and eight feet vertically from the tub rim or shower threshold, cord-suspended and chain-suspended fixtures, track lighting and paddle fans with a luminaire are not permitted, mirroring NEC 410.10(D). Any fixture inside the tub or shower footprint has to be marked for damp locations, or wet where it is subject to spray.
Bathroom Remodel Price Chart, Phoenix 2026
2026 Phoenix-market numbers for licensed, insured work, labor and materials together. Whole-room bands first, then the shower work by scope, then the line items.
| Scope | Typical range | What drives the price |
|---|---|---|
| Cosmetic refresh, layout untouched | $4,000-$8,000 per bathroom | Vanity, top, mirror, lighting, toilet, hardware, paint, re-grout and re-caulk. The wet assembly stays. Vanity size and any plumbing rework to fit it move this band most. |
| Small hall or guest bath, keeping the layout | $8,000-$14,000 per bathroom | A full room to the studs, but a small one, fixtures staying put. Tile square footage is low enough that selection swings the number more than labor. |
| Standard full remodel | $8,000-$20,000 per bathroom | Room to the studs, new pan and waterproofing, new tile, fixtures, vanity and glass, same drain locations. Shower size, tile format and whether wall tile runs to the ceiling are the variables. |
| Larger primary, new tile throughout, upgraded fixtures | $25,000-$45,000 per bathroom | Dual vanities, a freestanding tub, large-format tile through the room, a bigger shower with bench and niches, better fixtures and glass. Still in the existing footprint. |
| Primary suite with relocated plumbing | $45,000-$60,000 and up per bathroom | The tier that opens the slab: tendon scanning, saw cutting, trenching, an inspection with the trench open and patching back, on top of the row above. |
Whole-room bands orient you. The two tables below are what to bid against.
Shower Work by Scope, Phoenix 2026
What the shower itself costs at 2026 Phoenix rates, by the job you are buying. The whole-room bands above are mostly this line plus finishes.
| Job | Phoenix range | What moves it |
|---|---|---|
| Full tiled shower rebuild to the studs | $6,000-$12,000+ per shower | New pan, waterproofing, wall tile, valve and trim. Porcelain subway in a standard stall sits at the low end; stone, a custom layout, niches and a bench push it toward the top. In a standard full remodel this line is most of the number. Retiling the walls to the studs over a sound pan runs $3,000 to $6,500. A retile that skips the demo to the studs keeps whatever is behind the old tile. |
| Tub-to-shower conversion | $6,000-$14,000 per conversion | Whether the drain moves. A same-spot drain with full tile stays near $6,000 to $8,000; relocated plumbing, premium tile and a glass enclosure push toward $14,000. A prefab acrylic insert with no wall tile is a different job at $1,500 to $5,000. |
| Curbless, zero-threshold conversion on a slab | $15,000-$25,000 per shower | The slab. Cutting and recessing the concrete to get the drop for the mortar bed and drain is the Phoenix-specific cost, and it adds $1,000 to $5,000 over the same shower built with a curb. |
| Relocating a fixture on the slab | $1,500-$7,500 per fixture | Method. An attic PEX reroute that avoids the slab sits at the bottom; a direct saw cut, trench, inspection and patch through a post-tension slab sits at the top. Caliche can triple the trenching. |
| Bathroom doorway widened for access | $800-$5,000 per doorway | Whether the wall is bearing. Framing, a drywall patch and a wider door with casing at the low end; an engineered header, permit and inspection at the top. |
| Shower re-caulk or full re-grout, standalone visit | $120-$960 per visit | Scope. Cutting out and replacing every silicone joint runs $120 to $175. Grinding out and repacking every grout line runs $400 to $960 depending on the grout, and a floor done in the same visit can take it to $2,800. |
Line Items, So You Can Price the Unusual Part
Phoenix metro rates for the part of your bathroom that does not fit a whole-room band.
| Line | Phoenix range | What it covers |
|---|---|---|
| Bathroom demolition and disposal | $500-$5,000 per bathroom | Age of the room. A drywall and fiberglass tear-out stays low; plaster walls and cast-iron drains run high. Haul-away is often its own line at $150 to $600 by load size. |
| Wall tile setting labor, tile supplied by you | $8-$18 per sq ft, labor only | Layout, cuts around the valve and niches, spacing, silicone at changes of plane, grout. Backer and membrane prep are folded into this rate instead of being sold as their own line, which is part of why it runs where it does. |
| Floor tile, straight lay, supplied and installed | $7-$14 per sq ft | Format. Standard 12 by 24 runs $7 to $10, 24 by 48 large format $9 to $12, extra-large slabs $12 to $16. |
| Herringbone or pattern premium | +$2 per sq ft, on top of straight lay | A flat adder for the extra cutting and waste. Small-format or wall herringbone can run well past it because the labor hours roughly double. |
| Niche or bench | $150-$600 each | A single tiled niche runs $150 to $300; a full tiled bench $300 to $600. Framed, waterproofed with the assembly, sloped to drain and tiled. |
| Vanity replacement, labor with plumbing reconnect | $300-$800 per vanity | Whether the new drain and supplies line up with the old ones. A straight swap sits low; moving or extending the rough-in pushes it to the top. Cabinet and top priced separately. |
| Toilet replacement, supplied and installed | $290-$780 per toilet | Flange condition. A clean like-for-like swap sits low; flange repair, a smart toilet or any relocation goes past $800. |
| Frameless glass enclosure, supplied and installed | $1,200-$4,500 per enclosure | Glass thickness, a single door against a multi-panel return, and hardware finish. Measured on finished tile and ordered after grout. Framed runs $500 to $1,800, semi-frameless $700 to $2,800. |
| Exhaust fan, installed | $135-$250 per fan | A like-for-like swap on existing wiring and duct sits at the floor. A new opening with a short duct run to a roof or wall cap sits at the top, and a long run with a roof penetration runs past it. |
| Bathroom electrical: GFCI, vanity light, recessed cans | $100-$350 per fixture or outlet | Type of work. A GFCI upgrade $130 to $220, a vanity light on an existing box $100 to $200, each recessed can $150 to $350. New circuits and fishing wire through finished walls bill hourly on top. |
| City of Phoenix permit and plan review | $460-$700 per remodel | Set by declared valuation on the city's tiered schedule, with plan review charged at 100 percent of the permit fee under $50,000. A $10,000 remodel is about $460; a $20,000 remodel about $620. |
Glass is the line most often quoted before anyone has seen the tile. Frameless runs $1,200 to $4,500 in Phoenix, and a custom multi-panel enclosure reaches $4,000 to $6,000. It gets measured on the finished opening after grout.
The last number is not on any table, and it is the contingency. A bathroom estimate should carry 10 to 15 percent, and more on a house built before 1980. On a $20,000 bathroom that is $2,000 to $3,000, and it belongs written on the estimate. A contingency that is not written down comes back as a change order. For a real Phoenix bathroom broken out trade by trade, see our bathroom remodel cost guide.
Should you do any of this yourself?
Some of it. We would rather say which parts than pretend the answer is none.
The work that rewards a homeowner sits at the two ends of the job. At the front, selections: picking the tile, vanity, fixtures and lighting yourself and having them on site before demolition removes the most common source of delay in this trade. At the back: painting, hardware, mirrors, towel bars, and a full re-caulk of a sound shower with 100 percent silicone. That last one is the best maintenance you can do on a shower you already have.
Demolition is what most people volunteer for, and it is where we would push back hardest in an older house, for the lead and asbestos reasons set out further down this page.
Where it does not work is the wet assembly. The pan, the pre-slope, the liner or membrane, the drain and the flood test are a system where every error is invisible on the day it is made and expensive on the day it shows. There is no way to test a wall after the tile is on and no partial repair: a shower leaking at the pan comes out. Moving any valve, pipe or fixture also needs a permit in Phoenix, and an owner-builder permit moves the liability onto you. Do the selections and the finish work, and let the waterproofing be built by someone who will hand you photographs of it.
When we will tell you not to remodel this bathroom
A bathroom is the most disruptive thing you can do to a house per square foot. There are bathrooms where selling you a remodel would be selling you a problem, and these are the ones.
| If this is your bathroom | What we would do instead |
|---|---|
| The tile is sound, the shower does not leak, and the only complaint is the color | New vanity top, fixtures, mirror, lighting, re-grout and re-caulk. A gut is the most expensive way in the world to change a color. |
| You want the shower moved several feet and the house is on a post-tension slab | Pay for the scan first, then decide. If the tendons run through the route you want, redesign around the existing drain. |
| It is the only bathroom in the house and there is no plan for where you shower for three weeks | Line up the alternative before demo, or phase the work so the toilet and a sink come back early. |
| You are selling in the next sixty to ninety days | Clean it, re-grout, re-caulk, restore the glass, swap the mirror, lights and hardware. It shows nearly as well for a fraction of the money. |
| Your whole budget for a tiled shower is under about $4,000 | Do not build it yet. That number buys a pan that is not waterproofed to standard, and you end up paying for the demolition twice. |
| One shower pan has failed and the wall tile above it is intact and still matched | Rebuild the pan and bottom course and keep the tile. Less destructive, less expensive, and the first option we price. See shower pan rebuild and leak repair. |
| The layout is the real problem but the budget only covers finishes | Wait. New finishes on a layout you dislike is money spent twice, and the second time starts by demolishing new work. |
| Someone has quoted an acrylic overlay over the existing tub and surround and nobody has opened a wall | Ask what happens if there is water damage behind it. An overlay by design never looks. If the surround is dry and sound it is a cheap, reasonable answer. If not, you are sealing a wet wall shut. |
One more sits outside the table because it is about the whole house, and it changes demolition day before anyone picks tile.
What if the house was built before 1978?
Then the federal lead rule is in play, and the threshold is lower than people expect. Under 40 CFR 745.83, interior work qualifies as minor repair and maintenance only where it disturbs six square feet or less of painted surface per room, and jobs performed in the same room within 30 days count as one job against that limit.
Six square feet is a patch about two feet by three. A bathroom demolition passes it in the first hour, which makes a pre-1978 bathroom a lead-safe job from the moment the first piece of trim comes off. Worth knowing before you plan the schedule, because the containment, the wet methods and the cleaning verification at the end are real calendar time. One Arizona point: the EPA administers the renovation, repair and painting program directly here, because Arizona is not an authorized state, so the certification question is a federal one and fair to ask any bidder.
In Phoenix this is not an edge case. Encanto, Coronado, Willo, Arcadia, Maryvale and most of central and south Phoenix are largely pre-1978 housing. Asbestos gets handled the same practical way: in a pre-1980 bathroom, old sheet vinyl and the black mastic under it get tested before they get demolished.
Is your contractor actually licensed for this in Arizona?
It takes a minute to check. Norem Contracting holds an Arizona Class B General Residential Contractor license, ROC #365090, and is bonded and insured. We carry the contract for your job. Everyone who works on your bathroom is licensed for the work they are doing.
The test that matters is aimed at the unlicensed end of the market, and the dollar figure people quote is the least useful part of it. A.R.S. 32-1121(A)(14) exempts unlicensed work only where the total contract price, including labor and materials, is under $1,000. The same exemption carries three further conditions a bathroom trips immediately. It applies only to work of a casual or minor nature. It does not apply where a building permit is required, where the work is part of a larger operation, or where contracts have been divided up to stay under the threshold. Put those together and there is no bathroom remodel in the Valley that legally belongs to an unlicensed handyman.
The rule that does the most work for a homeowner is A.A.C. R4-9-108, the Arizona workmanship standard, which says that "a contractor shall perform all work in accordance with any applicable building codes and professional industry standards," measured against the standard of "a similarly licensed contractor possessing ordinary skill and capacity." That sentence pulls ANSI A118.10, the TCNA methods and the manufacturer's published details into the legal standard of care for your shower. The membrane thickness and the pre-slope are the benchmark your contractor is held to. Separately, abandoning a contract after bidding it is a ground for discipline under A.R.S. 32-1154(A)(1).
To check anyone, including us: search the Registrar of Contractors by license number or name, and confirm the license is active, the classification covers your scope, and the bond is current.
Do you need a permit to remodel a bathroom in Phoenix?
Almost certainly, and it is worth reading the city's own wording, because the two triggers a bathroom hits are written into the exemption list itself.
Phoenix publishes a document titled Work Exempt from Permit. At §105.2.4 item 3 it exempts replacing water closets, valves or fixtures with new complying ones, then adds: "except that a permit shall be required for the relocation of any valves, pipes or fixtures." Swapping a faucet is exempt; moving a shower valve is not.
The second trigger sits in the commentary at §105.2.1 item 18: "Removing and replacing interior finishes such as drywall do not constitute patching walls and therefore require a permit. Patching a hole in a drywall sheet would not require a permit, but removing and replacing an entire drywall sheet would require a permit." A bathroom taken to the studs removes whole sheets by definition. And §105.2.5 separately excludes from ordinary repairs any addition, alteration, replacement or relocation of water supply, waste, vent or similar piping, or of electric wiring. So a bathroom gut trips two independent permit triggers at once, which is why we do not write that a permit is optional and would not sign a bid that did.
What varies is how the permit issues. The city's Residential Over the Counter Permits guideline puts single-level interior remodels of 500 square feet or less with minimal or no structural alteration in the over-the-counter lane. Footnote 2 then decides most bathrooms: projects requiring electric sub-panels, new mechanical equipment, or the addition of plumbing fixtures require submittal for review. So reworking a bathroom in place is usually a counter transaction, and adding a second sink is a plan review with real calendar time attached.
Scottsdale draws the same line: non-structural finish replacement and interior paint are exempt, a minimum plumbing permit covers replacing fixtures in the same location only, and adding or altering a circuit takes an electrical permit. Relocation is not on the exempt list there either. Elsewhere in the metro we confirm with the jurisdiction, because the Phoenix answer does not always travel.
What else makes sense to do while the bathroom is open?
A bathroom remodel strips a room to the studs, opens the ceiling and puts containment across the doorway for weeks. Work folded into that mobilization commonly comes in 25 to 50 percent below what it costs as its own trip, on one condition: it has to be on the original quote. Added on day four, it is just another job.
Grab bar blocking, everywhere it could ever go. Solid wood behind the tile at the shower entry, along the back wall, at the seat and beside the toilet: a few dollars of lumber against opening finished tile later. See framing.
Vent the exhaust fan properly, and open up the ceiling once. If your fan currently dumps into the attic, this is the one window in the life of the house where fixing it is trivial: straight duct for the first three feet, the right diameter, a damper at the cap. The same open ceiling takes recessed cans, a switch leg for the shower, and a dedicated 20-amp circuit if the bathroom is sharing one with half the hallway. See electrical work and light fixture installation.
The closet or linen cabinet next door. When the adjoining closet is reframed inside the same scope, it prices as one sequence instead of two.
A pressure test, plus a pressure-reducing valve and expansion tank if it reads over 80 psi. High static pressure eats the cartridges and supply lines you are about to pay for. Settle the water softener question in the same conversation, because Phoenix water etches the glass you are about to order.
Doors, casing, baseboard and paint, in the bathroom and the hall outside it. The room is already stripped and masked. See interior painting.
Carry the floor tile into the hall. Tile flooring is priced by the square foot, $7 to $14 installed in this market, so extending the run into the hall adds tile and nothing else, and the transition strip disappears. See flooring.
The second bathroom, or the laundry room, in the same mobilization. Demo, dumpster, containment and the permit conversation are all shared. That is why a second stall priced in the same mobilization comes in well under the first, and it is the largest single saving on this page.
A plaster or tadelakt wall in the powder room. Tadelakt is the only plaster we will put in a wet shower, and the reasoning is on its own page: interior plaster.
Ask for these as priced options on the original quote.
Hiring questions homeowners ask us
How do I check that a contractor is licensed for this in Arizona?
Search the Arizona Registrar of Contractors by the six-digit license number or by company name. No account needed, and it takes a minute. Confirm three things: that the license is active, that the classification covers your scope, and that the bond is current. Expired, suspended and revoked all show on the same record. Arizona requires the number on contracts, bids and advertising, so a bidder who cannot produce one has told you something. We are ROC #365090, Class B General Residential Contractor.
What should be in the contract before I sign, and what is a normal deposit?
Above $1,000 in combined labor and materials, which is every real bathroom, Arizona sets content requirements for a written contract under A.R.S. 32-1158. The statute is explicit that those requirements are not prerequisites to forming or enforcing the contract, so non-compliance is a licensing problem for the contractor rather than a way for you to walk away. What you want in writing is a payment schedule tied to milestones instead of dates, a change-order clause, start and completion dates, and who is pulling the permit. On the deposit, Arizona has no statutory cap on residential deposits, and the ten percent or $1,000 rule people repeat is California law. Ten to thirty percent is the working norm, and anything at or above half should come with a specific reason, such as a custom-order material that has to be prepaid.
Who pulls the permit, and what is my risk if it gets skipped?
We do, on our license and in our name. Phoenix is unambiguous that relocating any valve, pipe or fixture requires a permit, and that removing whole drywall sheets requires one, so a bathroom taken to the studs trips both. The risk of skipping it lands on you: unpermitted work surfaces at resale, in an insurance claim and in an appraisal, and the city can require finished work to be opened back up after the tile is on. If a bidder suggests you pull an owner-builder permit for their work, that is a transfer of liability rather than a saving.
Should I hire a general contractor or a bathroom-only company?
It depends on whether anything has to be opened. An acrylic liner or overlay installs over the tub and surround you already have, and if the substrate behind it is dry and sound that is a fast, cheap, legitimate product. If it is not, the overlay seals the problem in, because by design it never looks. The moment the answer involves moving a fixture, changing a layout or rebuilding a pan, you are in general contractor territory.
How many bids should I get, and what makes two identical-looking bids different?
Three is the practical minimum on a full remodel and two is plenty on a cosmetic refresh. The more useful question is what separates them, because the words on every bid are the same. Ask which TCNA method the shower is being built to, whether there is a pre-slope under the liner, whether the drain has weep holes and how they are kept clear of mortar, what the membrane is and how many mils it goes on at, and whether a flood test is being done and for how long. Two bids three thousand dollars apart usually differ on exactly those answers.
What should I ask before you close up the shower walls?
Ask this one, because everything that matters becomes invisible the day the tile goes on. Ask for photographs: the drain body set flush with the slab before any mortar, the pre-slope, the liner or membrane at the inside corners and over the curb, the weep holes clear, and the water standing in the pan during the flood test. Every one is a five-second phone picture, and a contractor doing the work properly hands them over without being asked twice.
Do we have to move out, and what if this is our only bathroom?
Almost nobody moves out. We put containment across the doorway, cover the HVAC returns so dust does not travel through the system, and clean the site at the end of each day. With a second bathroom it is barely disruptive. If this is your only one, the toilet and a working sink come back as early as the sequence allows, and we tell you up front which days the room is out of service. What we will not do is start a single-bathroom gut when there is no plan for where you shower.
When is the best time of year to do this in Phoenix, and how far ahead should I book?
Roughly October through April is the easier window here, which is the opposite of the national pattern. It misses peak-summer job-site conditions and the monsoon schedule risk from June through September. Four to six weeks of lead time is usually enough for a fall or winter start, and two to three months is more realistic for spring and summer. Separately, the glass runs on its own clock that does not start until your tile is grouted.
Bathroom remodeling across the Phoenix metro
We remodel bathrooms in Phoenix, Scottsdale, Tempe, Mesa, Chandler, Gilbert, Glendale, Peoria, Queen Creek, Paradise Valley, Cave Creek and Fountain Hills. Permit thresholds are set city by city, so we confirm with your jurisdiction on every job. Recent work includes a full shower rebuild in Scottsdale, a wheelchair-accessible bathroom in Mesa, and a primary suite and guest bath in Paradise Valley. Here is the rest of what we do.
Related: shower pan rebuild & leak repair · what a bathroom remodel costs in Phoenix, line by line · is my shower leaking into the wall? · kitchen remodeling · flooring · see our completed work

Written by Harrison Norem, Licensed Class B General Contractor, AZ ROC #365090. About Harrison
Get a Real Number for Your Bathroom
Send photos of the shower, the vanity wall and the ceiling, plus a rough measurement. You get back which of the three scopes your bathroom is in, what it runs, and what we would look at before anyone quotes a moved fixture. Free estimate, licensed Arizona contractor, ROC #365090.
Request Free Estimate