Most rotted or cracked patio cover members in the Valley get replaced one at a time with the roof left on: the cover is held up on temporary supports, the bad beam or post comes out, and a new one goes in on galvanized hardware. In the Phoenix market that runs about $400 to $800 to re-base a post onto a sound footing, $1,200 to $2,500 to replace a post with a new footing, and $1,800 to $4,500 to replace a beam with the roof shored. Deep sun checks along a beam are usually cosmetic. Rot at the beam ends, a crack that runs through to another face of the beam, or a pile of tiny pellets under it are the signs the member has to come out.
We're Norem Contracting, a licensed Class B general contractor, Arizona ROC #365090, and we repair and rebuild the wood covers and ramadas that shade Valley backyards. The beams and posts themselves are the subject here. Footings, subterranean termites and the ledger at the house wall get their own treatment in our carport post and beam repair guide, and the same rules apply under a patio cover.
Does My Patio Beam Need Replacing, or Just Refinishing?
Five checks answer it, and none needs a ladder taller than the cover. Push a screwdriver into the bottom of every post and into the end of every beam, where it extends past the post. Sound wood resists the tip. Rot lets it sink in. Sight down each beam from one end for a sag that wasn't there before. Look at the cracks and decide whether each one stops partway into the wood or runs through to another face. Check the ground and the patio under the beams for small piles of hard, sand-like pellets. Last, look at the hardware at the top of each post and at the rafters for bent straps, pulled nails or bolts that have crushed into the wood.
If every probe meets solid wood, the beams are straight, the cracks stop partway in and the hardware is tight, the cover needs a refinish, not a carpenter. If any probe sinks, a beam has sagged, or a crack runs through a bolt line, a member comes out. Our carport guide walks through the screwdriver test for termites versus rot at the post base, where subterranean termites leave mud tubes.
Are the Cracks in My Patio Beams a Structural Problem?
Usually not. Those long cracks along the grain are seasoning checks, and structural design values for timber are not affected by them. Checks form as wood dries, because the surface shrinks faster than the core, and a check is widest at the surface and narrows as it goes in. If it reaches through to the opposite or an adjacent face, it is no longer a check. It is a split, and a split is a different conversation. The grading rules expect checking: when a green timber is graded, the top grades of beams and stringers allow a check up to a quarter of the timber's thickness, posts and timbers up to half, and No. 2 timbers have no limit at all. Checks that open after the timber is installed are not a reason to regrade it.
The math explains why. A check doesn't remove wood, so an 8 by 10 inch post has 80 square inches of cross section with checks and 80 without, and its ability to carry the roof down to the footing is unchanged. The cracks that matter are a split that runs face to face, a crack that runs across the grain or angles out through the bottom edge near mid-span, which is the wood failing in bending rather than drying, and a check near the end of a beam that lines up with the bolts in a post connection. That last one can cost the bolts their grip, and the fix is to evaluate the connection and reinforce it, often with stitch bolts or structural screws across the crack. New timber needs connections that let it shrink: a steel side plate bolted through a wet beam with bolts spread across its depth holds the wood as it dries and can split it along the bolt line.
Why Phoenix beams check so hard
Because the air is so dry. North Carolina State University's table of outdoor wood moisture, built from 30 years of climate normals, puts Phoenix at 4.4 percent in June and about 9 percent in December and January. Atlanta's driest month is 11.8 percent. A beam that came off the truck wet keeps drying toward that desert number for years, and timbers installed green can keep developing checks over their first several years of service. After that the checks are considered essentially stable, so a beam that looks rough in year three usually looks no worse in year ten.
Why Do Patio Beams Rot at the Ends First?
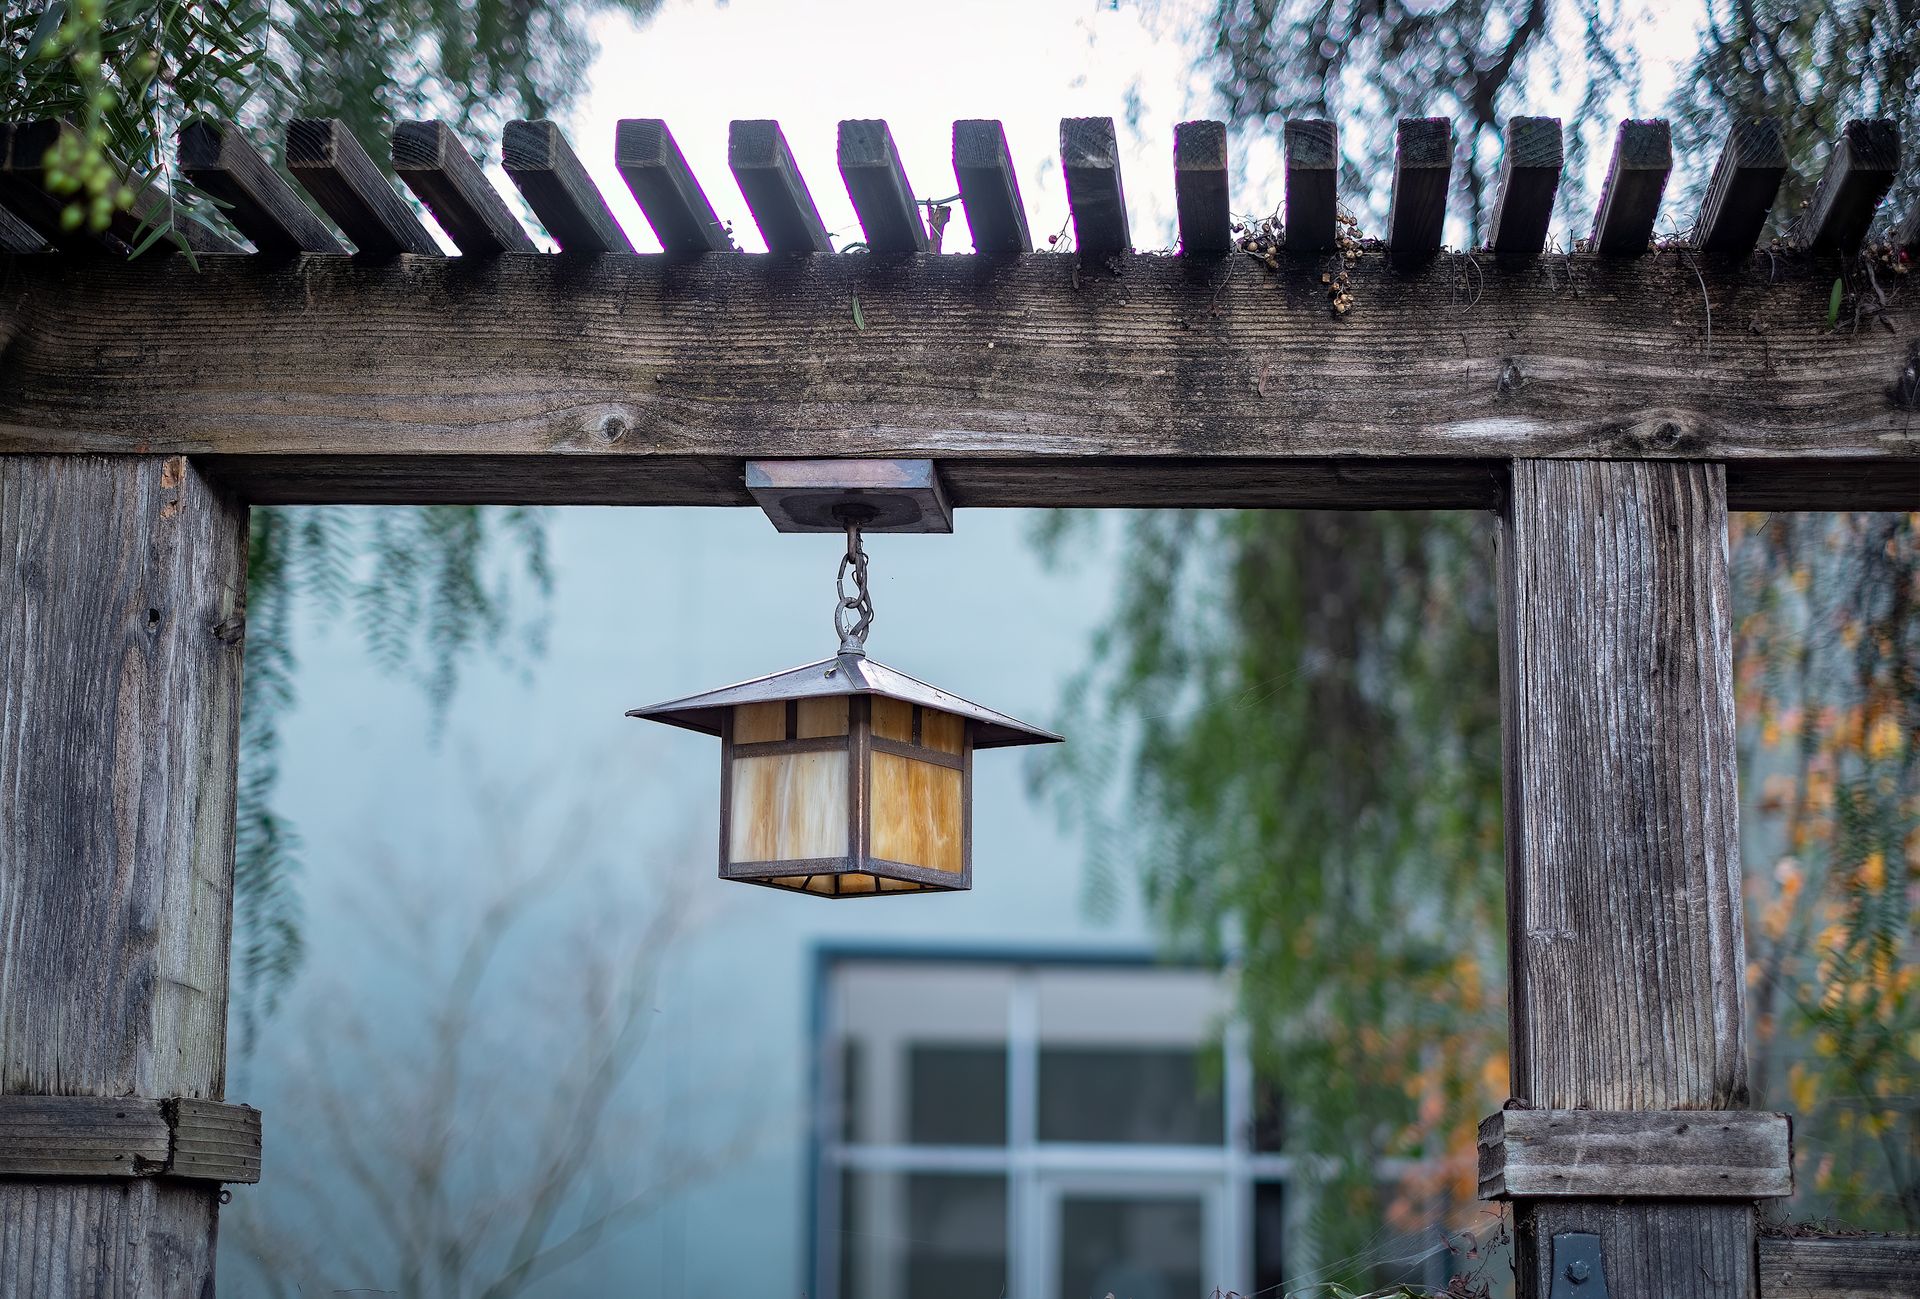
Because the ends are where water gets in and stays. End grain is the open ends of the wood's fibers, and it takes on and gives up moisture far faster than the sides do. The end of a beam that runs past the edge of the cover catches rain and, in most Valley yards, sprinkler overspray every morning. Decay fungi do their work in wood at about 20 percent moisture or wetter, at temperatures between roughly 50 and 90 degrees. With Phoenix air holding wood at about 4 to 9 percent, a beam stays dry everywhere except where water is delivered to it, which is why rot here shows up at the beam ends, the post bases and the joint where the beam sits on the post.
Cut ends of treated lumber are a second weak point. Treated Douglas fir is usually incised, with rows of small slits on its faces, because fir's tight grain resists taking treatment; the slits let the preservative go deeper, but a saw cut still exposes wood the treatment may not have reached. The wood preservation standard, AWPA M4, calls for field cuts, notches and drilled holes in treated wood to be treated on site, and it recommends a copper naphthenate solution with at least 2 percent copper metal. Read the can: Copper-Green, the familiar retail brand, is 10 percent copper naphthenate, which works out to only about 1.18 percent copper metal, short of that mark, while Tenino is one brush-on product sold at the 2 percent level. On a replacement, every cut end gets brushed, the exposed beam ends get capped or flashed, and the sprinkler heads that hit them get moved.
Can You Replace a Beam Without Taking the Roof Off?
Yes, in most cases. The roof stays on and its weight is moved onto temporary supports while the old beam comes out. It only has to come off when the rafters themselves are rotted or a soft roof deck shows the rafters under it have been wet for years. A rotted ledger at the house wall can often be swapped with the rafters shored too, but the roof-to-wall flashing and the stucco over it get opened and patched as part of the job. The sequence for a single beam:
- Shore and brace. A temporary header goes up under the rafters on each side of the beam, carried on adjustable steel shores or screw jacks set on the slab or on pads, and the posts get temporary diagonal braces, because with the beam out nothing keeps the cover from racking.
- Release the connections. Rafter ties and post caps come off, and the rafters are freed from the beam without disturbing the roofing above.
- Swap the beam. The shores are raised just enough to lift the rafters off it, a fraction of an inch, the old beam comes down, the posts and caps are checked, and the new beam goes up, cut and end-treated before it is lifted.
- Reconnect the load path. Post caps at each post and a hurricane tie at every rafter, so the roof is held down as well as up.
- Release the shores. The jacks come out slowly, the beam takes the load, and the line is sighted for level before the finish goes on.
A low-slope cover with a foam roof needs care at the jacking: the shores lift only enough to free the beam, because foam and its coating crack when the deck flexes, and a crack leaks. Most single-beam swaps run one to three days on site.
What Should Replace a Rotted Beam?
Something rated for being outside, sized to the real span and the real width of roof it carries. On most Valley wood covers that means rough-sawn or pressure-treated Douglas fir, an exterior glulam, or a treated engineered beam. What it should not be is a standard laminated veneer lumber header from the lumber yard's interior rack: LVL is made for dry service and isn't meant to be exposed to the weather. We don't print a span chart here: a deck table assumes a set floor load and joist span, not a roof that may carry tile and has to resist uplift. For a simple, light cover, the City of Phoenix's patio cover guideline publishes its own minimum beam table, and anything heavier or longer gets sized. The table below compares everything else.
Replacement beam options, compared
| Material | Look | Checking in dry air | Rot and termite resistance | Matches an old wood cover |
|---|---|---|---|---|
| Rough-sawn Douglas fir | Classic ramada texture | Checks as it dries | Untreated; lasts as long as it stays dry | Closest in texture and size |
| Pressure-treated fir or pine | Green or brown cast until finished | Checks as it dries | Good where the treatment reaches | Good after stain or paint |
| Exterior glulam | Clean, laminated face | Can check, more so if treated after gluing | Needs preservative treatment or a naturally durable species outdoors | Reads newer and smoother |
| Treated Parallam PSL, where a yard stocks it | Industrial strand face; needs prep to look finished | Surface checks only | Treated through the cross section | Paint-grade, not stain-grade |
| Painted steel tube | Slim, modern | None | Rust at the base and connections, not rot | Only on a cover going modern |
| Aluminum (Alumawood type) | Embossed woodgrain | None | No rot, no termites | Only when the whole cover converts |
Treated glulam has to be bonded with wet-use adhesives. Weyerhaeuser's treated Parallam Plus beams are rated for exterior, above-ground use and are kiln dried after treating; check with the yard, because availability varies by region.
The engineered options are harder to match on a stained cover. Weyerhaeuser's guide for its treated Parallam Plus says the product has an inherently industrial finish that may need surface prep before it looks architectural, and that it can be painted or stained. That makes it a good paint-grade beam and a poor match for a rough-sawn cover that is stained. On a stained ramada, a new rough-sawn fir beam, end-treated and finished on all faces before it goes up, usually blends best.
What Do the New Posts Sit On, and What Holds Them at the Top?
At the bottom, a galvanized standoff base that holds the post at least an inch above the concrete. The City of Phoenix's own patio cover guideline draws that on its standard post detail: a minimum 4 by 4 post on an approved elevated post base with a one-inch minimum gap, over a footing at least 14 inches square that reaches 18 inches into natural grade. The inch keeps the end grain out of the water that sits on any slab after irrigation or rain. Simpson's ABU anchors to existing concrete and adds uplift resistance, and its CBSQ base is cast into wet concrete when a new footing is poured, with the same one-inch standoff. Buy treated posts stamped for ground contact (UC4A) even on a standoff base; sprinklers keep the bottom wet, and the preservative standard puts lumber that is hard to maintain or replace in that category. Hardware against treated lumber should be Simpson ZMAX or hot-dip galvanized at a minimum, with hot-dip galvanized fasteners to match.
At the top, a connector that holds the beam down as well as up. The same Phoenix detail calls for a Simpson AC or ACE post cap where the beam meets the post and a Simpson H2.5 or equivalent tie at every rafter where it crosses the beam. On heavier beams, Simpson's CCQ column cap, or its ECCQ version for the end of a beam, carries more load with structural screws; its light-duty BC caps suit small covers. Monsoon outflow tries to lift a cover off its posts, and these few pieces of steel are what stop it. Footing size and depth, caliche and uplift at the base are covered in the carport guide.
Is It Drywood Termites or Rot Up in the Beam?
Look for pellets. Drywood termites live inside sound, dry wood, never touch the soil and build no mud tubes, and they push their droppings out through small round kick holes. The pellets collect in little piles on whatever sits below: the patio, a ledge, a cobweb. They are hard, less than 1/25 of an inch long, with rounded ends and six flattened sides, usually light tan with some black ones mixed in. Rot leaves no pellets. It leaves wood that is soft, stringy or crumbly, almost always where water reaches it.
Arizona has two drywood species that matter at home. The dark western drywood termite swarms in daylight, usually May through early August, and the light western drywood termite, found in the Sonoran Desert, swarms at dusk from May into early September. Both need as little as 2.5 to 3 percent moisture in the wood, so dry Phoenix air does nothing to stop them, and the University of Arizona's extension guide names exposed beams, porch roofs and their supports among the places to inspect. Swarmers get into wood through cracks, natural checks and exposed end grain, which describes a patio beam exactly.
Treatment comes first, and in Arizona it is licensed separately through the Department of Agriculture's Pest Management Division. It is not carpentry. Where the infestation is limited, the extension guide says removing and replacing the damaged wood is often all that's needed, preferably with pressure-treated wood, and spot treatments drilled into the galleries are another option. Widespread infestations call for fumigation by a licensed company. On new bare wood, a borate treatment such as Nisus Bora-Care, which is labeled to kill and prevent termites and decay fungi, can go on before the finish, and applied for hire it falls under the same pest-control license. Subterranean termites, the kind that come up from the soil, are covered in the carport guide.
How Much Does It Cost to Replace Patio Cover Beams and Posts in Phoenix?
Re-basing one post on a sound footing runs about $400 to $800 in the Phoenix metro, replacing a post with a new footing $1,200 to $2,500, and replacing a beam with the roof shored $1,800 to $4,500. Adding post caps and hurricane ties to a cover that never had them runs $350 to $900. A localized rot repair on wood that carries no load, such as a beam tail past the last post, prices around $592 to $1,112 per repair in national cost data; rot where the beam sits on a post means replacing the beam. When the work outgrows repair, a new wood-framed cover tied into the roof line runs $60 to $120 per square foot and a solid aluminum cover $24 to $30.
| Repair | Typical Phoenix range | Site days | What moves it |
|---|---|---|---|
| Single post, splice onto a standoff base, existing sound footing | $400 to $800 per post | 1 day | No slab cutting |
| Single post, full replacement with a new footing | $1,200 to $2,500 per post | 2 visits: pour, then set after 3 to 7 days of cure | Slab cut, dig, caliche, patch |
| Header replacement, shored, engineered beam | $1,800 to $4,500 per beam | 1 to 3 days | Whether the roof comes off to do it |
| Post caps and hurricane ties added to an existing patio cover | $350 to $900 per cover | Half a day | Rafter count, access |
| Localized rot repair where no load bears, such as a beam tail past the last post | $592 to $1,112 per repair | Varies | How far the rot runs; rot at a post bearing is a beam swap; national figure, May 2026 |
| Termite-damaged section cut out and repaired, up to 6 sq ft, where no load bears | $556 to $1,068 per repair | Varies | Pest treatment comes first and is licensed and priced separately; national figure, May 2026 |
| Repaint or restain a wood cover | $2 to $6 per sq ft to paint; $4 to $6 per sq ft to stain | Varies | Prep, height and access; national figure |
| Full rebuild, wood-framed cover tied into the roof line | $60 to $120 per sq ft | Two visits: footings, then the frame | Size, roof tie-in, drawings, gutter |
| Full rebuild, solid aluminum patio cover | $24 to $30 per sq ft | Two visits: footings, then the frame | Size, insulated or plain roof panels |
Phoenix market ranges for 2026 from published cost data; the two repair-per-unit rows are national averages from Homewyse and the refinish row is a national figure from HomeGuide. In our heat a new footing can dry instead of cure, so it stays damp and shored until it has strength, typically 3 to 7 days before it carries the structure.
The row that surprises people is the post with a new footing. The post is cheap. The cost is cutting the slab, digging, hitting caliche, waiting for the concrete and patching the slab. Nobody can tell from a photo whether a post sits on a real footing or on four inches of patio, so a quote that skips looking under the post is a guess.
Send Us the Post Bottoms and the Beam Ends
Photos of the base of each post, the ends of each beam where they extend past the posts, and one wide shot of the whole cover. We'll tell you which members are a refinish, which are a repair and which have to come out, and what each one costs.
Get a Repair EstimateHow Do You Keep a New Beam From Checking and Fading?
You can slow checking and you can stop fading, but a solid beam in Phoenix will check some no matter what. Let a rough-sawn timber dry out before it gets its final finish, so the finish isn't sealed over wood that is still shrinking. On green timber, a wax end sealer such as Anchorseal on the cut ends slows the moisture loss that causes end checks, and its maker says it prevents up to 90 percent of them. Then put a first coat on all six faces before the beam goes up, so the top and the ends that face the sky are protected too, and hold the final coat until the wood has dried in place.
For the finish, a penetrating semi-transparent stain keeps the wood visible. ProLuxe SRD, formerly sold as Sikkens Cetol SRD, is one example, made for exterior siding, railings and decks. For an opaque finish, the most durable system is a stain-blocking acrylic primer under two coats of all-acrylic paint. Skip clear film finishes like varnish and urethane outside. They have a short service life in the sun and are hard to refinish. Plan on recoating every two to four summers here. A sound coat of paint also helps against drywood termites, which the extension guide says generally won't enter wood that carries one.
When Does Replacing Parts Stop Making Sense?
When the repairs add up to the structure. One bad post is a repair. A third or more of the members bad, a roof deck that is soft underfoot, a rotted ledger at the house wall, or drywood termites in several members is a rebuild, because by then the shoring and the patching add up to most of what a new cover costs, and you still have old wood. A beam that has visibly sagged doesn't come back, and sistering it usually pushes the problem a few years down the road.
The other question is what the cover is for next. If it is about to be enclosed into an Arizona room, read about converting an Arizona room before spending on new beams, because an enclosed cover has to carry walls and an insulated ceiling it was never framed for. If you are weighing a different structure, our comparison of what a pergola or patio cover costs in Phoenix prices every option side by side, and our patio covers and ramadas in Phoenix page covers new builds. For the repair side, see our structural post and beam repair work, and for how posts get footings through an existing patio, the louvered pergola we installed over a paver patio in Phoenix.
What Do Phoenix Homeowners Ask About Patio Cover Beams and Posts?
Can I replace just one post?
Yes, and it is the most common repair on a Valley patio cover. The beam is shored on temporary supports, the bad post comes out, and a new one goes in on a galvanized standoff base with a post cap at the top. If the post was rotted only at the base and the footing under it is sound, it can often be cut back to sound wood and re-based instead, with the lost length made up by a short concrete pedestal under the base or a splice above it. What decides the price is the footing, not the post.
Should I fill the cracks in my beams?
No. Engineering guidance on exterior timber is plain about it: checks in timbers exposed to the weather should be left open, because an open check lets water drain or evaporate and a filled one can trap moisture and start decay. Keep the finish on the wood in good shape instead. The cracks worth acting on are the ones that run through to another face or line up with a bolt, and those get reinforced or replaced, not caulked.
Are 4x4 posts strong enough for a patio cover?
On a small, conventionally framed cover, often yes. The City of Phoenix's patio cover guideline draws a 4x4 as the minimum post on its standard detail, set on an elevated post base at least an inch above the concrete. The city's simple detail assumes a light roof with no tile. A 6x6 carries far more, with about two and a half times the cross section, and it is the better choice for tall posts, long beam spans, heavier roofs or a post that has to be notched to seat the beam. Anything beyond the simple detail gets sized, not guessed.
How long do wood patio cover beams last in Phoenix?
Valley installers put wood covers at roughly 10 to 30 years, with species and upkeep making most of the difference. A beam kept out of sprinkler spray, with its ends protected and its finish renewed every two to four summers, sits at the long end. A beam that gets wet every morning at the post connection can rot through in a fraction of that.
Can I wrap a rotted post instead of replacing it?
No. A wrap hides the rot without stopping it, and the post keeps losing strength out of sight. Wrapping can also trap moisture against the wood, which is why even the maker of a treated engineered post warns against cladding that does not drain and breathe and calls for a gap at the bottom. Replace the rotted section or the post, fix the water source, and then wrap it for looks if you want to, with vented trim held off the concrete.
Will a new beam match the old ones?
It can match the size and texture closely and the color after it is finished. Rough-sawn Douglas fir is easy to match in profile to an older rough-sawn cover. Fresh wood is lighter than weathered wood, so it gets stained or painted to blend, and it will develop its own checks over its first few years as it dries to Phoenix conditions. Most people stop noticing the new beam after the first refinish of the whole cover.
What Else Should Ride Along While the Cover Is Shored?
A beam swap puts shoring, a saw, galvanized hardware and a finish crew under the cover for a few days, and the work that touches the same posts and beams is cheapest in that window. Add-ons agreed before the shores go in usually land a quarter to a half below what they cost as separate trips, because the setup, the access and the cleanup are already paid for.
- Move the water off the wood. The sprinkler or drip line that rotted the old post will rot the new one. Rerouting it is a small job while the post is out; see sprinkler and irrigation repair in Phoenix.
- Refinish the whole cover. A new beam next to twenty-year-old ones is obvious until everything shares one coat. The house wall under the cover usually wants the same treatment; see exterior painting.
- Hang a fan. With the beams open, blocking for a damp- or wet-rated fan goes in with no patching. See ceiling fan installation.
- Light it. Wiring rated for a damp location runs in conduit or a routed chase along the new beam before it is finished, not stapled across it later. See light fixture installation.
- Fix the slab around the posts. A new footing means a slab cut and a patch anyway, and a slab that drains toward a post is part of the rot problem. See concrete patios.
- Screen the low sun. Under a cover facing west, sun screens on the windows behind it take the late afternoon heat the roof can't. See sun screens and window tint.
The order inside the job is the one that saves money later: pest treatment first if pellets showed up, then the structure, then wiring and fan blocking, then the finish.

Written by Harrison Norem, owner of Norem Contracting and a licensed Class B general contractor, Arizona ROC #365090. Fifteen years across the trades, including framing, structural repair and patio covers, across the Phoenix metro. More about Harrison.