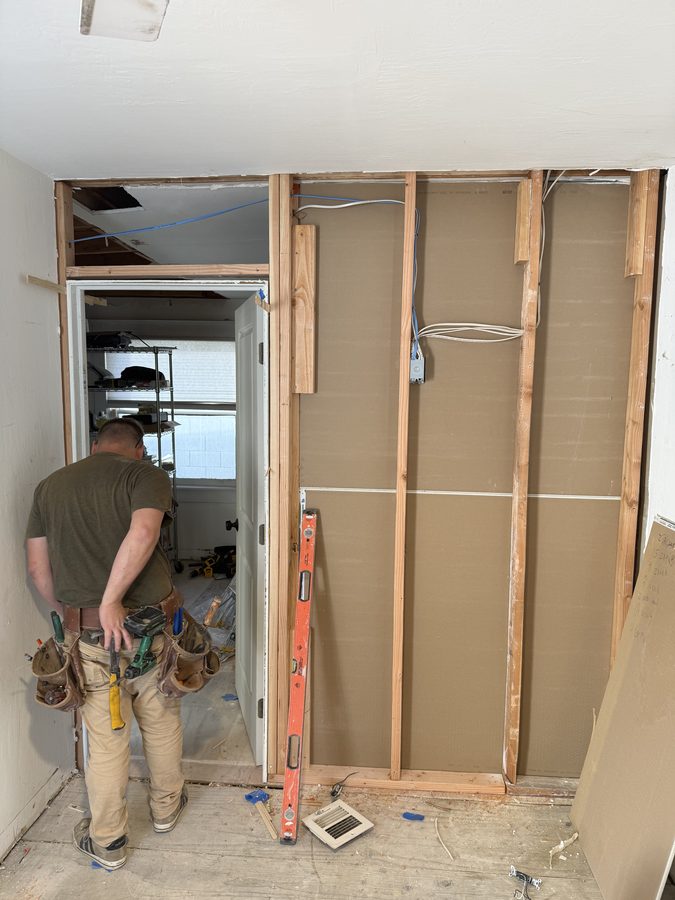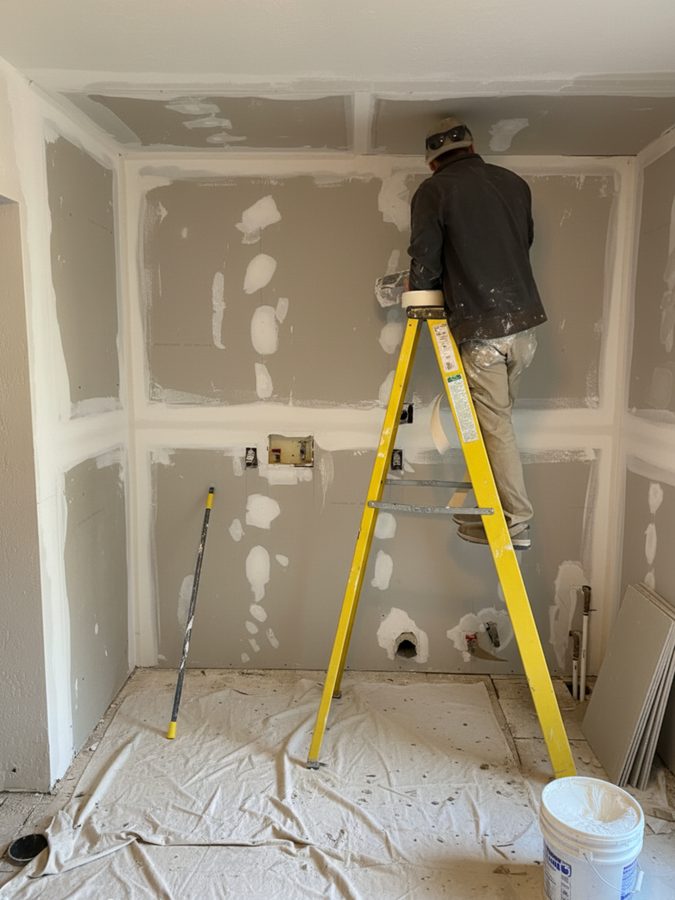
Drywall repair is two jobs wearing one name. The first is closing the hole, which is carpentry and takes an afternoon to learn. The second is making that repair vanish into thirty-year-old sprayed texture and aged paint, which takes years, and it's the part you're paying for. Almost every complaint anybody has about a drywall repair is a complaint about the second job.
We are a licensed Arizona general contractor, ROC #365090. Drywall sits inside our handyman and installation work, and it's one of the trades we run most. Every drywall call we took last summer was a ceiling, and three of the four started at an air conditioner. That shapes how we quote this. A ceiling with a brown ring in it is a symptom, and if nobody looks upstream at the condensate pan and the float switch, the homeowner buys the same ceiling twice. Being a general contractor rather than a coatings or patch specialist means the leak and the ceiling are one job on one contract, each part handled by the trade licensed for it, instead of three phone numbers and nobody owning the result.
The rest of this page is the craft: how a patch is made to disappear, how orange peel and knockdown are actually matched, what Phoenix heat and dry air do to wet joint compound, which cracks are cosmetic and which ones mean stop, and then the full 2026 price chart. There's a published standard for whether a repair passed or failed, and almost nobody applies it, so start there.
How close does a patch have to be before it counts as invisible?
The trade has an acceptance standard and it's specific. GA-214, the Gypsum Association's document on levels of finish, says the normal viewing position is a minimum of five feet, perpendicular to the surface, and that blemishes should not be visible from a normal viewing distance in normal light. Five feet, standing, room lights on. That's the test.
The same document says something more useful, and it's the sentence no contractor volunteers: it is not possible to achieve a perfectly flat surface when finishing gypsum panels. Finishing is successive thin coats that minimize ridges and recesses. Nobody is flattening the wall. So the honest promise is that at five feet you won't find the repair, and at twelve inches with a flashlight held flat against the wall you will find every repair in your house, including the ones the builder's crew made before you moved in.
The exception has a name in the standard, which is worth knowing before you sign anything. Critical lighting means strong side lighting from windows or from surface-mounted fixtures. GA-214 calls it severe lighting and lists exactly three remedies: skim coat the entire surface, use a medium to heavy texture, or soften the light with drapes and blinds. It also says plainly that textures conceal minor differences. That single line explains why every tract house in the Valley has sprayed walls and ceilings. It's not a style choice from 1994. It's the cheapest way to make a wall pass in raking light.
If the wall you want repaired takes hard afternoon light down its length, or sits under a sconce, or is about to be painted a deep color, say so at the estimate. That is a different scope than the same hole on a shaded hallway wall, and pretending otherwise is how a repair gets sold cheap and fails at handover.
Matching orange peel and knockdown, and how to tell whether somebody can
Orange peel on the walls, knockdown on a lot of the ceilings. That's the Valley default, and matching it is the whole job. Eight of the drywall pages ranking in Phoenix say they match your texture. None of them say how, which makes it impossible for a homeowner to tell a texture guy from somebody with a rented hopper.
The method has five parts, and any one of them makes a good screening question.
It starts with reading the existing pattern before anything gets mixed. Orange peel is a spatter left where it lands, and the size of the droplet is set by the hopper tip and the air pressure, which is why two crews spraying the same bucket produce visibly different walls. Knockdown is that same spatter flattened with a wide blade after it skins over. Popcorn is a sprayed acoustic material with aggregate in it and is the hardest of the three to match, because the aggregate size and density were set by whoever sprayed it decades ago.
Then the mud gets thinned to spray consistency, and this is the first place cheap work goes wrong. GA-236 is explicit: excess water only increases shrinkage and can affect bond. Thinning past what the material wants, which is tempting in a hot room because it buys working time, is how a texture ends up cracking as it dries. The correct move when the room is fighting you is a different compound, not more water.
Then a sample board. A scrap of drywall gets sprayed at the tip and pressure we think matches, and on knockdown it gets knocked at the interval we think matches, and it gets held up against the existing surface. That board is the difference between a match and a guess, and it costs about four dollars. Ask any bidder whether they spray a sample first. The answer tells you most of what you need to know.
The knockdown timing window is the part that fails in this climate. The splatter has to skin over on top while staying soft underneath before the blade touches it, commonly ten to twenty minutes, and that window moves with room temperature, humidity and how heavy the pass was. In a Phoenix house with the air conditioner off, that window is a fraction of what the tutorials assume. A crew that sprays an entire ceiling and then starts knocking will flatten stiff mud at the end they started on and smear wet mud at the other. That's the real reason knockdown matches fail here, and the fix is unglamorous: spray a section, knock that section, move on.
Last, the match gets judged after primer, not while it's wet. GA-214 requires a priming material over the finished surface before decorating and requires textured surfaces to be dry before painting. Wet texture reads darker and flatter than it will look on Tuesday. Anyone who declares a match while the mud is still gray is guessing.
Smooth walls and smooth ceilings are harder than either texture, not easier, because there's no pattern to hide a flat spot or a difference in sheen. The three ceiling photos in the next section come from a smooth vaulted ceiling, which is the unforgiving version of this work.
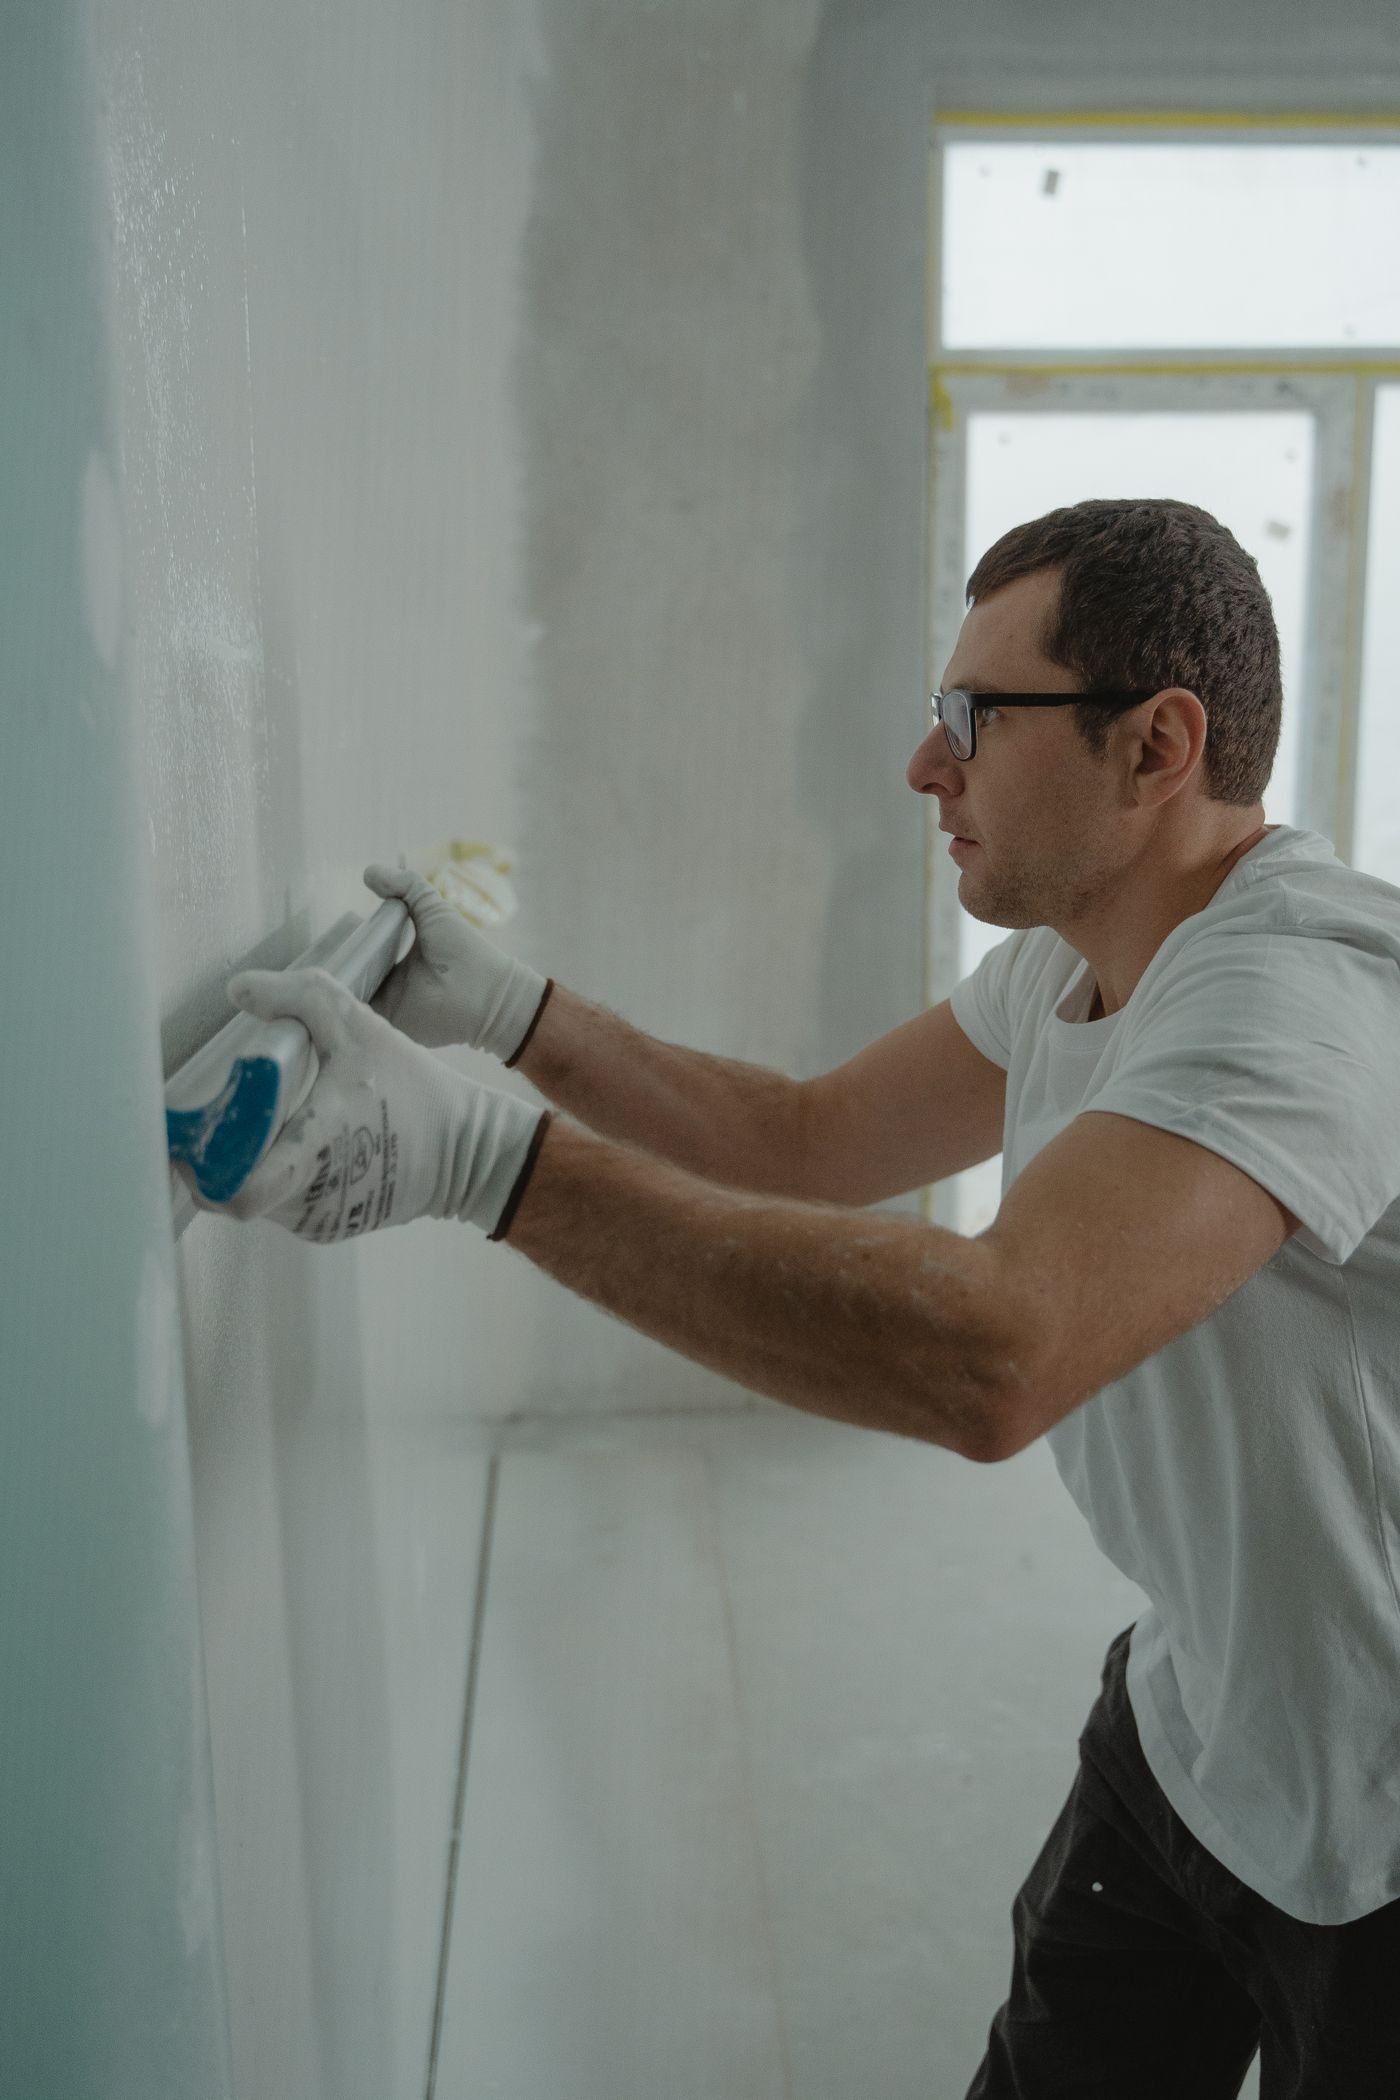
How a hole actually gets closed
Six steps. The first one is the one that gets skipped, and skipping it is why some repairs come back.
-
Find out why
Water, movement, a fastener, or somebody's elbow. Patching before the cause is dead is money spent twice. On a ceiling this means a moisture reading and a look at what is above it.
At the estimate -
Cut it square, back it
The opening gets squared, and where it lands mid-bay with nothing but air behind it, backing goes in first. A plug that bears on nothing is a hairline outline next summer.
20 to 45 min -
Tape in setting compound
Paper tape with enough compound left under it to bond. If mesh is used it gets setting-type compound forced through the weave, which the standard requires. Mesh over ready-mix is the crack that returns.
30 to 60 min -
Fill, then finish coats
A fill coat, then finish coats feathered wider each time. The finished edge of the repair ends up well outside the hole it started as. Windows stay shut and no fan points at it.
Same day or next -
Sand, but not flush
The standard says do not sand compound flush to the panel over joints and fasteners, and use the finest grit that works. Over-sanding raises the face paper nap, which then drinks primer differently and flashes.
20 to 40 min -
Prime, texture, prime, paint
Primer over the whole feather zone, texture matched off the sample board, primer again over the texture, then paint to a natural break line. Stains get a shellac or oil blocker, never latex.
1 to 3 hrs
These are the Gypsum Association's own published figures, and the association states that drying times significantly above 48 hours or under 8 hours are known to lead to poor results. A Phoenix room with the air conditioner off in July sits under that floor on its own.
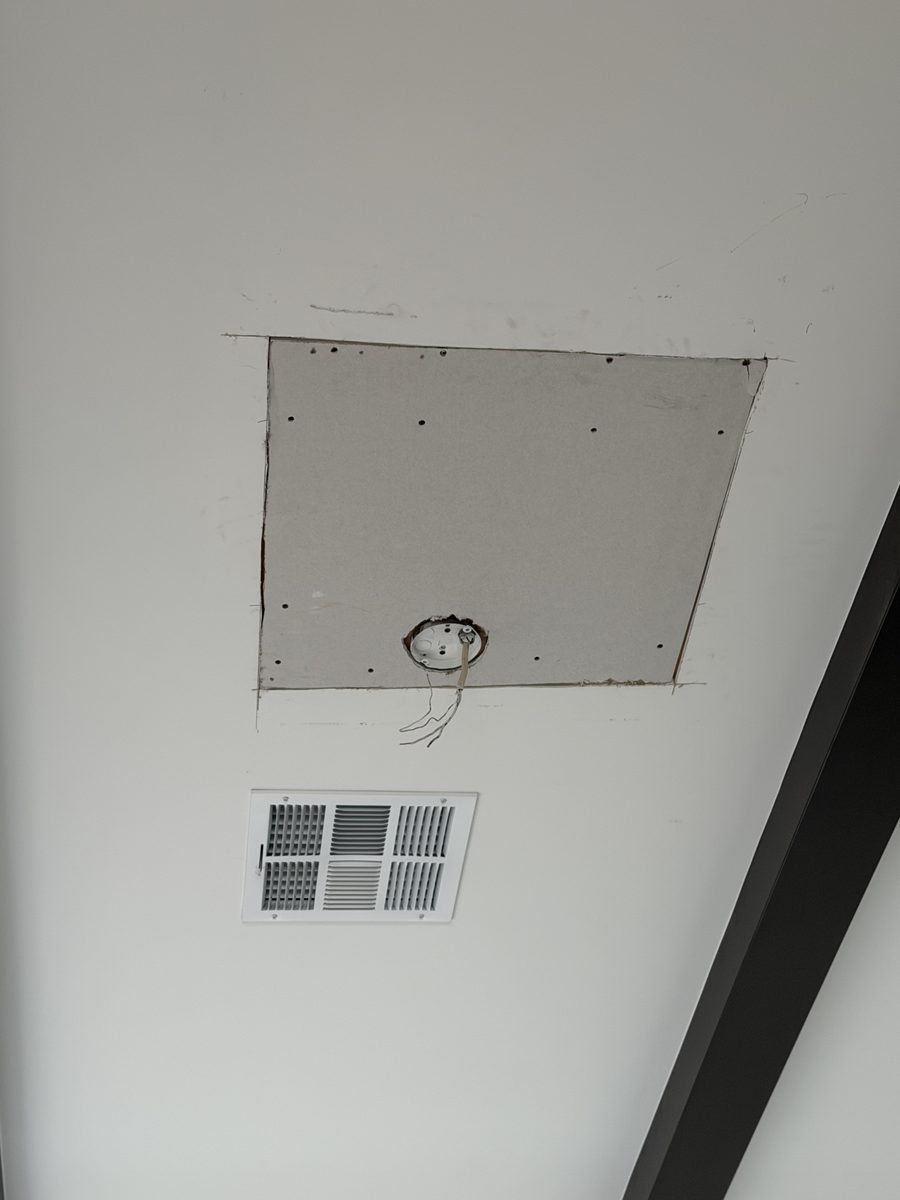
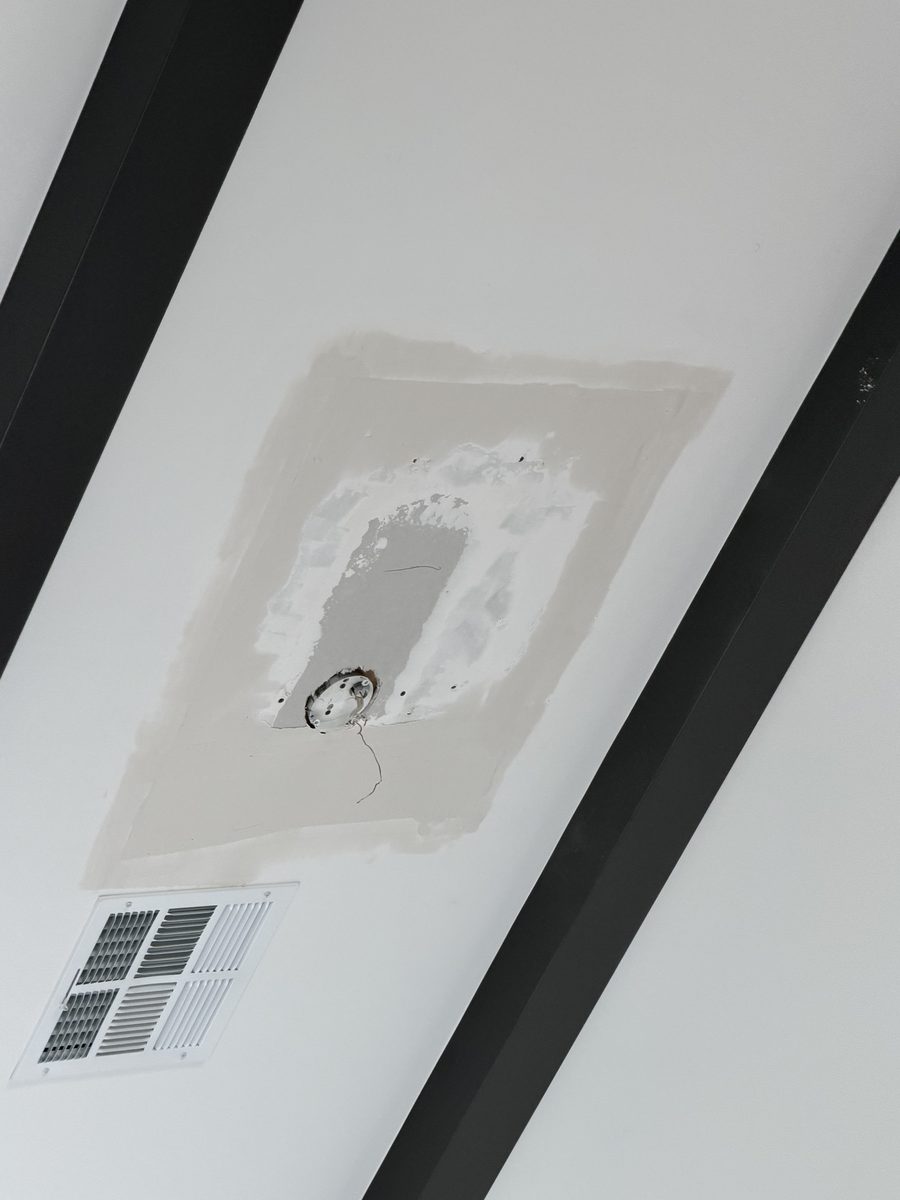
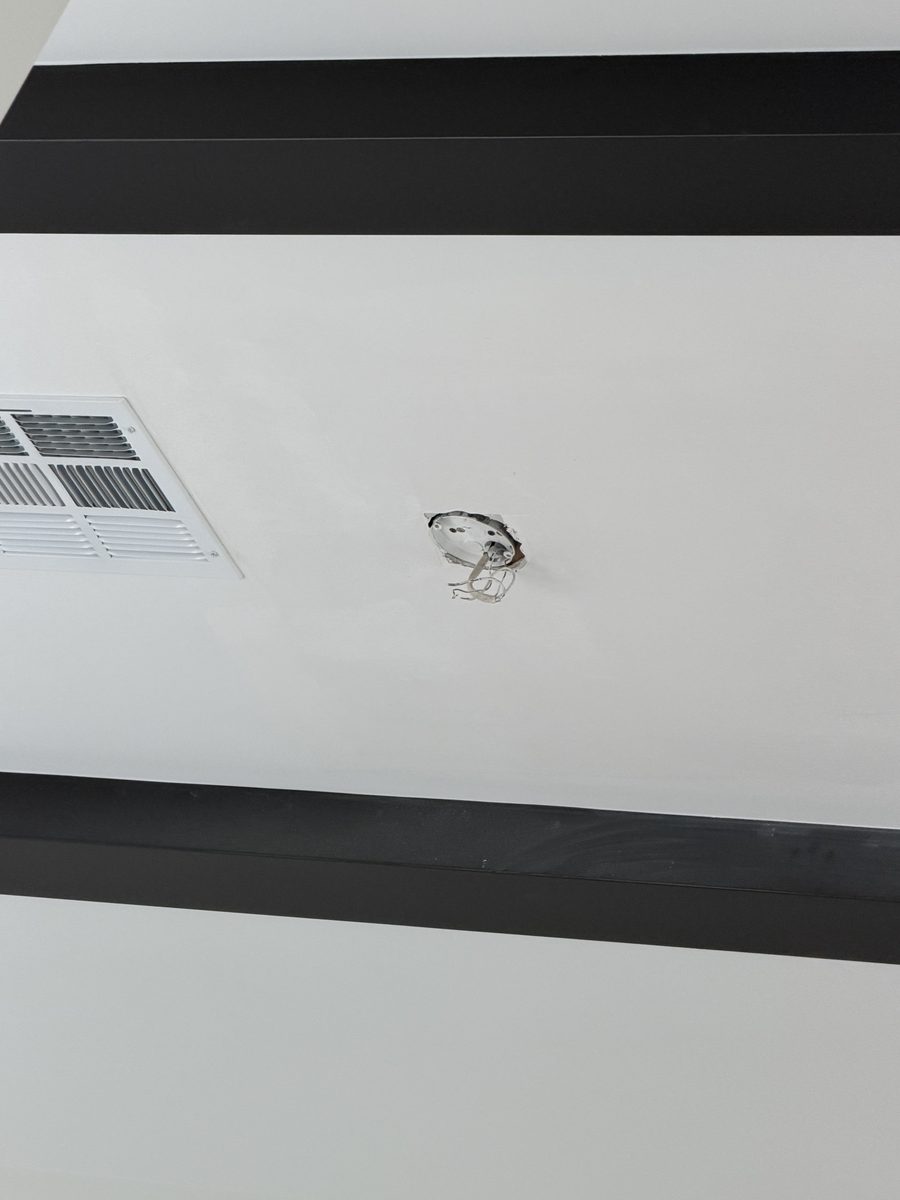
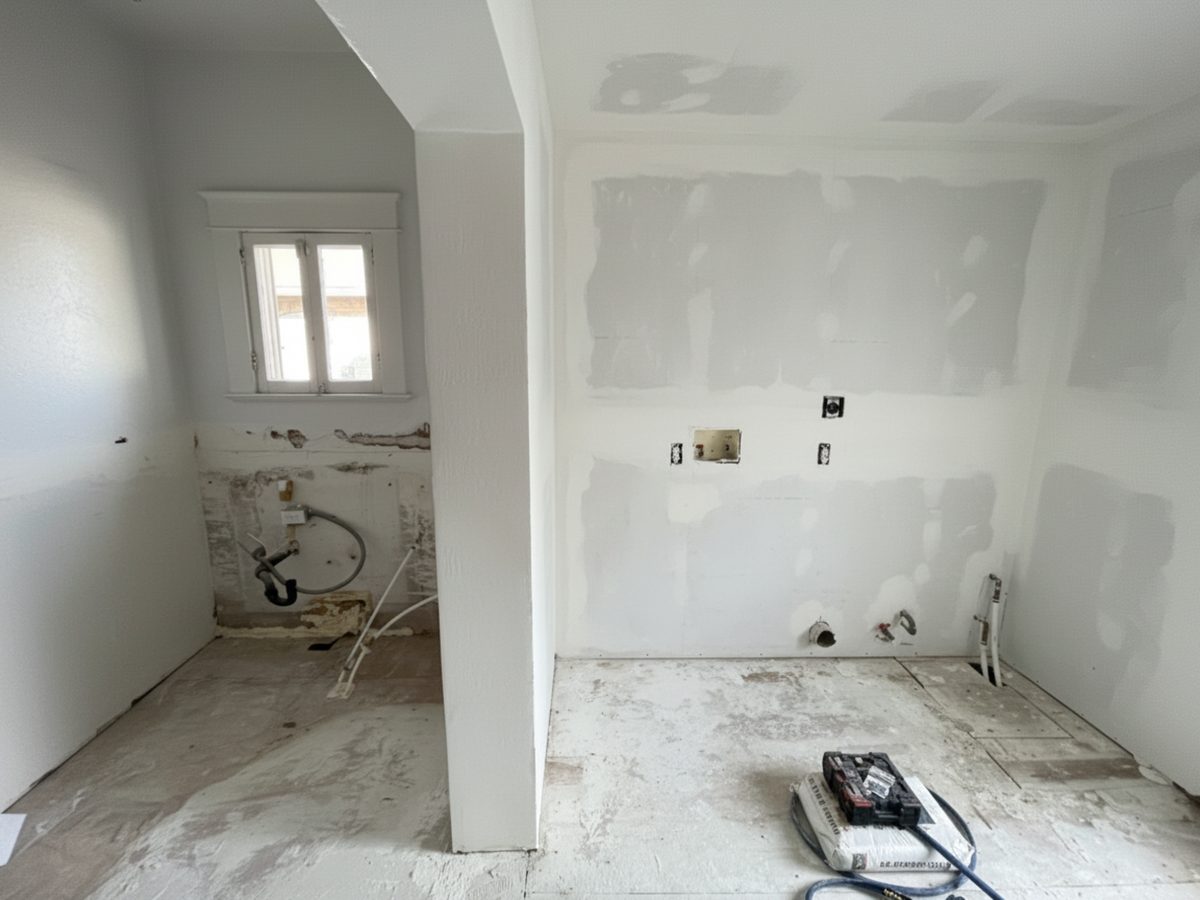
Those three come from a Phoenix dining room where we opened the ceiling to build blocking for a 184 pound fixture and closed it back up. Smooth and vaulted, which is the hard version. Knockdown would have been easier.
The paint half of the job, where the money is
A perfect texture match can still show, and when a homeowner is unhappy about a repair, this is usually why. It has nothing to do with drywall skill.
Primer is not about color. The Drywall Finishing Council defines a drywall primer as a product formulated to fill the pores and minimize suction differences between the board's face paper, the texture, and the compound over the joints. Those three materials drink paint at three different rates. Put topcoat straight onto that and you get an island of different sheen and slightly different color, which painters call flashing. It's a porosity problem, so a second coat of the same paint often won't fix it. Primer over the whole feather zone will.
The second half of that is a number nobody quotes. The Council's own guidance is that a surface uniform in appearance, color and sheen may not be achieved with a coat of primer or a single topcoat, and its properly painted surface under critical lighting or in gloss is primer plus two topcoats. A dab of paint on the patch is below the published trade standard.
So the paint question has three honest answers.
- Primer only. We prime the repair and the feather zone and stop. Cheapest, and the right call when you're repainting the room yourself anyway.
- Spot touch-up. Only worth doing where the repair hides behind a door, under a cabinet, or on a wall with heavy texture and flat paint. We'll tell you when it's a bad bet rather than take the money and let you find out.
- Corner to corner. The whole wall or the whole ceiling, painted to natural break lines. Always looks right, and it's the reason the ceiling rows on the price chart step up by two to three hundred dollars.
Two things push you toward corner to corner whether you like it or not. Dark and deep tone colors magnify surface imperfections even in flat paint, and GA-214 prescribes a full skim coat for them. And Level 4, which is what your builder gave you, is specified in that same document for flat paints and light textures only, with non-flat and dark colors sent to Level 5. So the eggshell or satin most people repaint with is already outside what the wall was finished for. That's not a defect anybody created. It's the spec, and it explains why the patch only appeared after you switched to the darker paint.
One more, specific to water: a stain sealed with latex primer will bleed back through in a few weeks, because the water in the paint reactivates a water soluble residue. Stains get shellac or an oil based blocker. That's the most common callback in this trade, and it's entirely avoidable.
What finish level is your wall, and why the number matters
Finish levels run 0 through 5 and they describe how much compound goes over the joints and fasteners. Three of them come up in a repair conversation.
| Level | What it is | Where it belongs |
|---|---|---|
| Level 2 | Tape embedded, one coat over tape and fasteners. Tool marks and ridges are acceptable at this level. | The standard names it for garages, warehouse storage and similar areas where surface appearance is not a concern. If you want the garage finished like a bedroom, that is a different price and worth saying out loud. |
| Level 4 | Standard residential. Three coats over joints, three over fasteners, sanded free of tool marks. | Flat paints and light textures only, per the standard. This is what almost every Valley house has under the orange peel. |
| Level 5 | Everything in Level 4 plus a skim coat of the entire surface. | Gloss, semigloss, enamel, dark or deep tone colors, and critical lighting. Also the substrate for a plaster finish. |
Worth correcting one thing that gets sold about Level 5, because it's in the standard itself: skim coating will not approximate a plastered finish. Once the skim dries, treated joints, filled voids and spotted fastener heads may still be visible. Level 5 is a paint substrate. If you want an actual mineral finish on the wall, that's interior plaster, and it is a different material and a different price. If a wall was already headed that way, taking it to a level 5 skim now instead of patching it twice is the cheaper order of operations.
What Phoenix heat and dry air do to wet mud
This is the one place the desert changes the craft rather than just the marketing copy, and the standard advice you find online is backwards here.
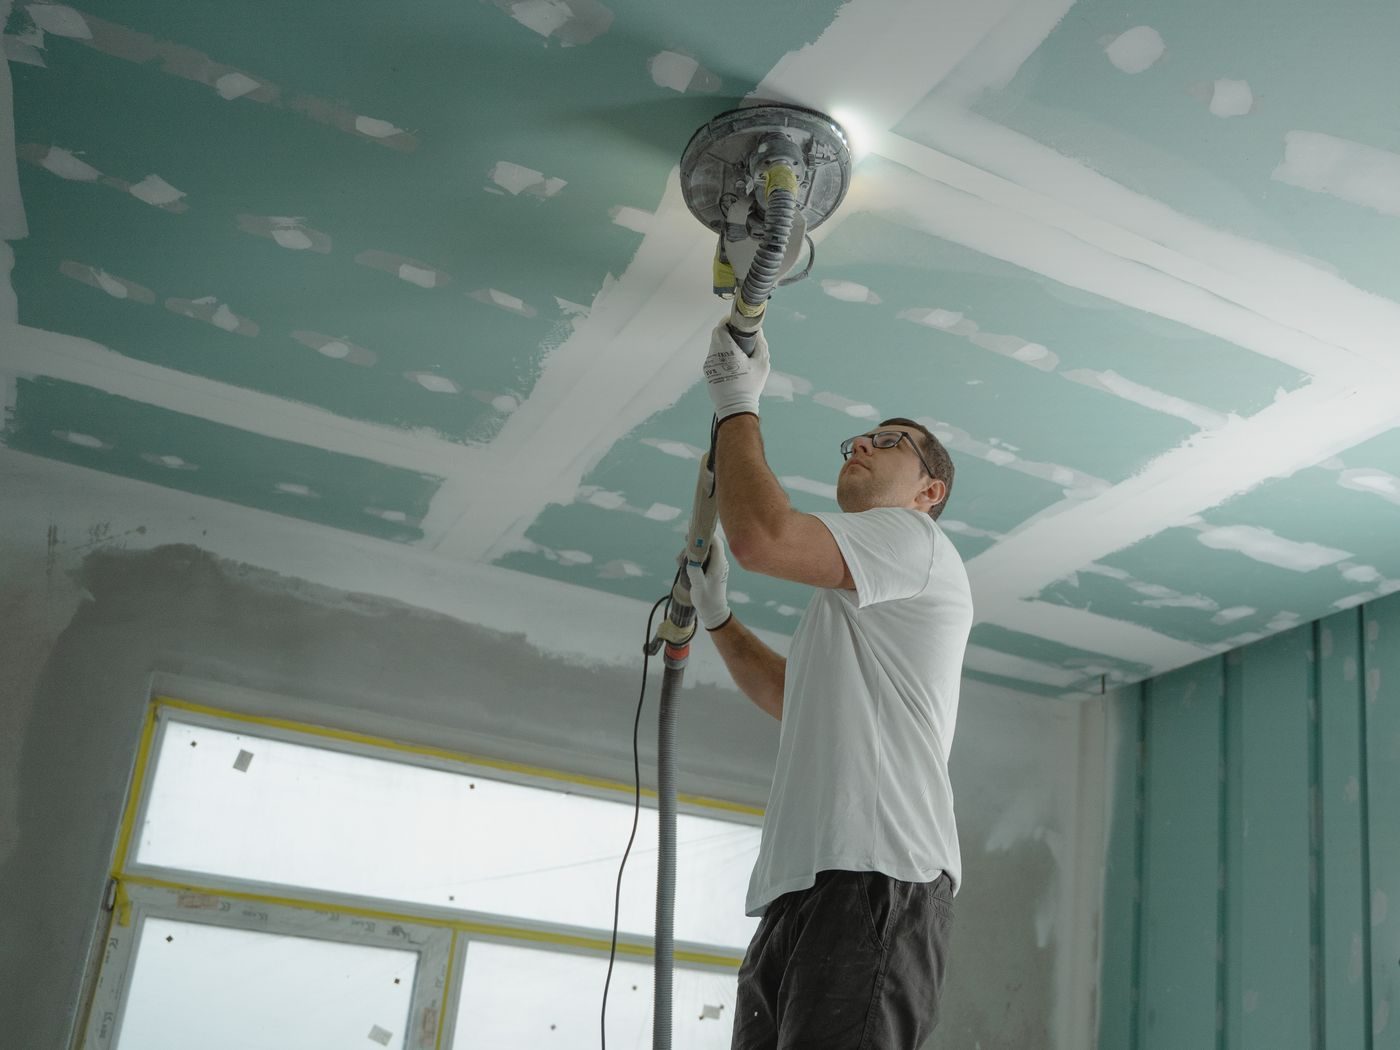
Start with the drying table above. At 90 degrees and 20 percent humidity a coat is dry in five hours. The Gypsum Association says under eight hours is known to lead to poor results. That's not a hypothetical Arizona condition. It's exactly the condition on an air conditioner leak repair, where the air handler that caused the damage is the same one that's now switched off. It is also a vacant house, a garage, and any room worked with the windows open in April.
So the practice is the opposite of what people expect:
- Close the windows. The published hot and dry weather guidance is to reduce ventilation and hold indoor humidity up, not to air the room out so it dries faster.
- No fan on wet joints. Direct air movement across fresh compound accelerates drying and causes fissures, checking and edge cracks. A box fan pointed at a patch is a defect generator.
- No extra water in the bucket. Thinning to buy working time increases shrinkage and can affect bond.
- Setting-type compound to embed tape. These have higher resistance to the edge cracking hot dry weather causes, which is why we use them here rather than because they are faster.
- Short runs. Work the shortest practical length of joint, keep the tools and the bucket walls clean, and do not let crusted compound get folded back into fresh mud.
Two temperature numbers worth knowing. GA-216 sets a minimum of 50 degrees for joint treatment, texturing and decoration, and caps temporary heat at not more than 95 degrees in any room. A Phoenix room with the AC off in July exceeds, on its own, the hottest condition the standard allows anybody to create on purpose. And gypsum panels are not to be exposed to sustained temperatures over 125 degrees, while Valley attics run 140 to 160 in summer. Practical version: board and compound don't get staged in the garage, the attic or the bed of the truck. Materials go inside, out of direct sun.
Before we patch it, we find out why it cracked
Not every crack wants mud. Some of them are telling you something, and a contractor who fills all of them without asking is selling you the same repair every spring.
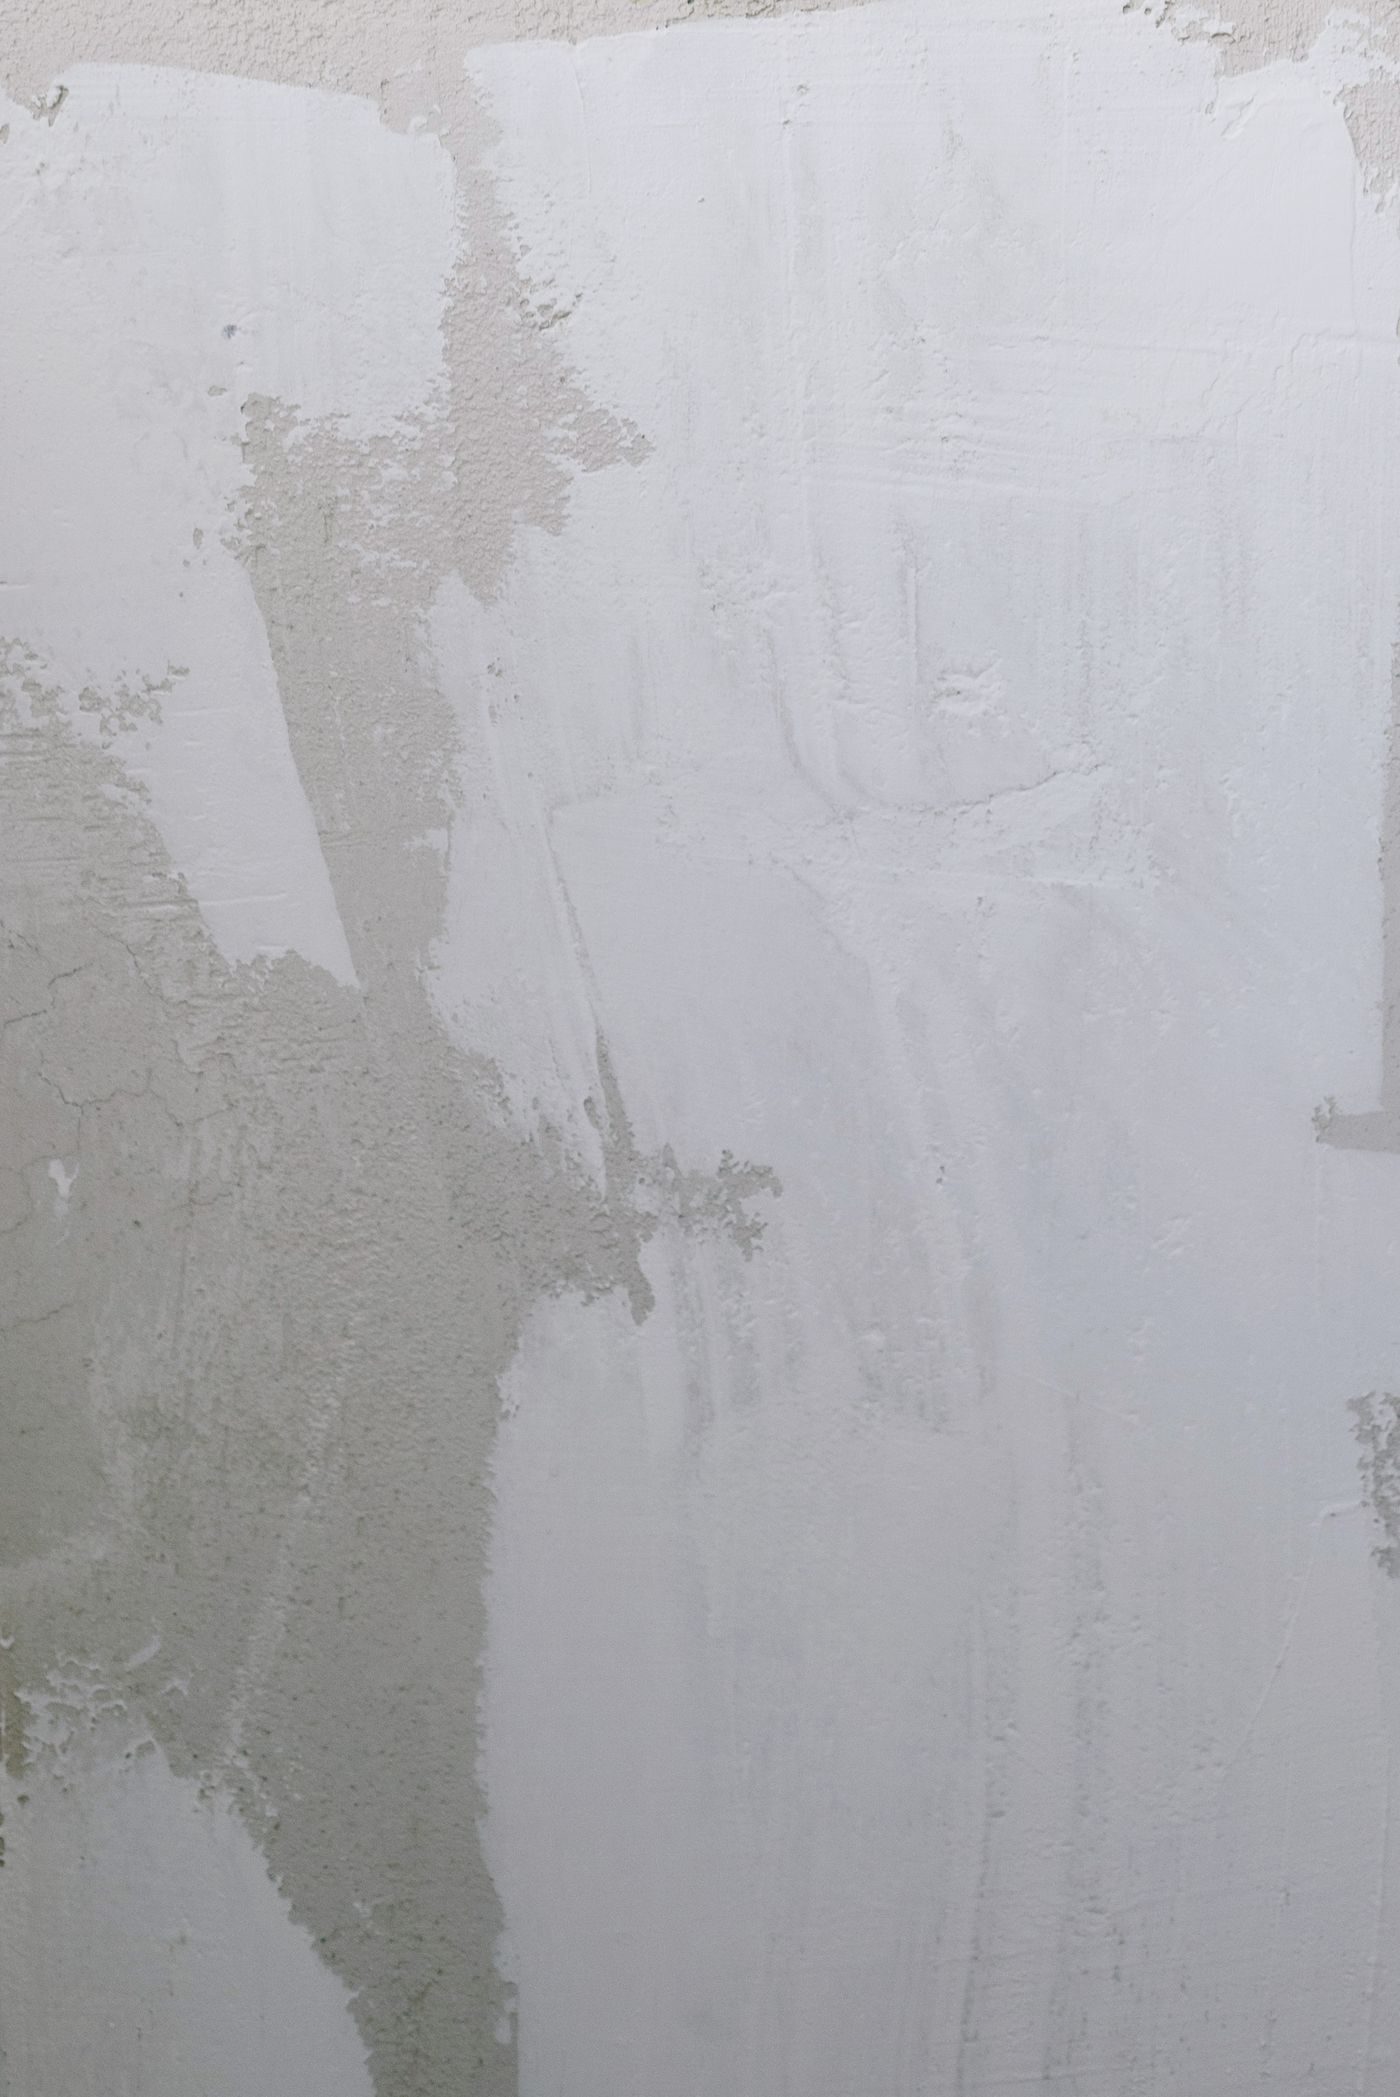
| What you are looking at | What it usually is | What we do |
|---|---|---|
| Hairline over a door or window, reopens seasonally in the same place | Framing moving with the humidity swing. Cosmetic. | Tape, mud, texture, paint, and we tell you it is maintenance rather than a permanent fix. |
| Straight crack running a long stretch of wall or ceiling | The assembly wanted a control joint. The standard calls for one where a wall runs beyond 30 feet uninterrupted, and on ceilings at 30 feet without perimeter relief or 50 feet with it. | Repair it, and where it keeps returning, discuss adding a relief joint instead of mudding it every year. |
| Crack on the same line in a great room ceiling, back every year | Ceiling framing members change direction there. The standard requires a control joint or intermediate blocking at that line, and plenty of houses do not have one. | Say so before quoting, because a straight patch there has a known failure date. |
| Gap opening where the ceiling meets the wall, worse in one season | Truss uplift. The top chords in a vented attic take on moisture and lengthen, the webs pull the bottom chord and the ceiling board up with it. | Repair with the corner detailed to move: the ceiling fastening held back from the intersection, which the standard calls the floating angle method and names specifically for truss uplift. Cosmetic, not structural. |
| Round pops in rows, screw or nail heads pushing through | Lumber drying out, not drywall shrinking. Framing goes from roughly 19 percent moisture to about 10 percent and a 2x4 loses about an eighth of an inch each way. The board stays put and the fastener travels. | A new fastener into the same framing member about an inch and a half from the popped one, with pressure holding the board tight to the framing, then the original reseated or removed. Then spot and finish. |
| Diagonal off a door or window corner, widening, doors out of latch, stair-step cracking in exterior block | Movement in the structure, not a drywall problem. | We say it on the estimate and recommend an evaluation before any finish work. Mudding this is covering evidence. |
A note on the last row, because a claim gets repeated across this market that we think is wrong as a default. You will read that Phoenix homes sit on expansive clay, that monsoon moisture swells it and the dry season shrinks it, and that your foundation is therefore moving. Expansive clay is real in parts of Maricopa and Pinal counties. It's also not the only story: collapsible alluvium, subsidence and earth fissures are the Valley's other geohazards, and most tract housing built here since the 1990s sits on a post-tension slab engineered specifically to move as one stiff plate over exactly those soils. On a post-tension slab, a hairline that reopens over a door header every year is far more often truss uplift and seasonal wood movement than foundation heave. Telling a homeowner their foundation is moving sells the wrong repair and scares people for no reason. We'd rather look at the doors, the exterior block and whether the crack is widening or just reopening.
One myth to kill while we're here: longer screws don't stop nail pops. With over-long fasteners the shrinkage gap can be roughly double what it would be with fasteners of the proper length, which is 1-1/8 inch screws for half inch board and 1-1/4 inch for five eighths. If a previous repair used three inch screws to be safe, that's why the pops came back worse.
If the crack turns out to be about a wall that's carrying load, or an opening somebody widened, that is framing work and it happens before the drywall, not after. We have written up how to tell whether a wall is load bearing if that's where you are.
Ceilings, water, and the air conditioner nobody looks at
Ceiling repair is the expensive end of this trade and it's most of what we get called for. Gravity is part of it: compound wants to fall off a ceiling, so the coats go on thinner and there are more of them, all of it worked overhead, and most Valley ceilings are knockdown or popcorn, both harder to match than orange peel. That alone puts the same size patch 20 to 30 percent above what it costs on a wall.
The rest of it is water. An attic air handler that drips, a roof that lets go during a monsoon cell, and a supply duct sweating in a 150 degree attic all leave the same brown ring. The third one gets reported as a roof leak more often than the other two, and the roofer who comes out finds nothing wrong with the roof.
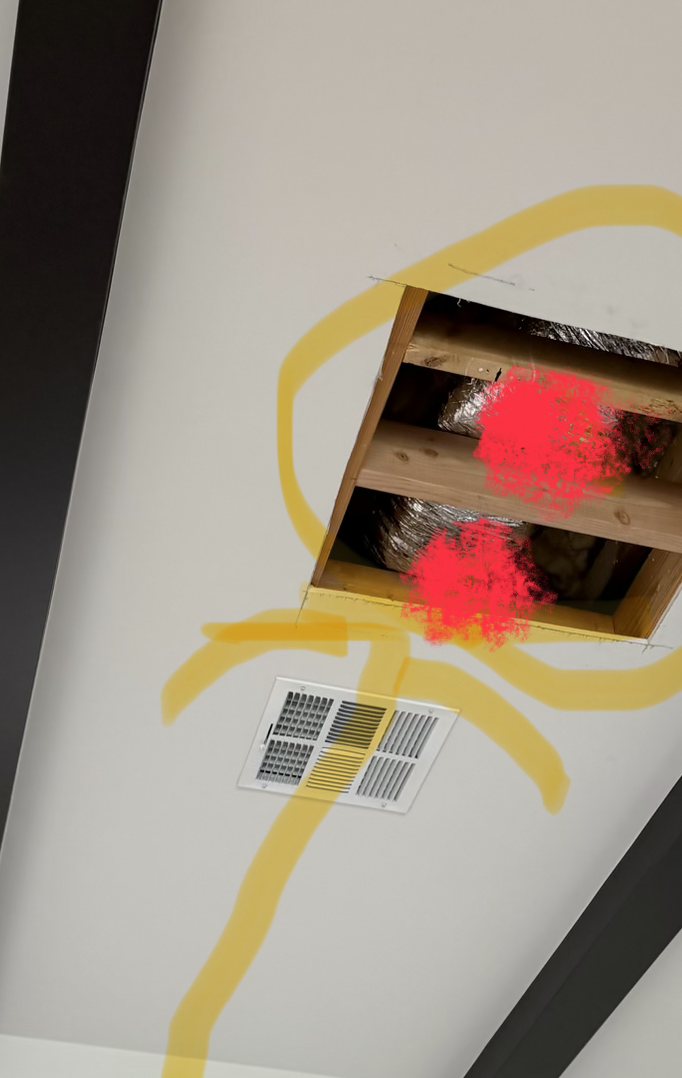
The decision about whether the board comes out
We use the EPA's line, which is clearer than the one most contractors give: wet drywall may be dried in place if there is no obvious swelling and the seams are intact, and otherwise removal is necessary. Mold gets established in the 24 to 48 hours after the water, so this is a same-week decision, not a next-month one. Sagging, softness, a seam that has opened, or anything growing, and the board comes out. A stain with sound board behind it gets dried, sealed with a shellac or oil blocker and painted. If it has been wet long enough to grow something, remediation comes first and we'll say so before we quote new board rather than closing it up over the top.
Before anything closes, two things happen that most patch bids leave out: a moisture reading on the framing and the surrounding board, and photographs of the open cavity. The photos are for your insurance carrier, who will ask for them after the ceiling is already shut.
The board that goes back is not always the board that came out
This is a code detail with real money in it, and we haven't seen a single Phoenix drywall page publish it. The IRC, which Phoenix has been on the 2024 edition of since August 2025, says in the Table R702.3.5 footnotes that three eighths inch board shall not be used on a ceiling that is going to receive a water-based texture, that ceilings receiving hand or spray applied water-based texture shall have the board applied perpendicular to the framing, and that on 24 inch on center framing the thickness goes from half inch to five eighths, or half inch sag-resistant board gets used instead.
Almost every textured ceiling in a Valley tract house is on trusses at 24 inches on center. So the correct patch material is five eighths or sag-resistant half inch, run perpendicular. A half inch regular scrap dropped in because it was on the truck is both wrong and going to telegraph a rectangle once the texture goes over it. That's a two dollar difference in material and the reason some patches read as a slightly different plane forever.
Check the pan before the ceiling closes
If the water came from an attic air handler, fixing the ceiling and stopping there means buying the ceiling twice. The residential code Phoenix enforces, M1411.9.1 in the 2024 edition, requires a secondary drain or an auxiliary drain pan wherever an overflow from the cooling coil would damage the building, which describes an attic air handler over a finished ceiling. The allowed setups are an auxiliary pan draining to a spot where you would notice it, a separate overflow drain, or a water-level detection device that shuts the equipment off. So there is supposed to be a pan, a second drain or a float switch up there already.
What goes wrong in practice is simpler: the switch is missing, or it is there and nobody has ever tested it. Either way, a drywall repair that doesn't include somebody going up and looking is an incomplete repair. We go up, we look, and we photograph what we find. If the pan is cracked, the primary line is plugged, or the float switch is missing or wired wrong, that's mechanical work, and it goes in the same contract and gets done by a licensed mechanical trade before the ceiling closes. Ten minutes of looking is the difference between one ceiling and two.
If the water came from a shower rather than the attic, that's a different chase entirely, and we have written up what a shower leaking into the wall usually turns out to be and what a pan rebuild involves.
Why cheap drywall repairs come back
Every one of these has a mechanism, and every one of them is avoidable. This is the list to hold a low bid against.
| What you see | What caused it |
|---|---|
| Crack traces the outline of the patch within a year | Mesh tape bedded in all-purpose ready-mix instead of setting-type compound. The standard requires setting compound forced through the mesh. This is the single most common source of a returning crack. |
| The patch bulges, or flexes when you press it | No backing behind the plug, so it is carried by tape alone. |
| Fine fissures and checking along the edges of a summer repair | A fan or an open window blowing across wet compound, or a coat that dried in under eight hours. |
| The seam sank and hollowed out after it dried | Compound thinned with extra water to buy working time. More shrinkage, weaker bond. |
| The water stain came back through the new paint in a month | Latex primer over a water stain. The water in the paint reactivates the residue. It needed shellac or oil. |
| A shiny or dull island where the repair is, even though the texture matches | No primer over the feather zone, so bare compound, face paper and aged paint absorb differently. Or one topcoat where the standard calls for two. |
| A faint rectangle telegraphs through a ceiling patch | Half inch regular board dropped into a textured ceiling on 24 inch centers that requires five eighths or sag-resistant, and often run parallel to the framing instead of perpendicular. |
| The screw pops came back in the same spots | The original fastener was driven back in or just mudded over, instead of a new fastener set an inch and a half away with the board pressed tight to the framing. |
| The ceiling-to-wall corner opens again every year | The board was fastened tight into the intersection instead of floated, so it cannot move with the truss. |
| The repaired ceiling leaked again the next cooling season | Nobody checked the condensate pan or the float switch. |
What we check before we call it done
These are the items that have come back on us, so they're the ones we walk before leaving. We're not going to advertise a zero callback record, because we've gone back out on our own work. The useful version of that is a list.
- Every corner actually closed, including the ones you have to get on the floor to see.
- The cut around light fixtures, vents and can lights tight, with no gap the trim ring is expected to cover.
- Nothing left primed and unpainted. Primer white in a corner is the most common punch item there is.
- No ridge at the feather edge. You find that with your hand, not your eye.
- A raking light pass: phone flashlight held flat against the surface, run along the repair. If it shows there, it will show in afternoon sun.
- The texture judged after primer and after the room lights are back on, not while it's wet.
Drywall Repair Price Chart, Phoenix 2026
Licensed, insured work, labor and materials, primed and matched to blend. Where our own recent jobs landed inside these bands is noted underneath. Our minimum for a drywall visit is $250, because the drive across the metro and the setup cost the same whether the repair takes twenty minutes or four hours. Stacking several small repairs into one trip is the cheapest way to buy this work, by a wide margin.
| Repair | Price | What moves it |
|---|---|---|
| Nail holes, dings and screw pops, one visit | $250-$350 per visit | The number of spots and whether they get painted, not the filling. On this job you're buying the trip and the finish work comes with it. |
| Hole under about 6 inches, no texture to match | $250-$350 per patch | Doorknob, fist, anchor blowout. Smooth or lightly textured wall, primed and left for you to paint. |
| Patch with orange peel or knockdown matched, you paint | $300-$500 per patch | The texture pass, the sample board, and the second primer coat over the texture. This is the most common wall repair we sell. |
| Medium hole or access cut, 6 inches to about 2 square feet | $350-$650 per patch | Whether the cut lands on studs or needs backing built behind it, and how wide the feather zone runs before the texture blends. |
| Corner bead, outside corner | $250-$500 per corner | Cutting out crushed metal or vinyl bead at a door corner or hallway, then getting the new corner dead straight over its full height. Harder than it looks. |
| Ceiling patch to about 20 square feet, texture matched, you paint | $400-$800 per section | Overhead work, thinner coats and more of them, and knockdown or popcorn to match instead of orange peel. |
| Ceiling repair, texture matched, we prime and paint the repair | $500-$1,000 per section | Two visits in most cases, because a rushed finish coat on a ceiling is the thing that shows later. |
| Ceiling repair plus the whole ceiling repainted | $700-$1,300 per room | Ceiling height, how much furniture has to move, and whether you supply the paint. Corner to corner is the version that never flashes. |
| Ceiling section with wet insulation pulled and R-30 replaced | $900-$1,400 per section | Cutting back about a foot past the damage, bagging out soaked blown-in, batt back in its place, moisture reading, stain blocker, then board and texture. |
| Seam re-tape, texture and paint on a long run or a garage | $350-$650 per run | Length, height, and whether the run gets a relief joint rather than the same repair next year. |
| Water damage repair, all in | $650-$2,000 per job | How much board is coming out, insulation, and whether the source is fixed. Framing damage or established mold puts a job past $3,000 and changes what it is. |
| Popcorn ceiling patch and match | $300-$800 per patch | The hardest match there is, because the aggregate size was set decades ago. In a house built before the mid-1980s, the material gets tested before anything is disturbed. |
Behind the ceiling rows are four jobs we ran in the Valley last summer: $400 for a Chandler bathroom ceiling of roughly four by five feet after an AC leak, $500 for a Scottsdale ceiling after a leak, $700 for a Phoenix bathroom where the whole ceiling got repainted and the customer supplied the paint, and $1,000 for the ceiling line on a Fountain Hills job where the soaked blown-in came out and R-30 batt went back. On that last one a shifted garage ceiling seam was another $450 on the same visit, which is exactly the bundling economics further down this page.
Why per square foot is a broken unit for drywall repair
You will find Phoenix cost pages quoting $50 to $75 a square foot for drywall repair, and other pages quoting $5 to $6. Both are real numbers and neither is wrong. They are measuring different regimes, and dividing a trip charge by a small number produces nonsense.
- Under about 2 square feet: flat rate, not per foot. $250 to $500. The mud is a few dollars. You are buying a trip, a setup, cure time and a texture match. A six inch hole priced at "$60 a square foot" is a $15 repair, which does not exist.
- 10 to 50 square feet: $20 to $25 a square foot. This is where our own transacted ceiling work sits. A 20 square foot ceiling section at $400 is $20 a foot.
- Over about 300 square feet: $2.00 to $6.50 a square foot, including tear-out and haul away. Now the material and the production rate dominate and the trip charge disappears into the total.
If a bid quotes you a rate per square foot, ask which regime it came from and how many square feet they measured. Without both numbers there is nothing to compare.
Bigger drywall work: new board, garages, texture and popcorn
Repair is one lane. Once a whole wall, a ceiling or a room is in play the pricing basis changes from per repair to per square foot or per sheet.
| Work | Price | Notes |
|---|---|---|
| New drywall hung, taped and finished | $1.50-$3.50 per sq ft | Or $60 to $90 a sheet hung, taped, mudded and sanded. Texture and paint sit on top of that. |
| Ceiling drywall installed | $2.00-$4.00 per sq ft | Overhead premium plus the heavier board a textured ceiling on 24 inch centers requires. |
| Large area or whole ceiling replaced | $2.00-$6.50 per sq ft | Includes tear-out, bagging and haul away. The wide band is mostly access and height. |
| Two-car garage drywalled, walls and ceiling | $1,300-$3,900 installed | Roughly 900 to 1,000 square feet of surface. The spread is finish level: a Level 2 garage and a bedroom finish are different jobs. |
| Texture only, orange peel or knockdown | $0.80-$2.00 per sq ft | Orange peel runs $1.25 to $1.95. Knockdown runs over $2.00, because of the extra pass. |
| Retexture, including removing the old texture | $1.80-$3.80 per sq ft | One bedroom lands $450 to $1,000, a living room $600 to $1,400. |
| Popcorn ceiling removed | $1.50-$4.50 per sq ft | $2.50 to $7.00 with skim, prime and paint included. Most Valley houses land $1,400 to $2,900. A positive asbestos test changes the job entirely and costs more than the removal did. |
| Wall removed, ceiling and walls closed back up | about $500 per lineal ft | All in: demolition, drywall, flooring pieced in, baseboard, electrical rerouted, haul away. A 15 foot opening priced at $7,500 on a job we signed this year. |
For hourly comparison, since some bids come that way: general handyman labor in this market runs about $60 an hour, a licensed drywall contractor about $90, and ceiling work $87 to $106. Two of those numbers describe different levels of legal exposure as much as different levels of skill, which the licensing section below gets into.
What actually moves your number
Four things, in order of how much they matter.
Where the paint stops. This is the biggest lever on the chart and the one customers underestimate. The step from priming the repair to painting the whole ceiling is two to three hundred dollars on a small job, and it's the difference between a repair that reads as a repair and one that doesn't.
Wall or ceiling. Reliably 20 to 30 percent, for the reasons in the ceiling section.
Access. A nine foot ceiling and a vaulted twenty foot ceiling are the same square footage and not the same job. Furniture, stairwells and anything needing scaffold rather than a ladder move the number.
Whether it is one trip or two. Setting compound lets a wall repair stack coats in a morning. A ceiling, a wide feather zone or a texture match usually wants a second visit so the finish coat is not rushed. Two visits cost more than one and produce a better result, and we'd rather quote it honestly than surprise you.
One thing that does not move the number as much as people expect: the size of the hole, once it's past a few inches. The trip, the texture match and the paint scope dominate. Which is why the smart way to buy drywall work is to walk the whole house first and put every hole, ding and stain on one list.
Which drywall repairs are not worth paying for
Some of this you should just do, and we'd rather say so than pad an invoice.
Do it yourself: nail holes and small dings on a flat or lightly textured wall. Lightweight spackle, a putty knife, fine sandpaper and matching touch-up paint, and none of it is worth a service call on its own. Fill your own nail holes.
Get somebody: anything that has to match texture, anything overhead, any hole bigger than your fist, anything where water was involved, and corner bead, because dead straight over eight feet is genuinely hard. Those are the ones where a DIY attempt telegraphs as a bulge, a ridge, or texture that's almost but not quite right, and the second attempt costs more than the first quote did.
Garage drywall, and three things people get wrong about it
The garage is where most Valley houses have their worst drywall, and it's also where the most bad information circulates.
It's not a firewall. The garage separation under R302.6 is a separation, not a fire-rated assembly, and no hourly rating is required. What the code actually asks for is half inch gypsum board on the garage side of walls, attics and supporting structure, five eighths Type X on the ceiling where there is habitable space above, half inch on the interior side of exterior walls for garages within three feet of the dwelling, and a door that is either solid wood, solid or honeycomb core steel at 1-3/8 inch, or twenty minute rated.
The code doesn't say the garage drywall has to be taped. It's silent on the point, which makes it a call for the local building official, and it varies. Anybody telling you the code requires taping is telling you their jurisdiction's practice as though it were the code.
Room over the garage has a fastener rule almost nobody follows. Type X board on a garage ceiling beneath a habitable room goes up perpendicular to the framing and gets fastened at a maximum of 6 inches on center, not the usual 7 and 12. Room-over-garage is a very common Valley plan, and this is the detail that gets missed when somebody patches that ceiling.
While we are in the garage: green board isn't a shower backer, and hasn't been legal as one for years. R702.3.7 says water-resistant gypsum backing board shall not be used where there will be direct exposure to water, and R702.4.2 lists the four backers that are permitted behind tile in a wet area. If somebody proposes green board in your shower, that's a different conversation, and it belongs with a shower rebuild. If the garage itself is the project, the drywall and paint are worth doing in the same trip as an epoxy floor coating, since the room has to be emptied either way.
Popcorn ceilings and the asbestos date everybody gets wrong
You will read on almost every drywall page in this market that homes built before 1978 may contain asbestos in the ceiling texture. That sentence mixes up two different rules, and the version most homeowners get told is not conservative enough.
1978 is the lead paint date. Asbestos in patching compounds and textured paint was banned by the Consumer Product Safety Commission in 1977, and that ban covered new production, not existing stock. Remaining inventory kept getting sprayed into the mid-1980s. So a 1982 Phoenix ceiling can still test positive, and a homeowner told "you're after 1978, you're fine" has been given the wrong answer.
The rule is simple: test rather than trust the year. A sample and a lab are cheap next to the alternative, and it happens before anything gets scraped or sanded.
On the regulatory side, one more correction. Contractors sometimes cite federal asbestos NESHAP compliance on a house. The federal NESHAP, which Maricopa County adopts, generally excludes single family residences and buildings of four or fewer dwelling units that are not used commercially, so on your house it usually does not apply at all. Maricopa County's notification thresholds are 160 square feet, 260 linear feet, or 35 cubic feet, filed ten business days ahead. But the exemption is regulatory, not a safety clearance. A rule not applying to your house doesn't make the fibers safe to breathe. That's the honest framing, and it's why we test first regardless of what the paperwork requires.
Is your contractor licensed for this in Arizona?
Worth checking, and easy. Three of the drywall sites currently in the Phoenix top twelve show no license number anywhere on the page.
Norem Contracting holds an Arizona Class B General Residential Contractor license, ROC #365090, and we are licensed, bonded and insured. Arizona's residential drywall specialty license is R-10, and a Class B General Residential license carries that scope, which is a cleaner answer than arguing about the exemption. Everyone who works on your house is licensed for the work they're doing.
The exemption is still the useful test at the cheap end of the market. A.R.S. 32-1121 lets an unlicensed person take work only when the aggregate contract price, including labor and materials and everything else, is under $1,000, only when the work is casual or minor in nature, never when a building permit is required, and it cannot be split into pieces to get under the cap. A couple of patches fit inside that. A ceiling with wet insulation coming out does not, and neither does drywalling a garage. So the moment a small patch turns into a real repair, an unlicensed handyman is either walking away or working outside the law with your house as the collateral. Ask for the number and look it up on the ROC site. It takes a minute.
Permits: interior drywall patch, repair and texture is cosmetic maintenance and does not pull a building permit in Phoenix or the surrounding cities. That changes if the work grows into structural framing, moving a wall, or anything that touches the garage separation.
What else makes sense to do at the same time?
The expensive part of a small drywall job isn't the mud. It's the drive, the masking, the drop cloths, the dust control and coming back a second time to sand and paint. Anything else that rides on that same setup usually lands 25 to 50 percent below what it costs as its own visit, and the Fountain Hills job on the price chart is the proof: the $450 garage seam happened because we were already there and already set up.
The catch is that it has to be in the scope before we start, not mentioned on the way out.
The obvious companions are the rest of the house's nail holes and the ding behind the door in the other bedroom, plus any ceiling scar left from a fixture swap or a ceiling fan, since we're already set up to work overhead. If a wall is coming out or an opening is being widened, that is framing work and it wants to happen before the drywall. If the wall was headed for a Venetian plaster or a limewash anyway, taking it to a level 5 skim now instead of patching it twice is the cheaper order, and that sits with interior plaster finishes. If the baseboards are coming off for new flooring, that's the moment to fix the wall behind them. And if this is a sale, a whole-house drywall and paint pass is the single highest-return item on most punch lists and turnovers, which we have written about in the context of the Arizona BINSR. Put the whole list in one scope and ask for the combined number up front.
Hiring questions homeowners ask us
What should I ask the other contractors bidding my drywall repair?
Four questions, and anybody who actually does this work answers them without stalling. What are you bedding the tape in, and is it setting-type compound or ready-mix out of a bucket? Are you spraying a sample board before you touch my ceiling, and what tip and pressure are you running? Where exactly does the paint stop, in words, on the quote? And what is your license number? The answers sort the bids faster than the prices do.
Do you charge for the estimate, and what should I photograph?
No charge, and photos get you a range the same day on most repairs. Take four. One of the whole wall or ceiling from about eight feet back, so we can see the room's light and where the natural break lines are. One close up of the damage with a tape measure or a dollar bill in frame for scale. For a ceiling, one straight up. And the one nobody asks for: hold your phone flashlight flat against the surface beside the damage and shoot along the wall. That raking light shows us the texture pattern and the sheen better than any straight-on photo, and it's what tells us whether this is a two hour visit or a two day one.
Does the price include paint, and where does the paint stop?
The quote says so in words, because this is where most of the money and most of the arguments live. There are three honest versions. Primer on the repair only and you take it from there, which is the cheapest. Spot touch-up, which we'll only recommend where the repair sits behind a door or under a cabinet. Or the wall or ceiling carried corner to corner, which is the version that always looks right. A patch out in the open field of a wall usually needs the whole surface, because a dab of paint on fresh compound flashes even when the texture match is perfect. Plenty of customers supply their own paint and that's fine.
Will the patch be invisible?
At five feet in normal room light, it should be. That's the industry acceptance standard in GA-214, and it's what we work to. At twelve inches with a flashlight held flat against the wall you'll find every repair in your house, including the ones the builder's crew made in 1998, because the same standard says outright that a perfectly flat finished gypsum surface is not achievable. If your wall gets strong side light from a window or a wall sconce, tell us at the estimate. That is called critical lighting and it changes the scope, usually to a wider skim or a heavier texture.
Can a drywall repair be taped, textured and painted in one day?
On a wall, usually. We bed the tape in setting-type compound, which hardens chemically instead of drying, so the coats stack in a morning. Ceilings and anything wide enough to need real feathering are often better as two visits, and the reason is Phoenix specific: at ninety degrees and twenty percent humidity a coat of ready-mix compound is dry in about five hours, and the trade standard says anything under eight hours leads to poor results. A finish coat that got rushed is exactly what shows up later when afternoon light rakes across the wall.
My ceiling got wet. Does the drywall have to come out?
The EPA's line is the one we use: wet drywall can be dried in place if there is no obvious swelling and the seams are still intact, and otherwise it comes out. Mold gets going in the 24 to 48 hours after it got wet, so this isn't a decision to sit on. Board that's only stained can usually be dried, sealed with a shellac or oil based stain blocker and painted. On a Fountain Hills ceiling last summer an attic air handler had leaked, so we squared the opening about a foot past the damage, pulled the soaked blown-in insulation, put R-30 batt back in its place and pieced in new board. Before anything closes up we take a moisture reading and photograph the open cavity, which is what your insurance carrier will ask for later.
Is it cheaper to repair the drywall or replace it?
Repair, for anything under about two square feet, and it's not close. Replacement only wins once most of a wall is coming out, because hanging one clean sheet takes less finish work than blending four seams into thirty-year-old texture. Per square foot is a broken unit here: a small patch is really a trip charge with some mud attached, a 10 to 50 square foot repair runs $20 to $25 a square foot, and a job over about 300 square feet drops to $2.00 to $6.50 a square foot including tear-out and haul. When half a wall is damaged we price it both ways and hand you the two numbers.
Are you licensed for drywall work in Arizona, and does the repair need a permit?
Yes, and no. Norem Contracting is an Arizona Class B General Residential Contractor, ROC #365090, licensed, bonded and insured, and Class B carries the residential drywall scope that the R-10 specialty license covers on its own. Interior patch and repair is cosmetic maintenance and does not pull a building permit. The licensing part is worth checking though. Arizona's handyman exemption in A.R.S. 32-1121 caps unlicensed work at $1,000 for the whole job including materials, it never applies where a permit is required, and the job cannot be split up to get under the cap. A couple of patches fit. A ceiling with wet insulation coming out does not.
What happens if the repair shows up later?
Call us and we come look at it. That's not hypothetical. We've gone back out on our own work, once to finish punch items around a light fixture and once to paint a ceiling a customer wasn't happy with, and we'd rather say that than advertise a record nobody has. What we'll tell you at the estimate is which cracks are going to come back no matter who repairs them. A seasonal crack over a door opens and closes with the weather, and taping it is maintenance, not a permanent fix. Anybody selling you a lifetime warranty on a moving crack is selling you a return visit they have already priced in.
Drywall repair across the Phoenix metro
We patch, repair, texture and replace drywall in Phoenix, Scottsdale, Tempe, Mesa, Chandler, Gilbert, Glendale, Peoria, Queen Creek, Paradise Valley, Cave Creek and Fountain Hills. Drywall is one of the trades we run. Here's the rest of what we do.
Related: interior plaster & level 5 finishes · framing & structural work · punch lists & turnovers · shower pan & leak repair · handyman services · see our completed work

Written by Harrison Norem, Licensed Class B General Contractor, AZ ROC #365090. About Harrison
Get a Real Number for Your Drywall
Send the four photos from the FAQ above, including the flashlight-along-the-wall one, and you get back a clear range, usually the same day, priced against the chart on this page so you can hold it next to any other bid. Free estimate from a licensed Arizona contractor, ROC #365090.
Request Free Estimate